dry flowersPhotos
1649
0
4
Posted on 10-20-2014
Sun and Flowers
by Cr8tive1
Posted on Apr 8, 2024
31 Views | 0 Likes 0 Comments
Spring Floral
by NinaB
Posted on Apr 13, 2024
6 Views | 0 Likes 0 Comments
Sun and Flowers--Toes
22 Views | 0 Likes 0 Comments
<a href='http://nailartgallery.nailsmag.com/alpsnailart/photo/380696/dry-flower-nails-tutorial-alpsnailart?ref=side-embed'><img src='http://s3photo.nailartgallery.nailsmag.com/ccbd67e7-b1da-4394-93d6-5647c96aadb9_set.jpg' alt='Dry flower nails tutorial @alpsnailart - Nail Art Gallery' /></a> Copy and paste the embed code above to put this step-by-step nail art tutorial on your web site.
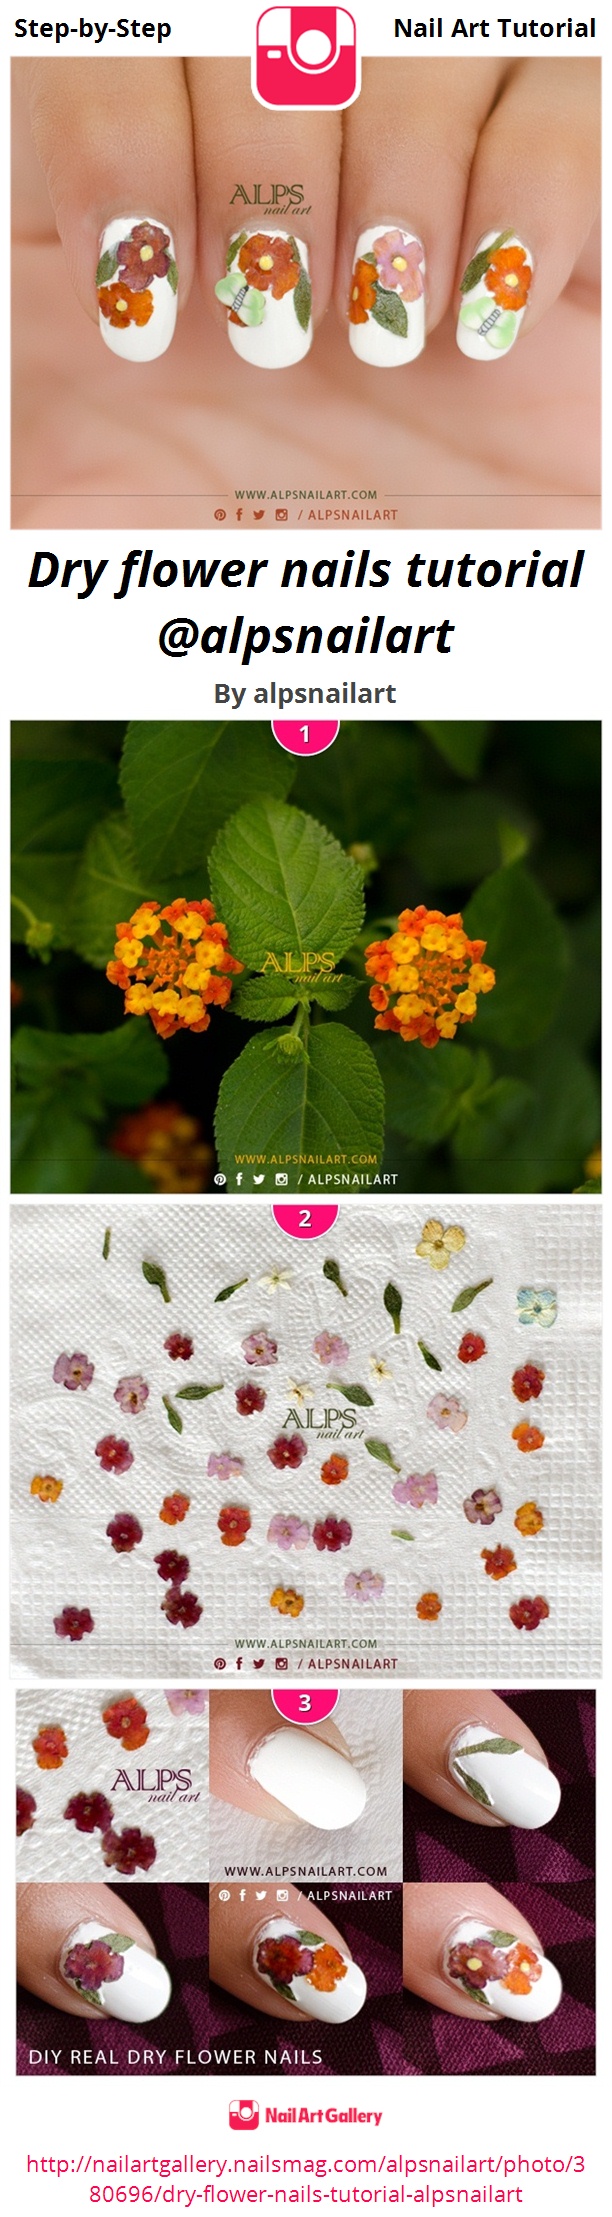
DIY Real Dry Flower Nail Art Tutorial by @alpsnailart\n\nI cut the flowers petals very close to its stems. Being careful, not to damage the petals shape.
Laid them flat on a tissue paper. Left them inside a book overnight. Next day they were dried and looked like above image.
Paint the base nail polish. Once its semi dry, start placing dried real leaves and flowers. Add the dot in the center using a dotting tool. Seal the flower nail art design with a Top Coat.