alpsnailart'sPhotos
2077
0
3
Posted on 02-11-2015
Spring Floral
by NinaB
Posted on Apr 13, 2024
17 Views | 0 Likes 0 Comments
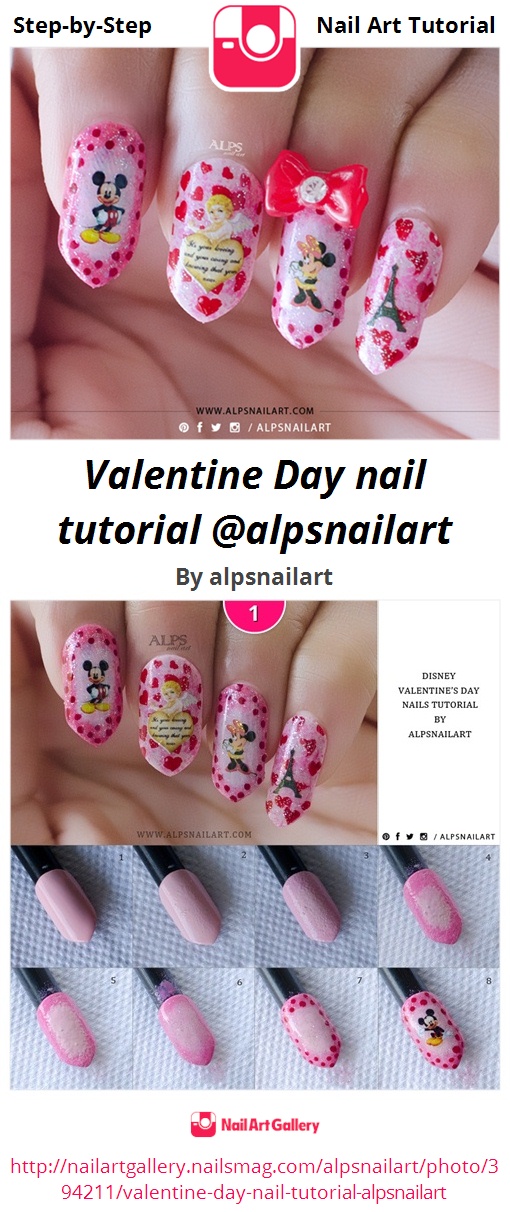
<a href='http://nailartgallery.nailsmag.com/alpsnailart/photo/394211/valentine-day-nail-tutorial-alpsnailart?ref=side-embed'><img src='http://s3photo.nailartgallery.nailsmag.com/d152d7b5-97c1-4596-b649-0cdc4e6bb0f7_set.jpg' alt='Valentine Day nail tutorial @alpsnailart - Nail Art Gallery' /></a> Copy and paste the embed code above to put this step-by-step nail art tutorial on your web site.
\tHere is Step by step for Disney Valentines day nails / Oval gradient nails tutorial:\n\t1. Apply lightest shade of pink as base.\n\t2. Take small amount of first light pink nail polish on sponge. Dab the sponge at the center of the nail in oval shape.\n\t3. Dab second light pink color around first color. ( leaving some base color in center but overlapping first color towards outer frame of nail.)\n\t4. Similary, Dab darker shade of pink on the outer frame on nail. (Overlapping second color outline.)\n\t5. Repeat 2,3 and 4. \n\t6. Apply quick dry top coat. Add glitter top coat.\n\t7. With the help of a toothpick, add red dots on outer frame.\n\t8. Add Mickey water decal in the center. Top coat to seal the design. \n