carsPhotos
885
1
8
Posted on 06-11-2015
Spring Floral
by NinaB
Posted on Apr 13, 2024
17 Views | 0 Likes 0 Comments
<a href='http://nailartgallery.nailsmag.com/amberdidit/photo/409836/ntna-top-24-pre-challenge-cover-artist?ref=side-embed'><img src='http://s3photo.nailartgallery.nailsmag.com/3f9f515d-e6ad-4830-91f7-ffb482557370_set.jpg' alt='NTNA Top 24 Pre-Challenge "Cover Artist" - Nail Art Gallery' /></a> Copy and paste the embed code above to put this step-by-step nail art tutorial on your web site.
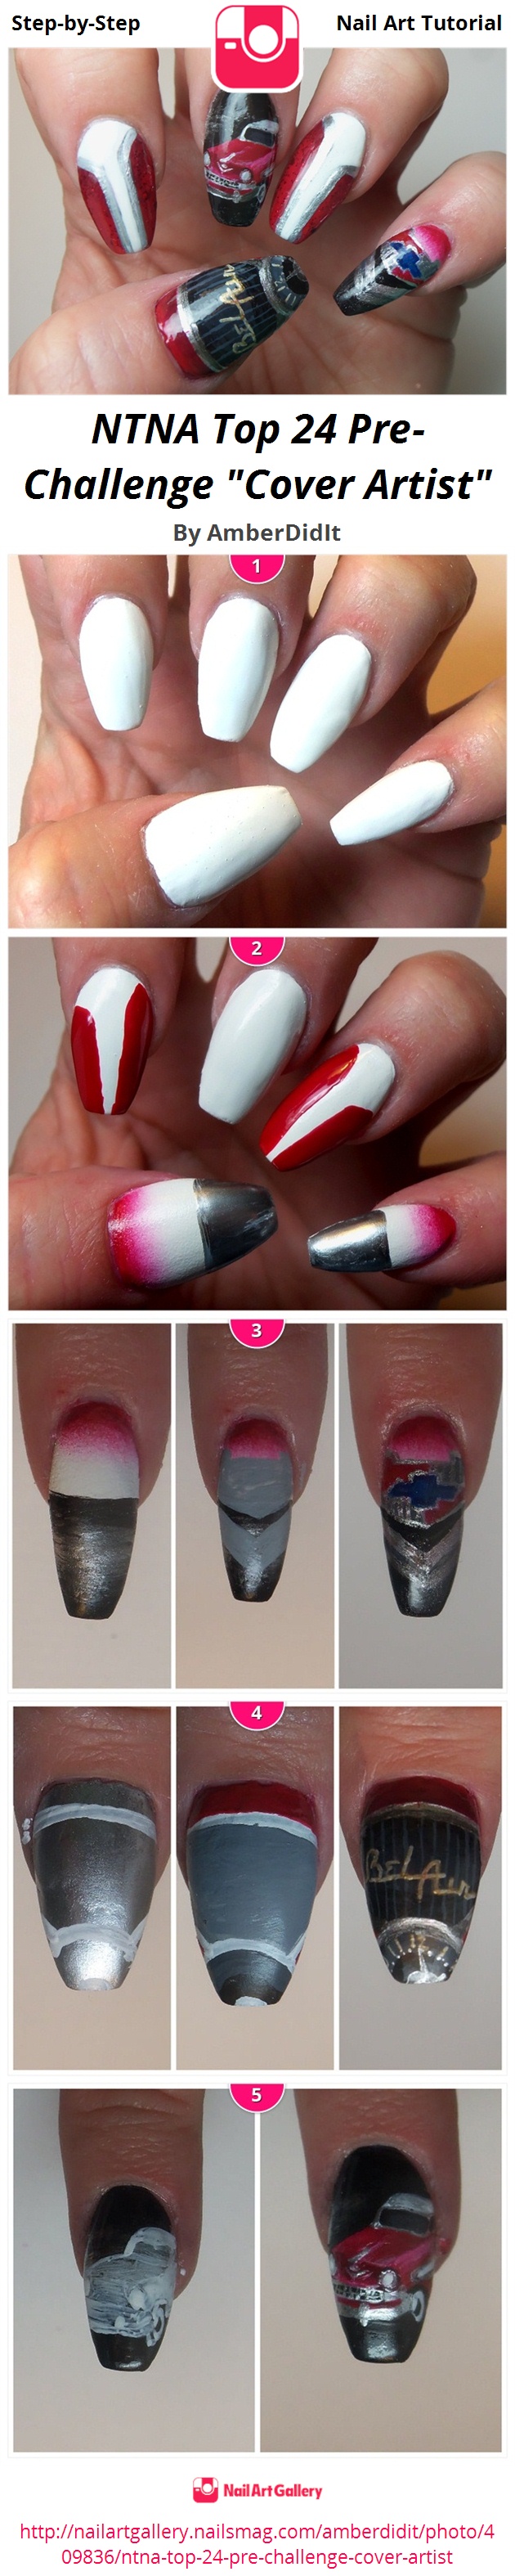
First, I began with a white base of traditional nail polish.
I used polish and added the red abstract designs on the index and ring fingers (mimicking the design side of the car) . The Pinky and thumbs I did a small red and white gradient using a make up sponge and then used a a chrome polish on the bottom half to give it the same look at the NAILS cover art. (Note: the thumb & middle were changed later and I ended up going with the solid chrome polish base for my art)
(Pinky) Once the chrome polish was dry I used a black acrylic paint to give the chrome more depth. Then I used a grey outline for the emblem. Once that was dry I used a mixture of polish and acrylic paints to add the details with a detailing brush.
(Thumb) I started with a chrome nail polish base and then used white acrylic paint to begin the outline for the dash clock and speaker. Then I added different shades of grey paint and red polish. The detailed art was done using a small detailing brush with a combination of polish and acrylic paints.
(Middle) I began with the chrome polish and added black acrylic paint to give it a more grunge feel to it. The car outline was doing using white paint and the details were handpainted with a small detailing brush with a mixture of acrylic paints and polish.