This week challenge was sponsored by Orly and their newest holiday collection "Sunset Strip". We were supposed to create a wearable look that would give anyone VIP treatment behind the velvet ropes.
Having never even been to California, much-less L.A. I had to do my research. I began by reading as much as I could on the interwebs and ended up finding a great documentary on the Sunset Strip and was instantly inspired. The documentary began in the 1920's and went all the way to now. There is so much history and intrigue about the Sunset Strip. I loved hearing about the glamorous, sexy, and dirty Hollywood gossip. From the 1920's to 2016 the celebrities are always around. Whiskey A Go Go, The Rainbow Bar & Grill and The Roxy were the place to be and be seen. I was very inspired by the late 70's and early 80's Rock and Roll presence there. Guns and Roses to David Bowie and every other rock and roll, punk, and metal band in between, they really got their big starts on the stages of Sunset Strip venues.
My piece this week was inspired by the 70's and 80's punk rock glam and of course the beautiful jewel tones of the Orly "Sunset Strip" Collection. The graffiti nails are a nod to the world famous hand painted billboards that line Sunset Boulevard. They ranged from detailed to graffiti style but they were always eye catching and bold. The stones and chains are inspired by the leather and studs worn by some of the greatest bands in history who got their start there. And of course I had to add the iconic Palm trees that also line the streets of Sunset Blvd.
Step-by-Step Nail Art Tutorial
1
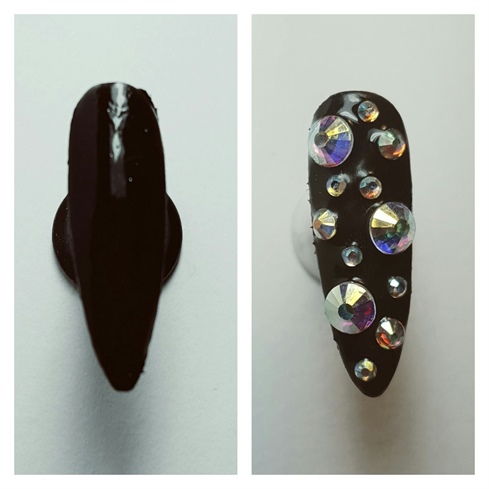
I began with black gel polish then added a thin layer of gel to adhere the stones,cured and then added a clear top coat.
2
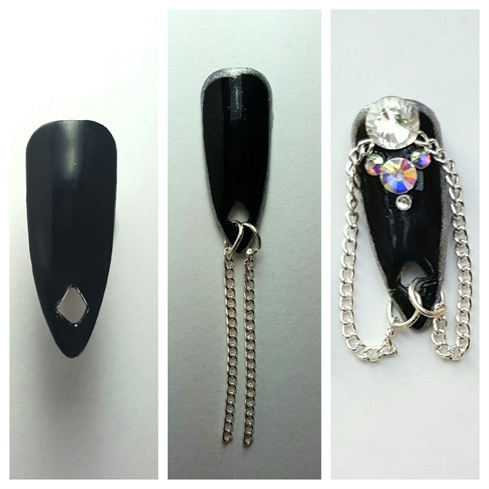
The first step to the chain nails was to cut the diamond shape in the nail with an Xacto knife. I then polished with a black gel polish, added the jump rings and chains that I got from a jewerly making kit and then added the stones and chains with gel and then seal with a clear topcoat.
3
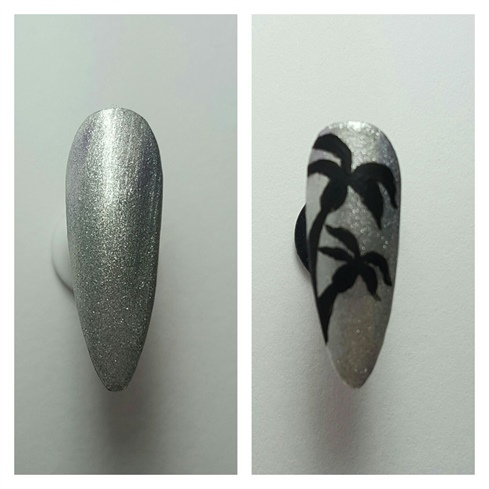
I begain with a custom mixed silver gel polish. The palm trees are hand painted with a small detailing brush and black acrylic paints and sealed with a clear gel top coat.
4
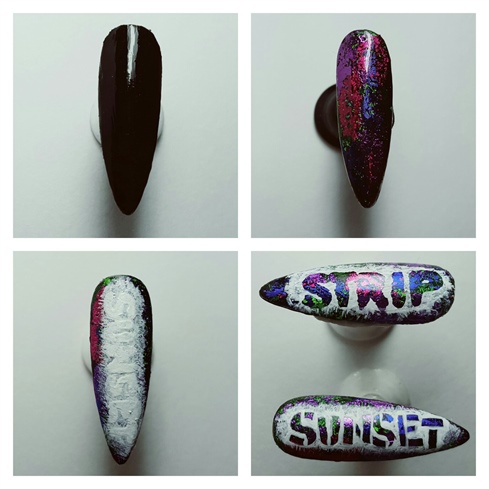
I began this Sunset Strip nails with a black gel polish and then pressed 4 different foils into the tacky layer and top coated them. I cleaned the inhibition layer and then used a thin detail brush and craft glue and wrote the words and let dry (I did 3 coats of the glue) Once dry I sponged a white acrylic paint over the words and let that dry as well. Once the paint was dry I was able to peel the words off was was left with a negative space. I then added the details to give it a look of it being steciled on and then used a clear top coat to seal.
5
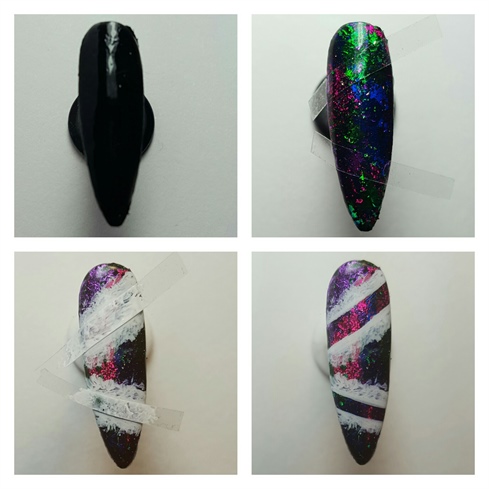
I begain with black gel polish and then pressed 4 different foils into the the tacky layer and top coated. I used two thin strips of tape and then then sponged white acrylic paint over the tape. Once dry I pulled off the tape and was left with the negative space and I cleaned u the lines with the white paint and a thin detail brush.
9 Artists like this Photo
Write a Comment
Submit