The Day of the Dead is a beautiful celebration of life and death, an expression of love for the deceased ancestors full of creative decorations, flowers, sugar skulls and candles. With this set I wanted to create an explosion of color, represent life and death, day and night, harmless ( dragonfly) and dangerous (snake) and of course showcase the beautiful Swarovski Crystals. First I created a little inspiration board with some pictures I found on the internet for Dia De Los Muertos art and tattoos. I chose some elements from them to create something of my own. The first photo you see is my inspiration board and the second photo shows some of the products that I used. So this is how I created this 5 tip mural:
Step-by-Step Nail Art Tutorial
1

Inspiration
2
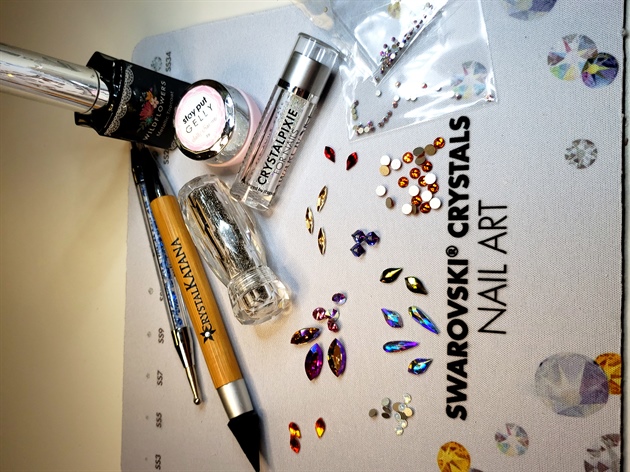
Products and tools used to create the set
3
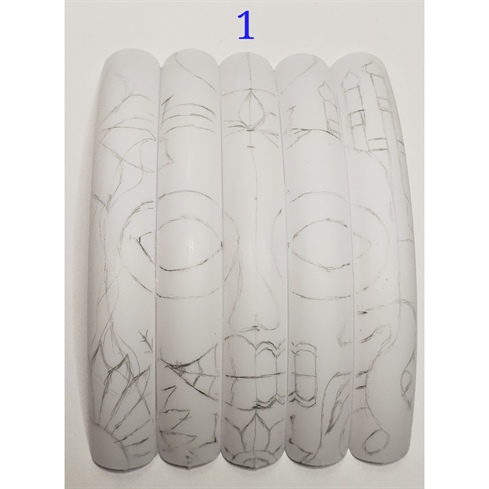
1. To create this look stick 5 extra long white nail tips of similar size using nail glue and buff the surface lightly. Sketch the design with a pencil to outline the main elements of the mural.
4
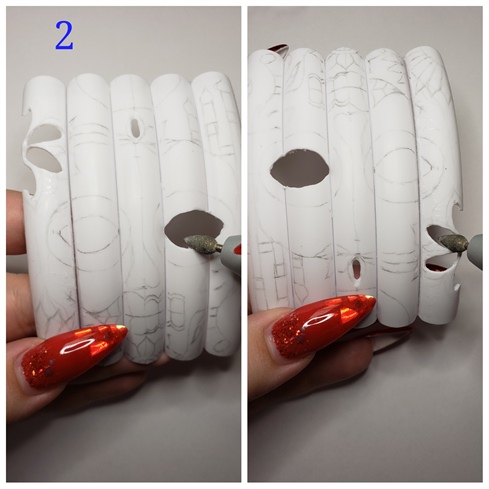
2. Using the e-file drill holes for the bigger stones with pointed back and the beautiful Swarovski 3D eye.
5
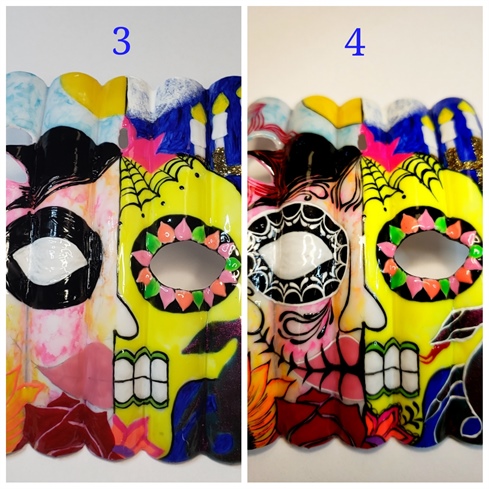
3. With gel polish, acrylic paint and regular polish, paint the neon yellow sugar skull, candle holder, snake, the sun and the moon, sunflower, rose, flowers and spiderweb on the skull, outline the eye socket and create a simple marble background and the make-up on the girl.\n4. Using black, white and red gel paint add detail to the design and outline main elements to make them more visible when you apply the stones. Use non-cleanse topcoat and cure.
6

5. With sticky 3D gel and Crystal Katana place the 3D Swarovski eye into the right eye socket and create the left eye with 3 light green Eclipse Swarovski crystals and 1 black rivoli.
7
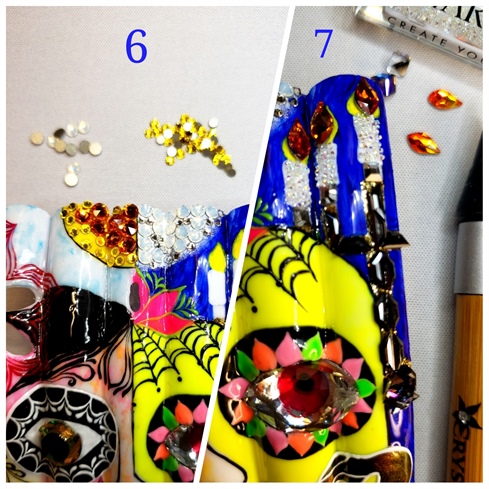
6. Use orange and citrine stones and nail glue to embellish the sun, for the moon use white opal and clear Swarovski crystals.\n7. To create the candle holder with 3 candles use 3 fireopal Swarovski flames, 3 clear squares and 14 small crystal trapeze Swarovski. Add Swarovski Crystal Pixie 'Cute mood' to give a 3D look to the candles and 3 Swarovski cubes at the base.
8
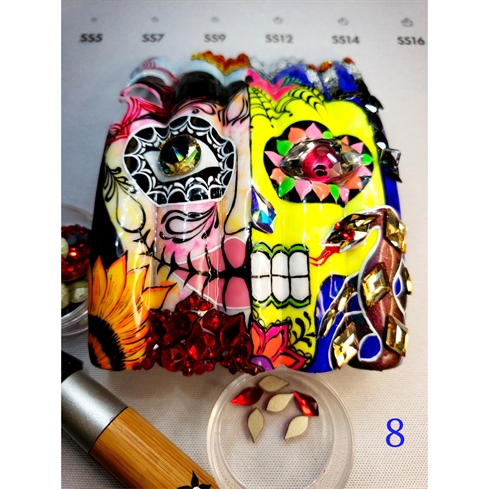
8. Use 4 flatback Diamond Swarovski in Golden Shadow to embellish the snake, 1 green flame to make the head with 2 red eyes and 5 Aurum raindrop to make the tail, mouth and add more depth to the design. Place 3 dark siam flame crystals on the red rose and round flat back Swarovski ss5, ss7 and ss9 in siam.
9
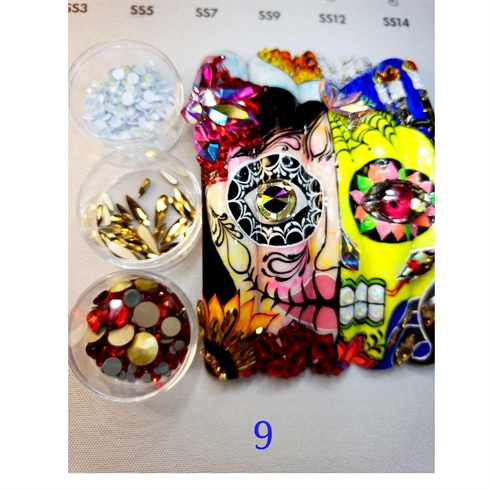
9. Create the flower in the girl's hair with 4 large pointed back navette, using sticky 3D gel, 4 pointed back chatons , embellish with 3 Siam flame crystals and smaller red stones. Stick Aurum Raindrops small and large onto the sunflower, use 5 Aurrum round ss8 to add 3D look to the center.
10
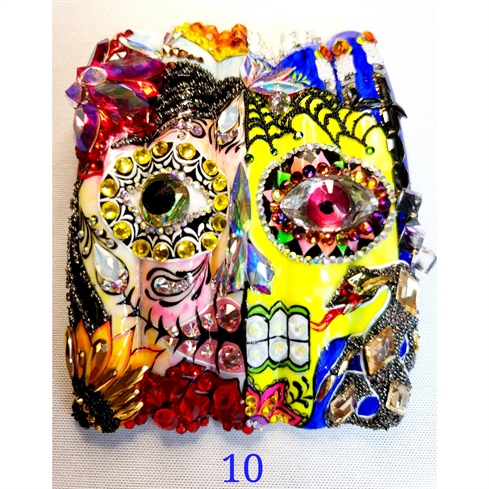
10. Add round Citrine ss12 to embellish the left eye, round volcano ss10 to outline the right eye and round AB ss5 around both eyes. Use 5 raindrop AB and 1 flame AB to create the nose, 6 powder blue ss12 on the teeth and various size pink Swarovski for the lips. Use Swarovski Crystal Pixie mixed with non-cleanse gel top coat to create her hair, embellish the snake, and black Crystal Pixie for the spiderweb and sunflower. Add Swarovski elements to the flowers on the skull and make a cute dragonfly out of 4 AB Raindrop, 5 round rosegold and 2 round green Swarovski crystals for the eyes.\n
10 Artists like this Photo
Write a Comment
Submit