Maleficent is my favorite witch for several reasons. First off she is so Avant Garde and its just flat out awesome, ok, but seriously, I chose her because her background story is powerful and relatable. I really love the Angelina Jolie version; she is innocent, full hearted and kind. However she is betrayed by her one true love which causes her to turn to a very dark side and seek revenge on him. She seeks her revenge through the innocence of his first born, placing a curse on her for the day she turns 16 of an endless sleep that can only be broken by one true loves kiss. Later on in his young daughters life she befriends Maleficent whom she thinks is her godmother. Maleficent then realizes the damage she has done as her bond grows with the young girl. On the girls 16 birthday the curse falls upon her, Maleficent visits her as she sleep, confessing her love, sorrows and sadness for what she has done, she kisses the girl on the cheek apologizing. With that the girl wakes up because maleficent love for the child was true love as she’s watched her grow from a child to young girl and created such a unbreakable bond through it! My favorite parts are the action scenes before battle and therefore I have based my piece around that!
Step-by-Step Nail Art Tutorial
1
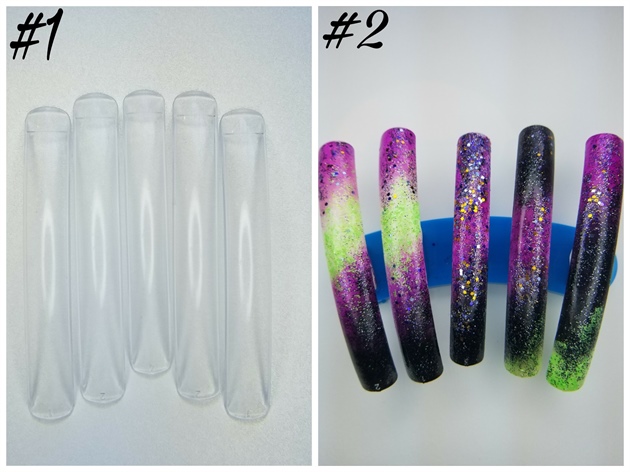
-\tStart with 5 blank tips as shown in figure #1.\n-\tPaint all 5 tips bright white, this will boost the intensity of the coming colors. \n-\tOmbre black, bright green and bright purple in random areas, adding corresponding glitters AFTER achieving desired level of opaque coverage. \n
2
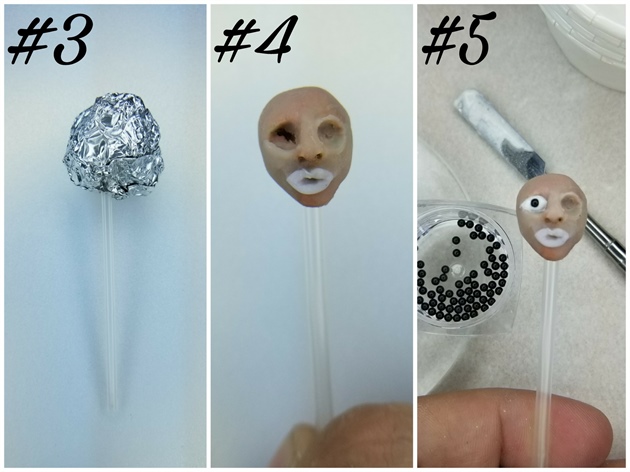
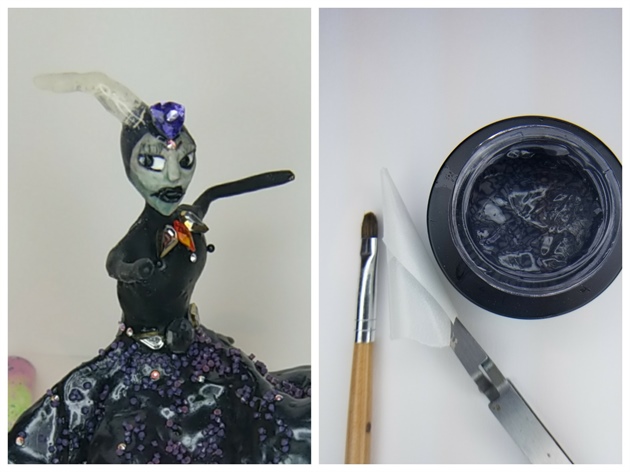
-\tBegin Maleficent by rolling aluminum foil in a ball and placing a small straw inside as shown in figure #3.\n-\tSculpt out the head with 4D gel using the aluminum foil as a guideline to general shape only. Use your 3D brush and orange wood stick to carve out eve sockets and build up her nose and mouth as shown in figure #4.\n-\tFill the eye sockets with 4D white gel, adding black Swarovski pearls in the center as shown in figure #5\n
3
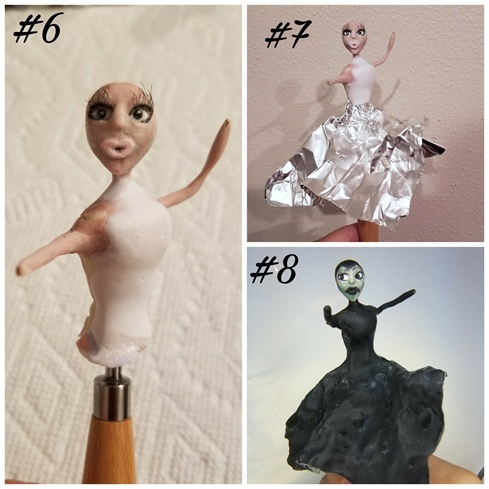
-\tSlowly build/ Sculpt out her body and arms with 4D gel , sculpt in layors to avoid extra unnecessary filing, use wiring internally to support the arms if necessary as shown in figure #6.\n-\tTake a sheet of tin foil and wrap it around the torso to create a full flowing skirt. Create depth by crinkling the foil in parts; this will create the look as though the dress is in motion as shown in figure #7.\n-\tHAND PAINT the face a tinted green by mixing clear and olive green, this will create a transparent coverage that is buildable to your desired color. HAND PAINT eye features, mouth and the top of the head in black along with all of her body except her neck and face as shown in figure #8. \n
4
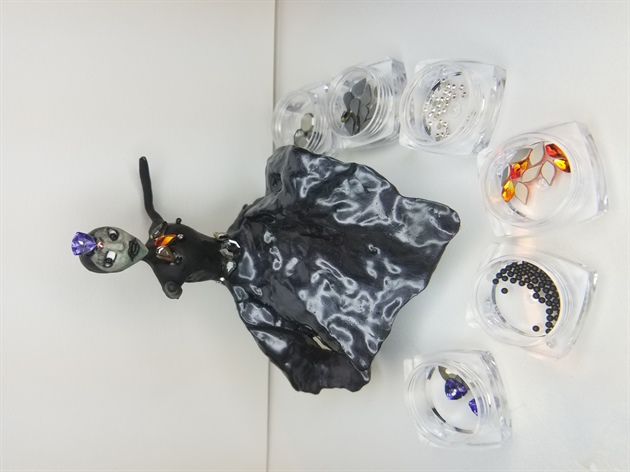
-\tApply a metallic grey to all of the skirt, this will bring out the effect of the ripples on the dress.\n-\tUsing your various Swarovski crystals design her neckline and waist accents.\n-\tApply a large Swarovski crystal charm to the forehead; this will accent the upcoming pieces we will add.\n
5
-\tAttach Maleficent to the center nail with clear hard gel.\n-\tSprinkle Purple Pixie Crystal Edge onto her skirt for added texture.\n-\tTwist a nail form into a cone shape to create the base of the horns, once your base is created, dangle gel off the base and cure. Specifically Speaking you should apply a bead to the base of the horn, tip your horn sideways and allow gravity to pull it AWAY from the base you created, You will need to bring your lamp off the table and cure in mid air to avoid gel dripping onto charm) and cure.\n
6
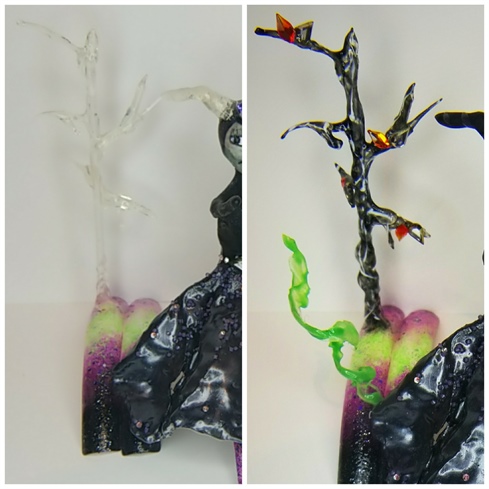
Create your spooky tree by attaching a small straw to your nail with hardgel. Sculpt your spooky branches by applying a bead of hardgel to an area on the tree, tip the tree sideways and allow the hardgel to flow downwards towards your table, as the gravity pulls the gel downwards cure by taking your lamp off the table and curing in mid air. Repeat these steps until you have reached your desired number of branches. Complete your core of the tree by swirling hardgel around the entire tree, this will create texture. HAND PAINT your detailing onto the tree with white and greys to accent the texture of the tree. Finish by using your Swarovski crystal teardrops attached in clusters of 2 to represent leaves.
7
Create 2 green magic spirals using a nail form twisted into a cone and applying tinted green hard gel in a spiral.
8
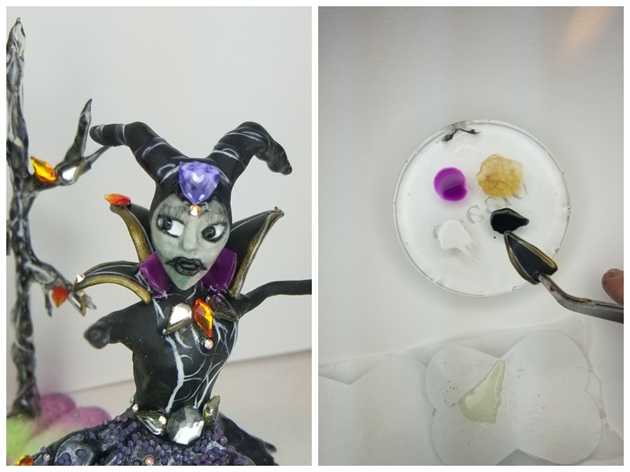
-\tCreate her collar in a total of 5 pieces with clear 4D gel. Sculpt the first layer closest to her neck in two small rectangles, HAND PAINT them in bright purple and attach with hardgel. Create her second layer of the collar by sculpting a triangle with your 4D gel, to get the triangles to curve, bend your form in the lamp slightly while curing repeat 2 more times for a total of 3 triangles. HAND PAINT each triangle black and add the detailing in white and gold. Attach the second layer of collar with hardgel and apply 1 Swarovski to each triangle tip. HAND PAINT scrolling and details to her bust, torso and horns.
9
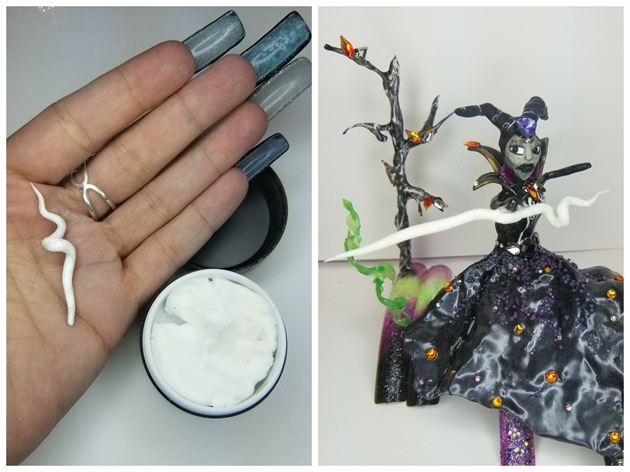
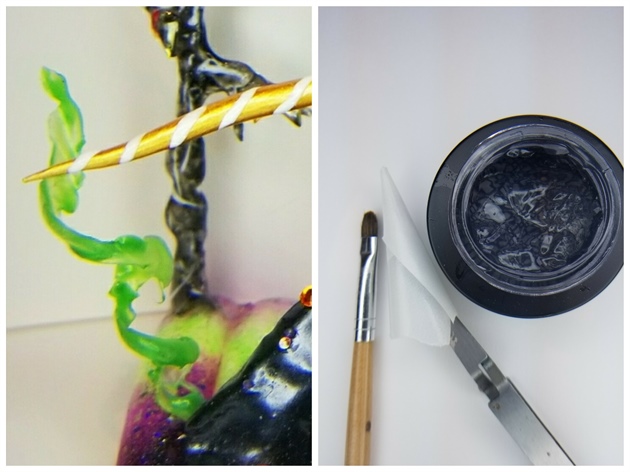
-\tUsing lace paste to roll a small bead with your fingers to create a string, curl using your fingers and cure in your led lamp, take another small bead and again roll into a string, attach this to your spiral and cure. Attach staff to Maleficent using hard gel.
10
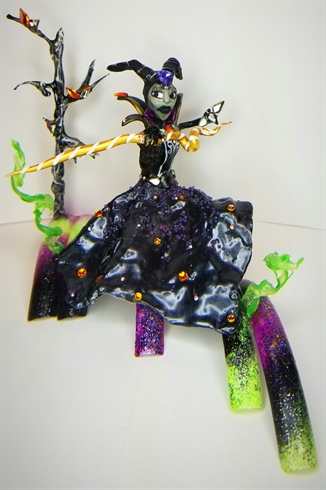
Finish your piece by HAND PAINTING your staff gold, apply detailing in white , Create a crystal bat by attaching 3 teardrop Swarovski crystals together to form a T, attach two Swarovski beads in black to the top for eyes and your done!
4 Artists like this Photo
Write a Comment
Submit