With Halloween being only a couple of days away, Swarovski invites NAILS Magazine’s Next Top Nail Artist Season 5 Top 24 competitors to create Halloween nail art inspired by each contestant’s favorite witch. Using only 5 nail tips, contestants were asked to create a magical design incorporating Swarovski Crystals as well as hand-painted and 3-D elements.
Stevie Nicks is an American musician known for her work as a solo artist and as the lead singer for the classic pop rock band Fleetwood Mac. While Stevie is not a witch in the typical sense, she is known for her haunting live performances as well as her spellbinding style. Chart-topping hits such as “Rhiannon” combined with Stevie’s ensembles of fringed shawls, top hats, and platform boots have made her a fashion icon. Stevie is my favorite “witch” because her mystical aesthetic has played a major influence in women’s fashion trends and has provided countless people with fashion inspiration over the course of several decades. This design was inspired by Stevie’s witchy style.
Step-by-Step Nail Art Tutorial
1
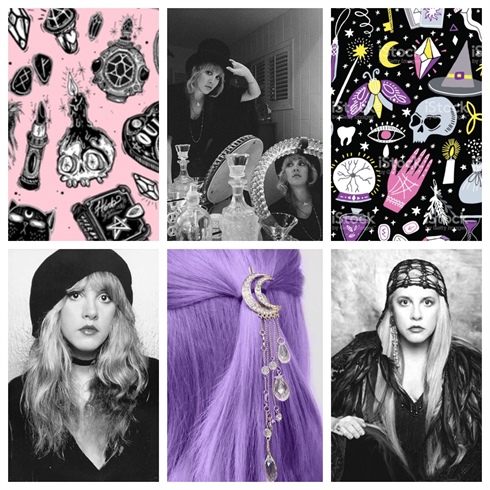
Research is the first step in creating original designs! I spent two days researching my witch and decided to go with Stevie Nicks and her witchy style. The above mood board served as my guide through the design process. **HELPFUL HINT: When researching, I always look for details in clothing and accessories. I see an element I like in the clothing, and incorporate this into my nail design. For example, as you can see in my final nail design, I incorporated elements from the moon hair accessory shown in the mood board. If you can train yourself to use this research technique rather than looking at Pinterest nail art boards for nail inspiration, you will be coming up with original nail art in no time!
2
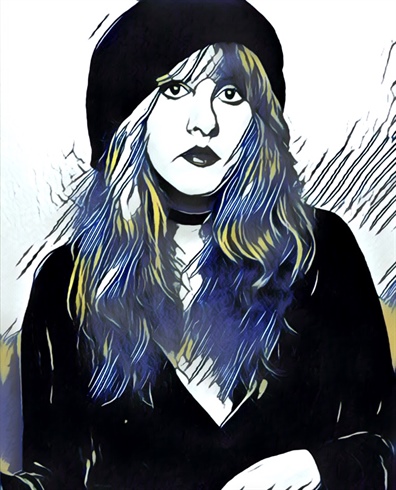
Last year was the first time I attempted a portrait on a nail tip. I was painting the gorgeous Dolly Parton and everything was going great - until I finished and it looked like Amy Winehouse! (Not upset, TBH). Since then, I have shied away from painting faces on nails. When I was planning this design, I loved the idea of painting Stevie's face on one of the nails. Naturally, I was intimidated by this idea, but hey, the point of NTNA is to challenge yourself! So I asked myself "How can I pull this off considering portraits are my weakness?" After examining my resources, I decided to download Prisma on my phone, which is a free app that allows you to turn photos into artistic effects. I used the above Prisma filter on Stevie's portrait so that I could better see the lines and contours of her face. While I still have much to improve as far as painting a more realistic portrait, I was very pleased with results! I feel like this would be a great way for a beginning nail artist to get used to painting portraits.
3
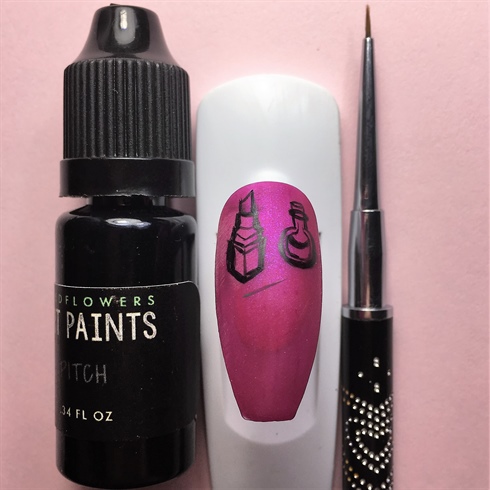
I created a rough outline of Stevie's accessories using black nail art paint and a detailing brush. Since this a rough outline, don't worry about perfecting the details just yet.
4
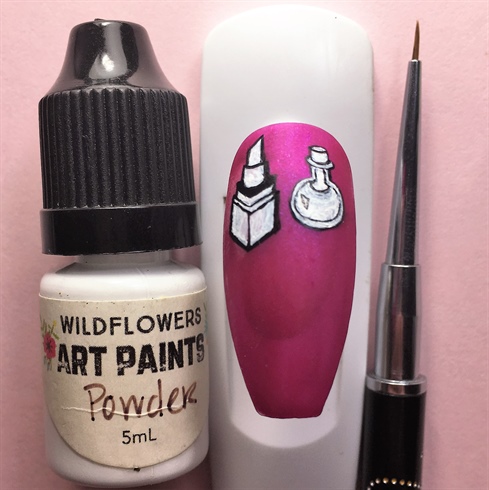
I then filled in my rough outline with white nail art paint. Painting a white fill first not only makes your colors appear brighter, but it also gives you the opportunity to create crisp lines. The same way a nail tech would use remover and a brush to clean up a traditional polish smile line, you would be using the white paint and a brush to clean up the rough, black outline. This is the time to perfect those lines. After I filled with white and cleaned up the outline, I proceeded to fill with my desired colors.
5
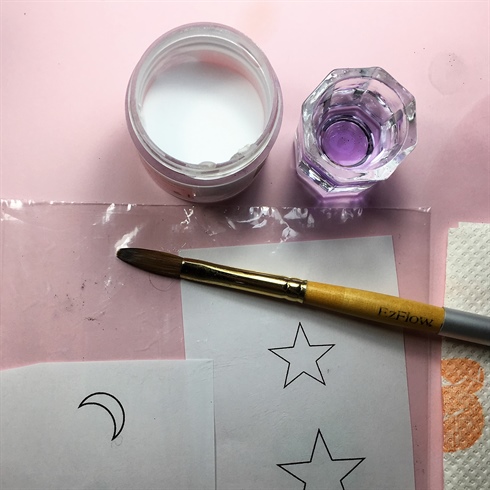
I sculpted 3-D elements like this moon and star using clear acrylic. I placed my outline in a sandwich bag and sculpted the shapes on top of the plastic. **HELPFUL HINT: Most of the time I have to sketch out the outline, but since these are basic shapes I did a quick google search of the shapes, copy and pasted the images into a Word document, shrunk the images down small enough to fit the nail tip, and printed the outline. This saved me a lot of time! I don't know anyone who can draw a perfect star.
6

I used the same outline/sandwich bag technique with my 3-D witch hat. I had a very particular way I wanted the hat to look, so the hint mentioned in Step 5 would not work here unless I was able to find an exact image of the hat on Google. **HELPFUL HINT: Place a small piece of tape on the back of the outline before you place the paper in the sandwich bag. This will prevent the paper from sliding around underneath while you are sculpting. Once I finished sculpting my 3-D elements, I blinged them out with Swarovski Crystals.
7
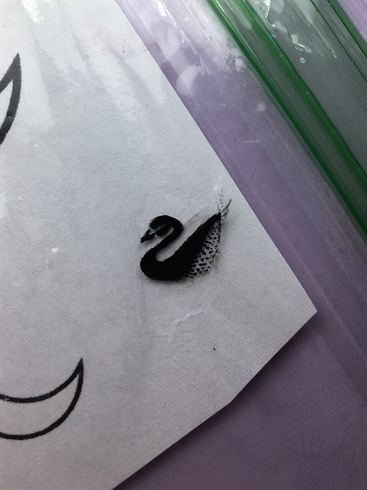
Originally, I created a blank crystal ball using a Japanese gem mold. I felt this left too much open space in the design, so I created an image to put in the gem mold. This is essentially a reverse stamping technique applied in a unique way. I painted a thin layer of quick-dry top coat onto my sandwich bag and let it dry. I then used black nail art paint and a fine detailing brush to paint the Swarovski swan logo onto the dried top coat.
8
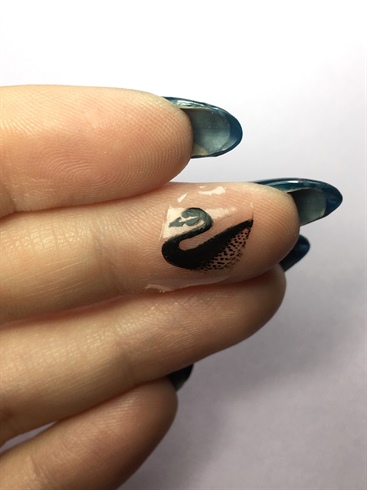
After the image dried, I used a silicone tool to lift the decal off of the sandwich bag.
9
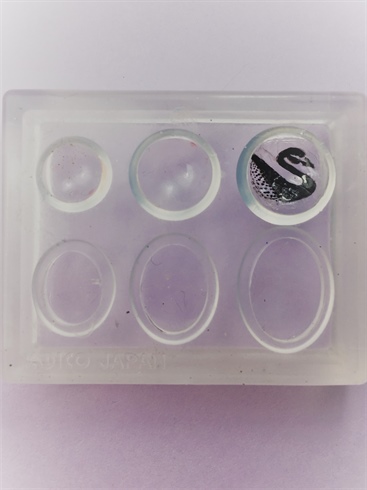
I coated the mold with a thin layer of tacky gel top coat and cured (to give the decal something to stick to). I then positioned my decal over the mold and used a silicone tool to press the decal into the mold. I used the silicon tool to smooth out any air pockets. I then filled the mold with clear hard gel and placed a few small drops of a sheer, iridescent blue and white gel polishes into the uncured gel. I used a fine dotting tool to lightly marble these colors to create a hazy crystal ball. After curing, I popped the gem out of the mold, and then created a 3-D pedestal using Swarovski Crystal Pixie Edge.
10
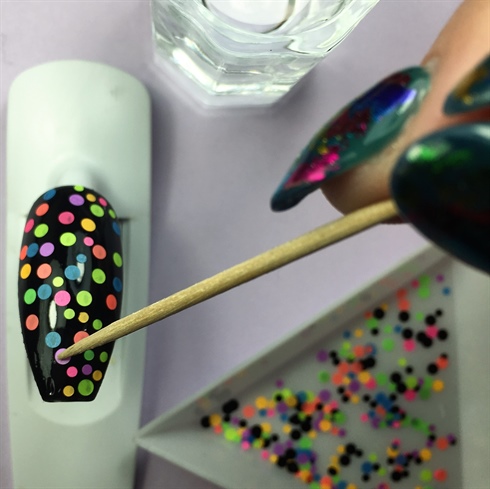
I applied multi-colored dots onto the tacky layer of black gel polish. I topped with a layer of base coat, cured, a layer of top coat, and then cured again. I then applied my 3-D elements using a small bead of clear acrylic. **HELPFUL HINT: Dip a toothpick in a dappen dish of water to easily pick up tiny glitters.
11 Artists like this Photo
Write a Comment
Submit