spellbinding witch. created with Swarovski Elements
Introducing lady Morgana Pendragon. She was the illegitimate daughter of King Uther and grew up in his castle. I was inspired to create Morgan because of her glamour’s appearance and natural gift of magic. I created Morgana gazing into her Crystal ball as she holds it in her hands. Her Dragon familiar sits proudly on her right side and to her left her illuminated cauldron sits as her potions pour themselves into her latest potion.
For my 3D element I really wanted to challenge myself and try something new. I decided to try clay. Clay proved to be very versatile and once I completed the design I was able to bake and set the clay. Each Creations starts with a skeleton that I molded out of thin wire. Once their skeleton was positioned I was able to apply clay and create arms, torso and a head. Creating the hands was a very delicate process I really had to practice not having such a heavy hand.
Each object was handed painted with either gel polish or a regular lacquer. For contouring the lacquer seemed to work for me the bet on varies parts of this design. I want to use colors that would help bring out the vibrant colors of the Swarovski element. Orange behind the red crystals gave the dragon just the right mystical appeal. Creating the Literal crystal ball, I used the largest crystal given to us by Swarovski. Again using builder gel I created a small clear orb that sits in top of the crystal. I drilled off the teflon underneath the crystal so that light could pass through. I then used clear acrylic to secure a small light underneath. Creating this witch really ignited a creative flow, I am proud to present my spellbinding witch and can’t wait to create more.
Step-by-Step Nail Art Tutorial
1
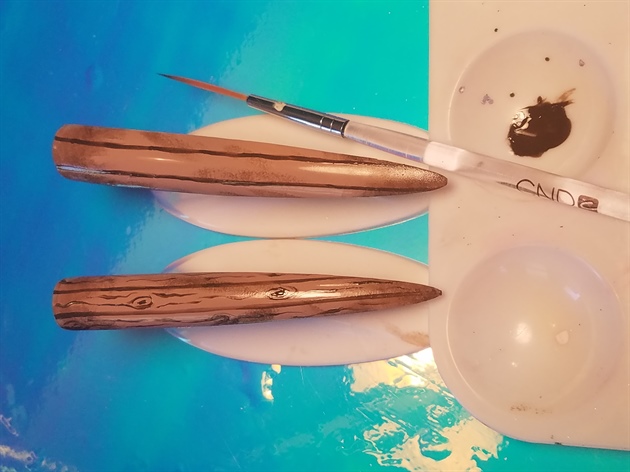
as a base I polished all five nails to look like a wood grain floor. each nail started off with a light brown base and using a makeup sponge I dabbed darker polish to give it an aged look. once dried I used a striper brush to add detail and give it that woodgrain effect.
2
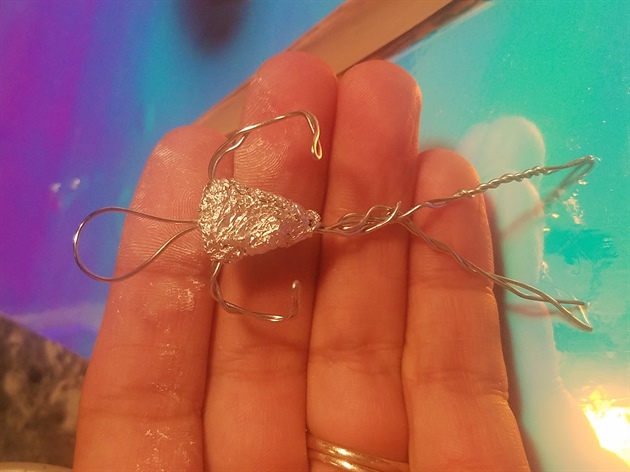
my witch starts with a skeleton. once I had the desired pose I added clay and really started to mold and shape her.
3
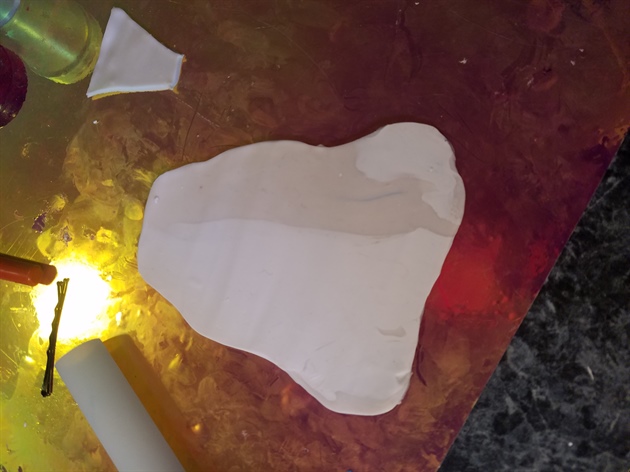
her dress was defiantly a challenge I want her dress to have the appearance of movement. Once I had the desired length and size I began to make folds and adding pinches in the right areas gave just the touch of movement I was looking for.
4
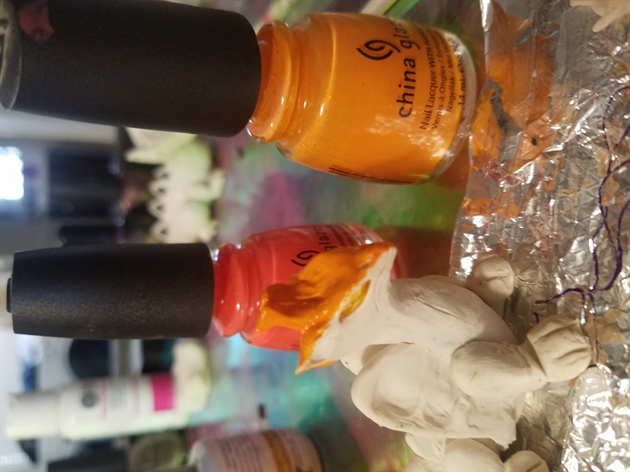
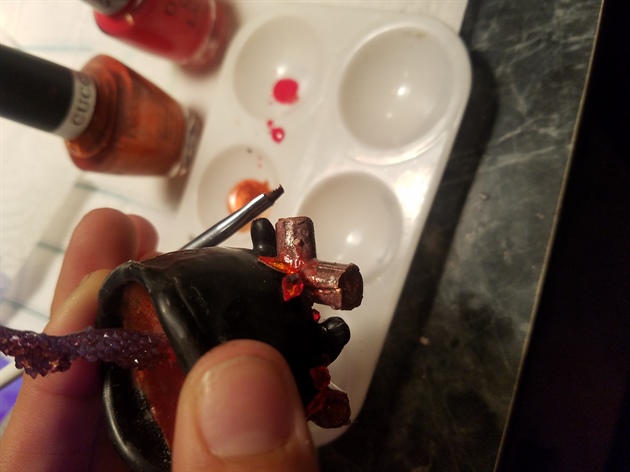
her dragon familiar was made also from clay and it to started off with a skeleton. once completely baked and cooled I used lacquer to give the dragon life. I gave the dragon a bright orang base and add red Swarovski crystals for a mystical flare.
5
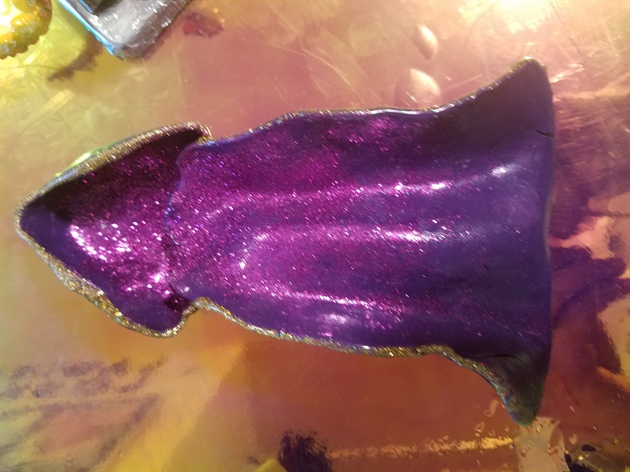
The cloak is hand painted with gel polish. I sprinkled purple glitter to back it pop in the background. its trimmed with gold gel polish and top coated with a tacky free top coat.
6
The caldron sits on top of 6 logs I polished to appear if it had burning embers. I completed the look with the fire opals by Swarovski.
7
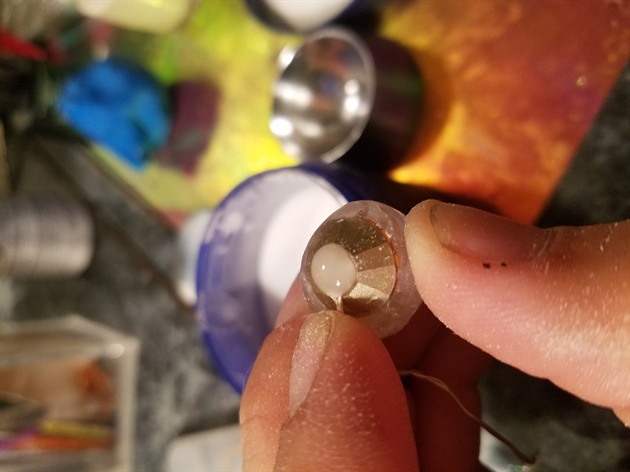
For the crystal ball I used the largest Swarovski crystal. I drilled underneath to remove a small portion of the Teflon coating underneath. I did this in order for light to pass through it. I created a small clear orb from builder gel to sit on top of the crystal. I secured the lights with clear acrylic. this would provide a very sturdy hold.
8
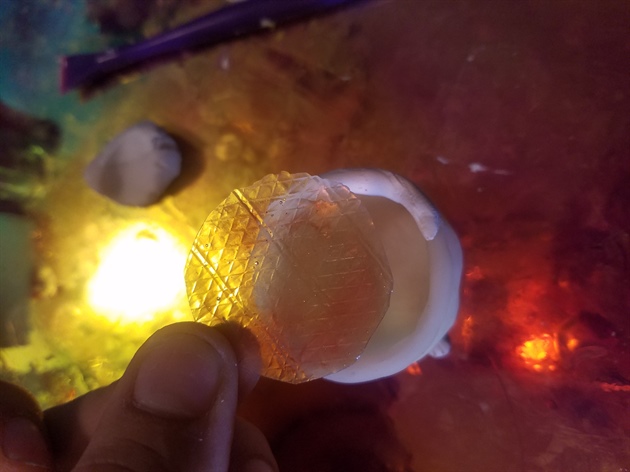
For the couldren I created a clear film to place on top. I used orange and red color drops a clear gel polish so the film has colored translucent effect. light will also be passing through the cauldron.
9
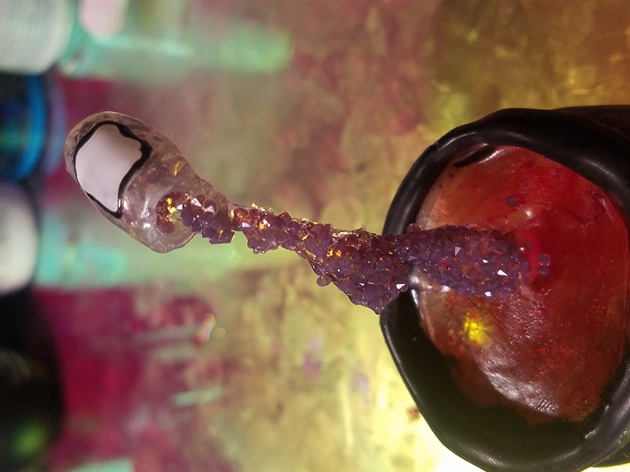
for the illusion of a suspended potion bottle I had to work backwards using builder gel. I drew an outline of tear drops flowing down and carefully applied gel right before I cured the gel I sprinkled the smaller purple edge crystal. this would give the appearance of falling diamonds. I also created the potion bottle out of builder gel. once completed I fill it with more crystals and secured it to the tear drops using more builder gel for a secure hold. the potion bottle reads 'baby tears' for a dramatic affect. this adds just the right amount of sorcery I need.
10
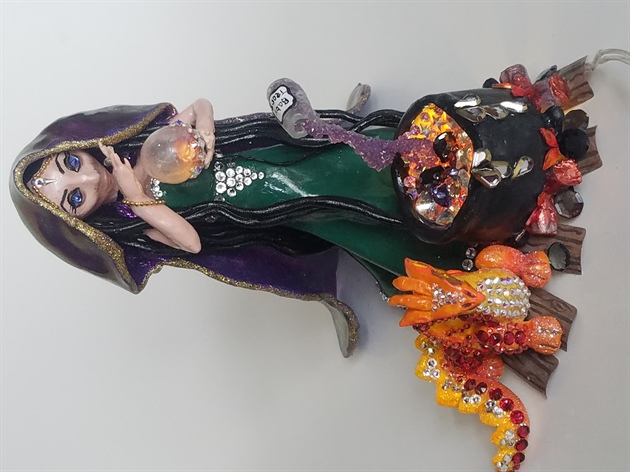
This is the completed design. This projected really challenged me to try new creative techniques I never thought I would dabble in. I am excited and proud to present to you my spell binding witch Morgana Pendragon.
9 Artists like this Photo
Write a Comment
Submit