Since I do traditional p&w competitions (but only in gel) I was really excited to try out my first acrylic nails ever and on top of that – competition style with a haut couture twist!
A couple of years ago I actually ran my own webshop where I sold my own handmade jewelery with my own brand, “byCelina”. So that’s what I wanted to incorporate into my design. Haut couture for me means statement design that’s really over the top and one of a kind, something that you’ve never seen before. So I pulled all of my former jewelry designer skills back and really tried to make something that would be over the top and memorable!
I started off by doing some research online to find out what colors and textures are in for the fall and winter seasons. Since the base would be mostly white I found that I still wanted to keep it clean by sticking to the colors grey and black to compliment the p&w base and still be fashion forward when it comes to coloring.
I then did some research on textures and shapes this coming season and I saw a lot of lace and large wavy skirts mixed with metallic (both gold and silver) so that was definitely something I wanted to incorporate. I did also find that a lot of the designers used hand and nail jewelry in their collections with a lot of rings so that worked perfectly with my vision!
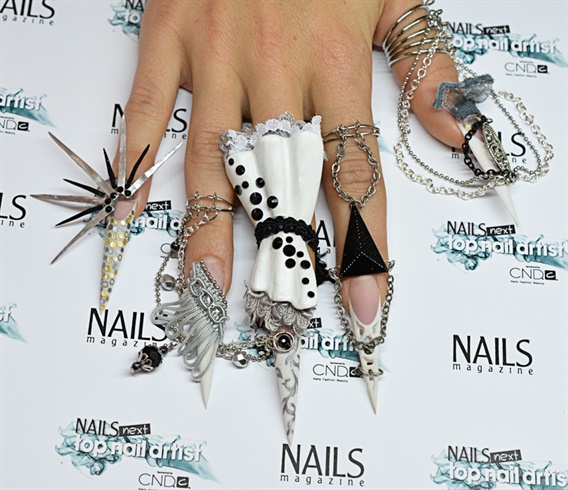
The “spike piece” on the pinkie was inspired by a hat I saw and the large white nail/finger piece by one of the large wavy dresses and so I ended up with my take on if I would have been a haut couture nail designer! I hope that this piece will get your inspiration going and maybe want to try out something that’s a little bit over the top.
Step-by-Step Nail Art Tutorial
1
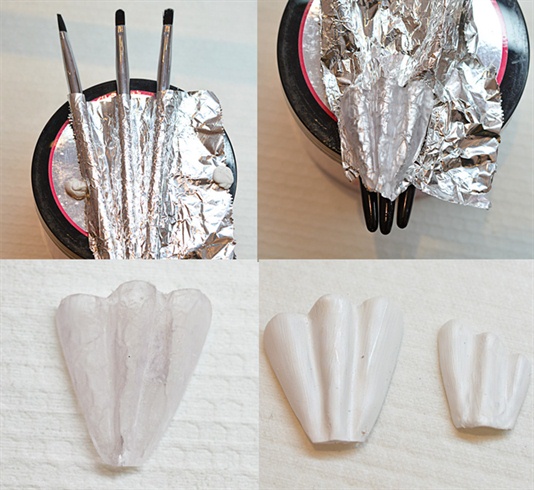
When I did my research, the first thing that caught my eyes where the large wavy dresses so I started by trying to create something that would draw your mind to that. After a lot of failed tries using only tinfoil and pressing it to the shape I wanted, using clay, etc I found that this way worked the best. I attached three brushes with some blu tack and pressed down some tinfoil over it. Then I sculpted the scape using acrylic and then painted it white (using acrylic paint). I then repeated this one more time, only making it smaller.
2

This piece was inspired by one of the hats I saw. I started out by drawing my shape on a piece of paper, putting it into a plastic zipper bag and then sculpted out the different parts on top using acrylics. I then panted the base using a mix of clear and black gel and the spikes where colored with some chrome gel and black acrylic paint. Then I attached it all together with some glue.
3
Here I’ve attached the spike shape onto the pinkie using acrylic. The pinkie also got pimped up with a lot of mixed flat silver and gold studs. I wanted this nail to be the edgy one focusing on the metallic details that are super hot for this coming season! Earlier that week I also went to a small sewing shop and bought a lot of different ribbons. I found this one perfect for this set because of color and the shape and added it with some glue. To add that flowy, smooth and beautiful ribbon next to the edgy spiked up one really creates a cool contrast and makes it interesting and adds to the dimension.
4
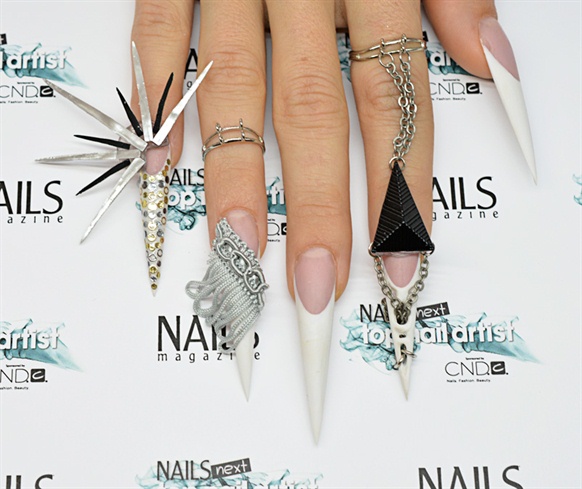
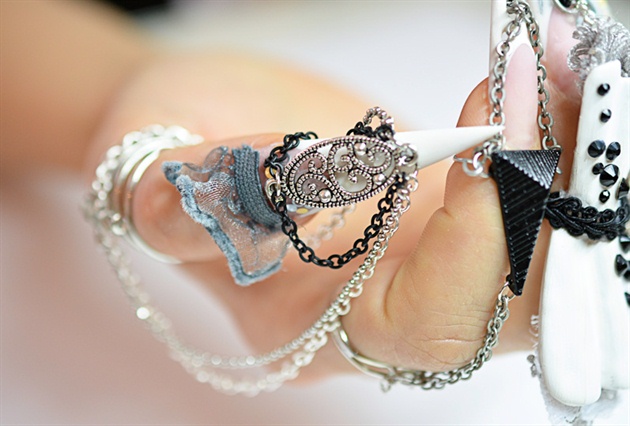
Here’s where I started to incorporate my background as a jewelry designer. I bought a couple of chains, some rings and this super cool black triangle and created a nail/finger piece making it go though the hole in the nail. The black triangle was also attached around the finger to keep it in place using a piece of wire. I also prepared my other jewelry piece by placing my next ring onto the ring finger.
5
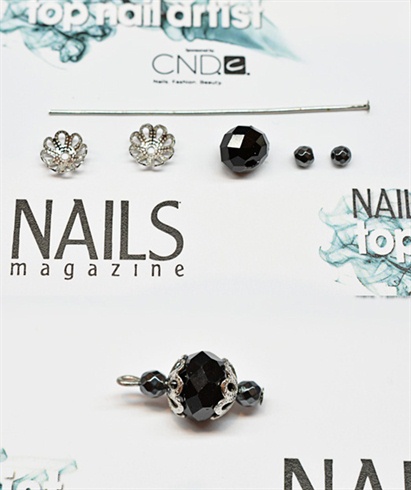
I wanted to make this whole set as personal as possible so even this piece right here was made from scratch. I placed all my beads in the right order and then took a special jewelry tool to bend a loop at the top.
6

I then created my next jewelry piece using two different chains, attaching one side to the ring finger ring and the other to a small ring that I placed on the middle finger using gel. And what is haut couture nails without some bling? Of course I had to place a large black Swarovski crystal in the middle of the ring.
7
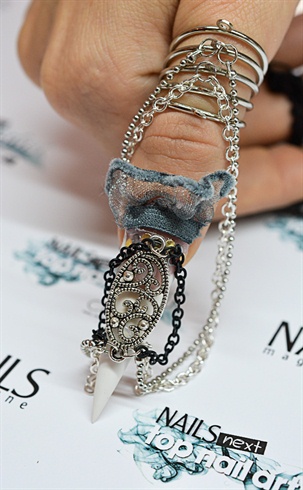
My third large jewelry piece was added to the thumb. I bought the middle piece at a jewelry/craft store then I placed three different chains (six pieces in total) and attached them to the middle piece and then to the ring. I also took another ribbon and placed it with some glue onto the nail to add more wavy shapes and to create that cool contrast between soft fabric and metallic chains.
8
Another view of the thumb piece.
9
The last thing to do was to add three different ribbons to the “dress piece” to make it look like an underskirt and attach it to the nail and around the finger using a black thin ribbon. To add that final touch I placed a couple of black Swarovski crystals in different shapes using glue.
10
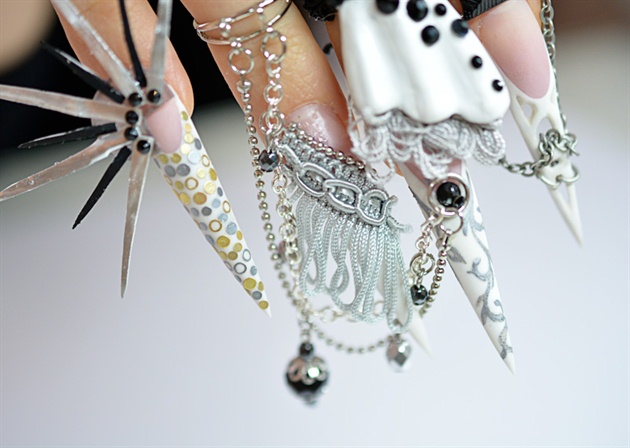
A closer picture of the middle and ringfinger jewellery piece.
16 Artists like this Photo
Write a Comment
Submit