bridal showerPhotos
656
0
4
Posted on 06-14-2016
Sun and Flowers
by Cr8tive1
Posted on Apr 8, 2024
31 Views | 0 Likes 0 Comments
Sun and Flowers--Toes
22 Views | 0 Likes 0 Comments
Spring Floral
by NinaB
Posted on Apr 13, 2024
6 Views | 0 Likes 0 Comments
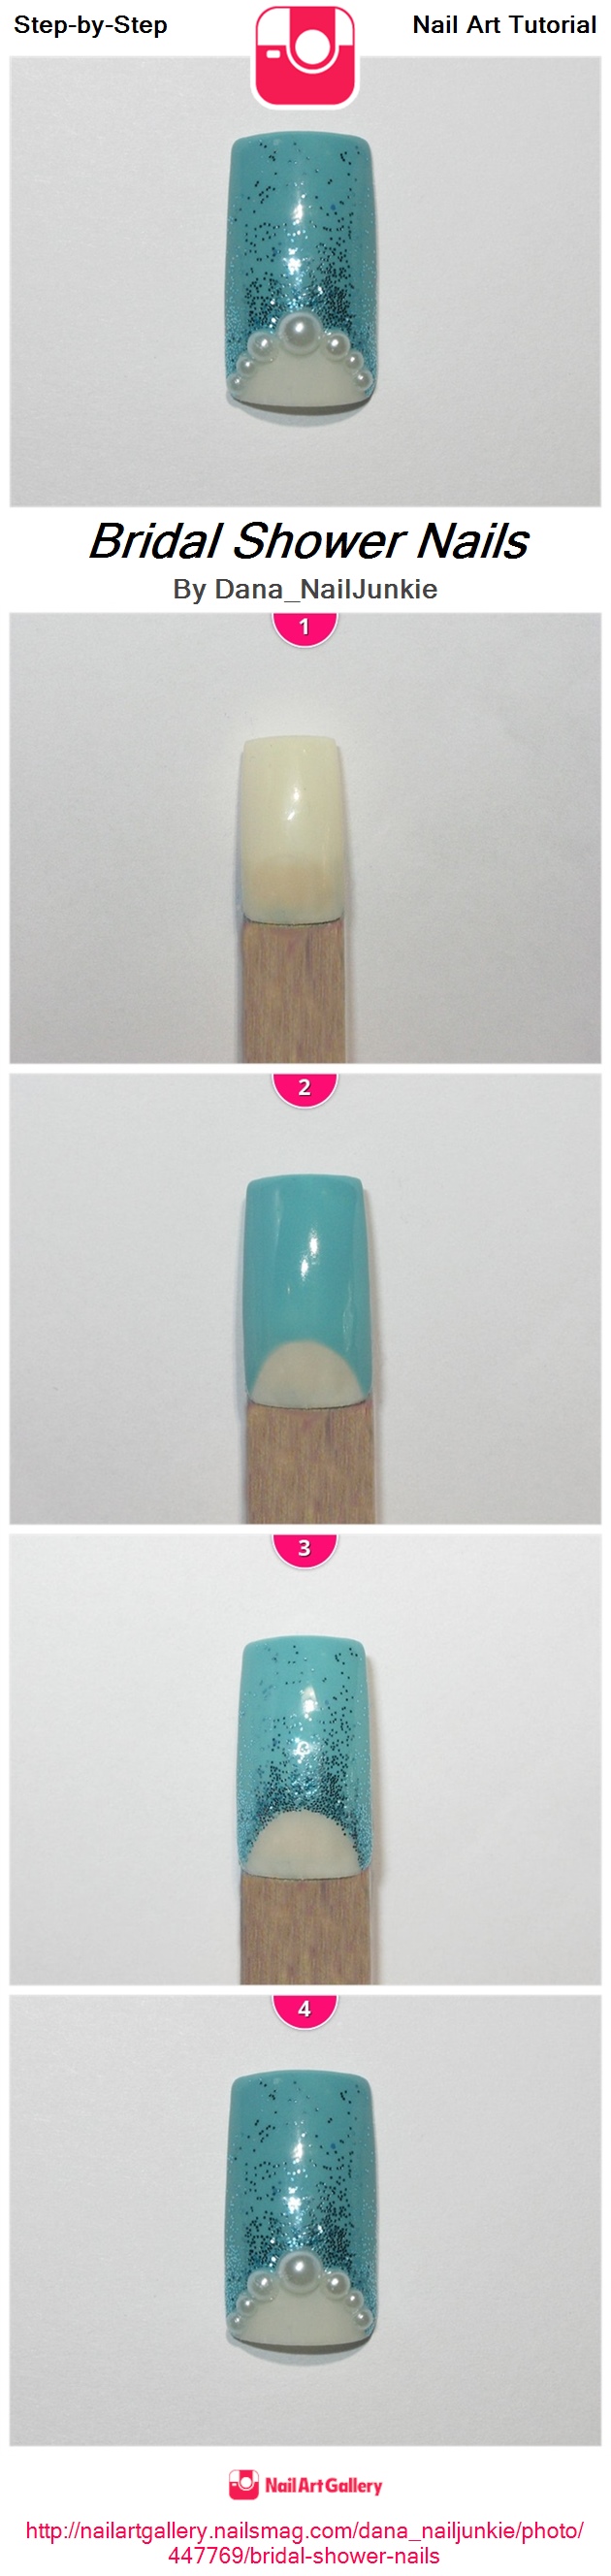
<a href='http://nailartgallery.nailsmag.com/dana_nailjunkie/photo/447769/bridal-shower-nails?ref=side-embed'><img src='http://s3photo.nailartgallery.nailsmag.com/b7664a10-7583-4798-a915-da2237fe395a_set.jpg' alt='Bridal Shower Nails - Nail Art Gallery' /></a> Copy and paste the embed code above to put this step-by-step nail art tutorial on your web site.
Paint the nail a buff/nude color using gel polish. Cure, and wipe off tacky layer.
Create a half moon effect by bringing the Tiffany blue gel polish all the way down to the moon of the nail.
Cure, then create your glitter fade by lightly whisping a glitter brush onto the nail in a downward motion. Hold the client's nail downward so the glitter lightly falls to create it's own fade.
Gel polish topcoat, cure, remove tacky layer. Then glue flatback pearls to the half moon line. Done!