For this week's challenge, we were asked to create a wearable nail look on two hands that would get anyone the VIP treatment behind the velvet ropes. The design was to be inspired by the history of the Strip, and fit for the club. We were allowed to use gel polish, lacquer, acrylic paints, and embellishments.
To get you up to speed, just know that I LOVE HISTORY, and old/new Hollywood glam. There were a couple iconic buildings that came to mind when I got this challenge. But I researched, and researched many other places. Watched a documentary, saved pictures, and drew up some designs. I learned a lot, and really enjoyed this challenge. I decided to use mostly neons because, well, The Sunset Strip is basically all neon signs! I like the contrast between neon and black line-work. I hope you enjoy! Please ask questions in the comment section. I'll be happy to assist anyone with design.
Step-by-Step Nail Art Tutorial
1
The first step to this design is to paint all ten nails with white gel polish and cure. To keep my design cohesive, and add some old Hollywood Glam, I decided to paint with black gel polish, a reverse half moon (which I just found out is a yoga pose) and place large gold glitters in a pyramid design. Topcoat, & cure.
2
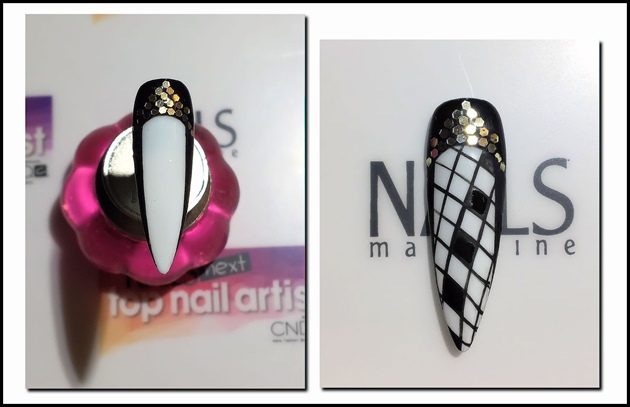
The next step is for the Chateau Marmont Penthouse entryway. I used black acrylic paint (watered down for smoothness) to paint both sides of the nail to create a hallway feel, then placed my lines for the checkers. My favorite part is coloring in the squares! I mentioned that in my 1st pre-challenge. ;) Topcoat, & cure.
3
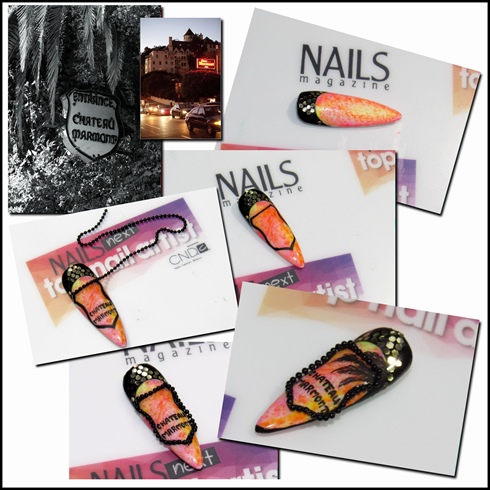
Start this nail by using neon acrylic paints in the colors of pink, orange and yellow. grab a tiny piece of sponge with tweezers and sponge until you're content with your fades. Next step, create an outline of the sign with black acrylic paint, as well as adding your lettering. Be patient, and take your time! You'll thank yourself afterwards. ;) Topcoat, cure, clean. Now add your beads or beaded chain sections at a time using glue. Spray with a glue dryer for maximum and fast adhesion. Now add your palm tree using the back acrylic paint. I chose not to topcoat my palm tree because I like the depth it creates over the shiny design underneath. You may choose to topcoat, and that is fine.
4
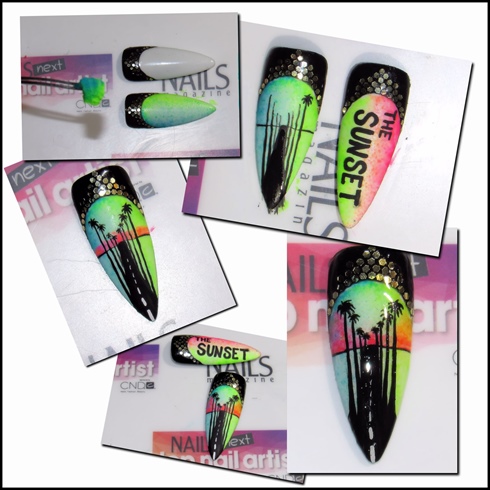
The strip, and it's amazing palms! Get out your sponging colors of your choice for this design. I chose to use most all of the neon colors. Sponge on to create your fades, then begin your outlines with black acrylic paint. Add the sunset if you want to the horizon, then begin your palm trees. As you continue, just refine your lines so that they are crisp.
5
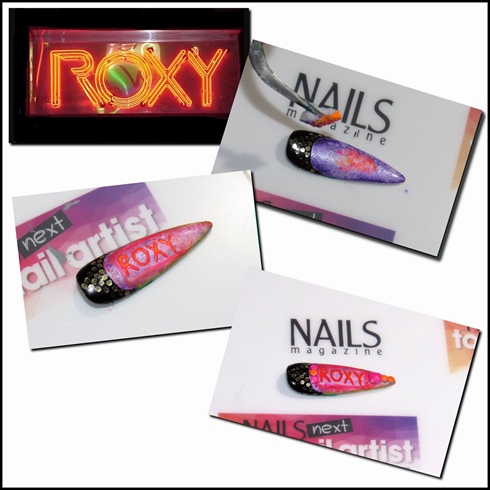
The ROXY! A famous nightclub on the strip with a super bright neon sign! In 1974, The Rocky Horror Picture Show had it's first American open at the Roxy. Before it was even a movie. Now it's time to start sponging again. This time I used purple, orange, and pink. Then you will want to create your box, for your letters, and then your letters. Since The Roxy sign is neon, I first used pink acrylic paint, then while it was still wet, I drug some neon orange through it to create a tube like effect. Topcoat and cure, the add your embellishments with glue. Once again, use a glue dryer spray for maximum and fast adhesion.
6
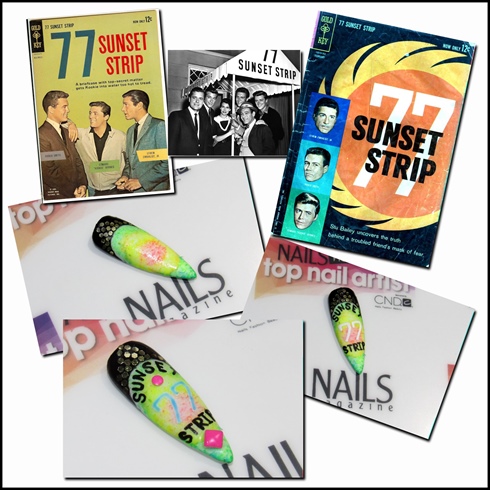
**77 Sunset Strip** Is anyone else singing it? I didn't know it until just last week, and now it's stuck. Look it up! So 77 Sunset Strip, is not an actual address. It's the name of a popular TV show back in the sixties. It was based around the Strip, and seems quite entertaining! I used a tie-dye effect on this nail. I sponged my acrylic paints in circles until I was happy, then I used paints to design the rest. Topcoat and cure, then add any embellishments. \n\n**77 Sunset Strip** *snap**snap*
7
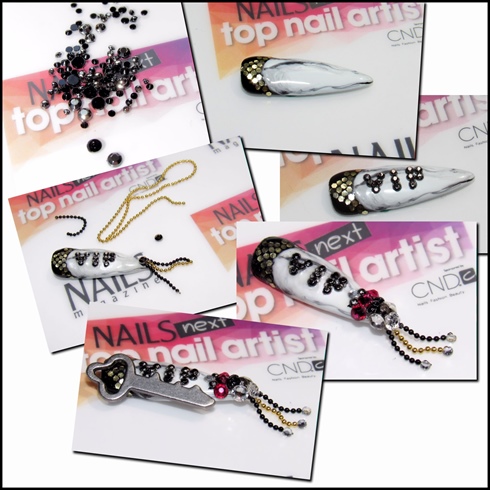
Bling! Who goes to the Hollywood clubs without a VIP nail?! There were a few places, such as the Roxy where you could get VIP treatment, and you would have a key to prove you were worthy, so I had to create a VIP key nail. =) I started by putting a thin layer of white gel over the already wgite area. I did this so that I could create my marble background by dragging black gel through the non cured white gel. After I was happy with my marble effect, I top coated and cured. I then placed the crystals, and small beads in a pattern to form the VIP lettering using tack-free gel topcoat. Cure. Now onto the major bling! Cute strands of your favorite bead chain, and adhere to the tip of the nail using glue. The add as many Swarovski crystals as you want, in any colors you want using glue. This nail says "I AM VIP!"
8
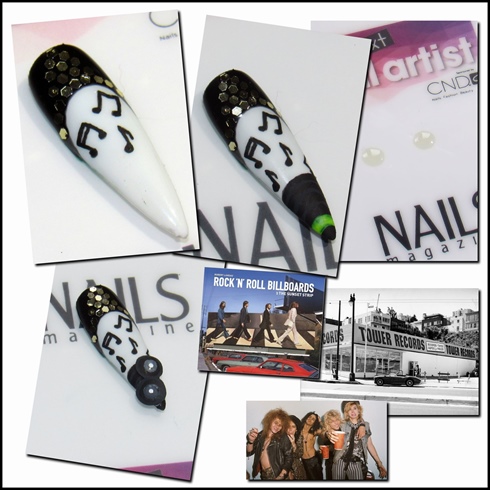
Music was, is, and always will be HUGE in this area. Anything you read about the strip from years past or today's paper, has a mention of music. With so many theaters and clubs to play in, many bands got their start right here on the strip! Using black acrylic paint, I started with the music notes, then on the tip I created a record. I wanted to have something else that stands out on this nail, so I created little records by placing gel polish on my mat in a circle, then cured it. After they were cured, I glued them to my nail, and decorated them.Topcoat and cure. The worlds smallest, cutest records!
9
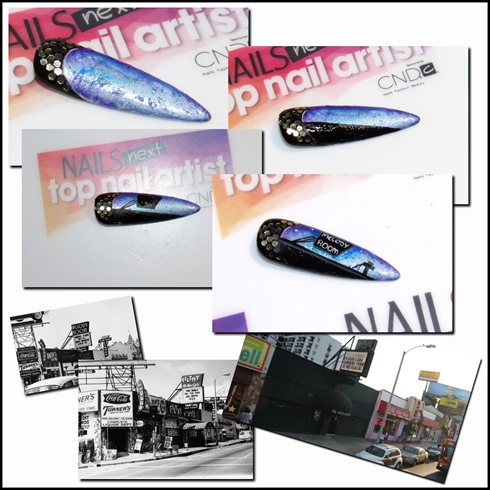
This nail is designed after the famous Melody Room, where mobsters like Bugsy Siegel, and Mickey Cohen liked to hang and listen to the Jazz music being played there. They may also have frequented this club because they ran some illegal gambling in the back! The Melody Room has been servicing the public through many different owners and names. It is currently the home of The Viper Room, which was co-owned by Johnny Depp from 1993-2004. I created a night sky first, by sponging purples and blues onto the nail. Then I began the line work with black acrylic paint. I added small dots of white for stars, top coated and cured.
10
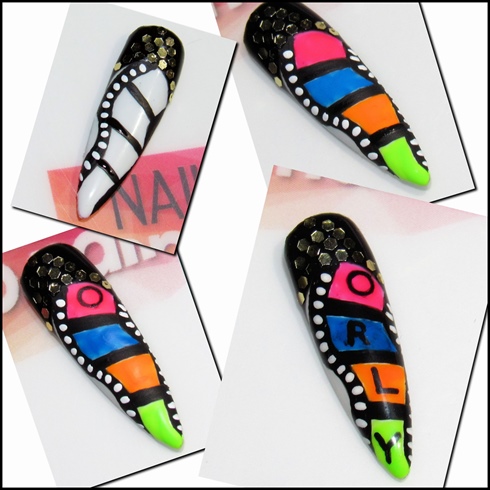
Last, but not least........A nail representing the timeless filmstrips of Hollywood, along with the name of our sponsor this week! ORLY! Begin by creating the line work for your filmstrip using black acrylic paint. Then add your white dots on the sides, fill the squares with color, and place your letters. Don't forget to leave enough squares for the word you plan to paint in them. Happy Painting!
5 Artists like this Photo
Write a Comment
Submit