fall nail artPhotos
3024
4
37
Posted on 08-30-2014
Sun and Flowers--Toes
by Cr8tive1
Posted on Apr 8, 2024
23 Views | 0 Likes 0 Comments
Spring Floral
by NinaB
Posted on Apr 13, 2024
7 Views | 0 Likes 0 Comments
Sun and Flowers
32 Views | 0 Likes 0 Comments
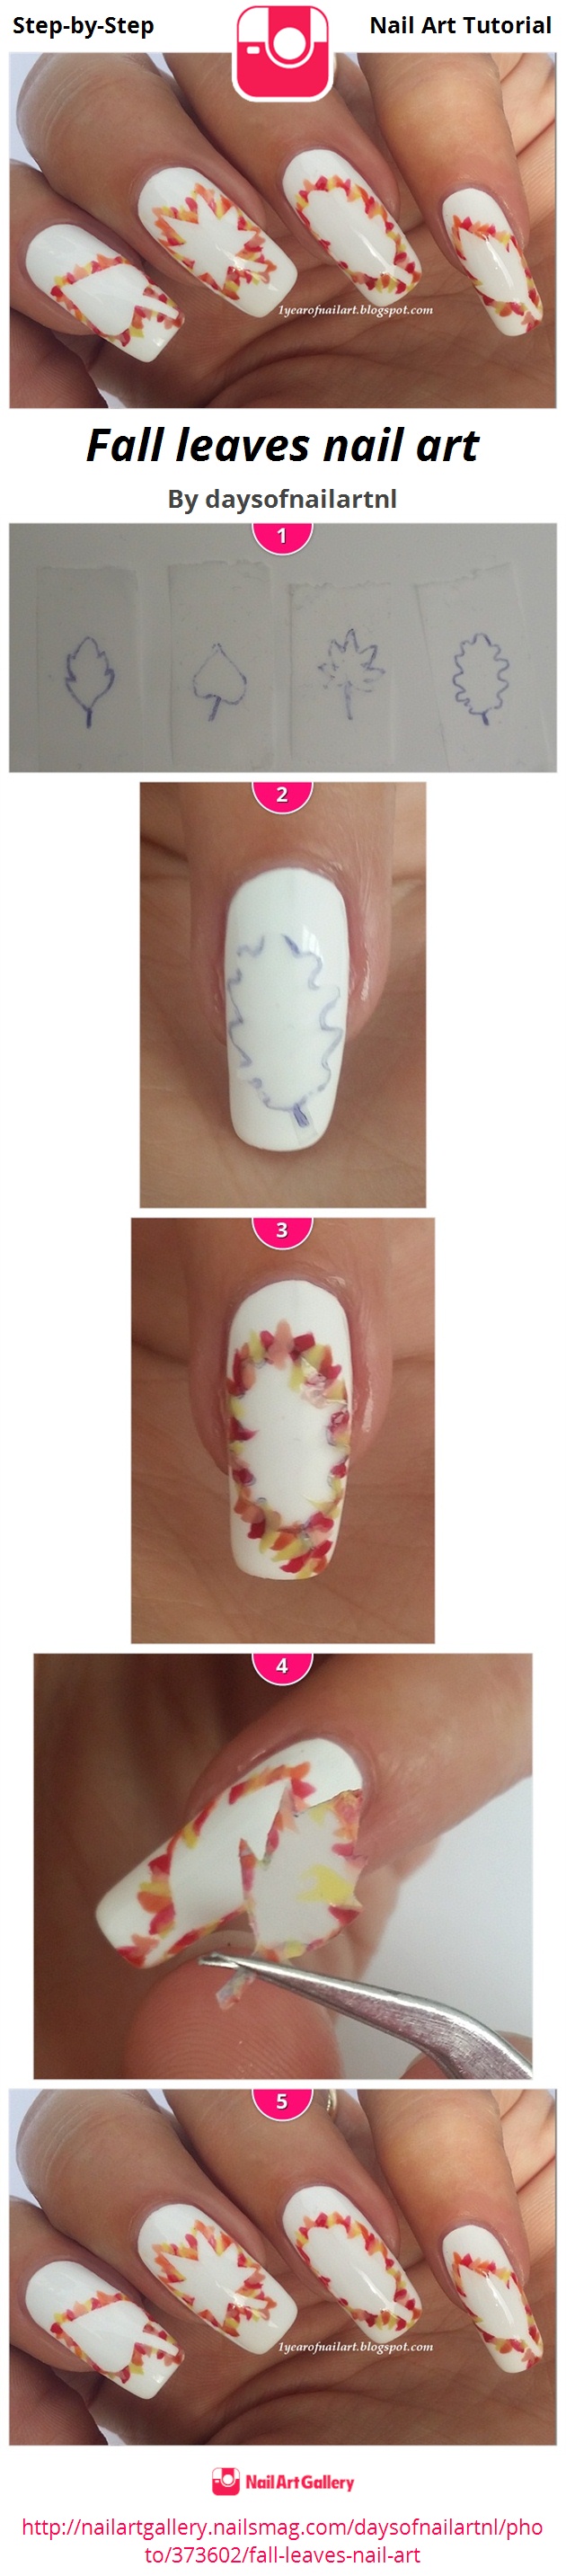
<a href='http://nailartgallery.nailsmag.com/daysofnailartnl/photo/373602/fall-leaves-nail-art?ref=side-embed'><img src='http://s3photo.nailartgallery.nailsmag.com/43ed7ec6-973e-4354-8806-0eaf754ae2a7_set.jpg' alt='Fall leaves nail art - Nail Art Gallery' /></a> Copy and paste the embed code above to put this step-by-step nail art tutorial on your web site.
Start with applying a white nail polish on all the nails. \nLet it dry completely and use a topcoat to speed up the drying time.\n\nStep 1:\nPlace some pieces of tape (10 if you're going to do all 10 nails) on a flat surface. \nThe pieces of tape can be as big as you want but around nail size is most handy.\nUse a pen to draw fall leaves on the pieces of tape.\n\nTo prevent smudging and to make cutting easy, place another piece of tape on top of the drawed ones.
Use the scissors to cut out the fall leaves. \nAnd place the fall leave like a sticker on your nails.
Get your polishes and the nail art brush.\nPaint small fall leaves around the outline of your sticker.\n\nWait for it to completely dry!!!\n
Use the tweezers or your nails to remove the stickers from your nails.
Apply topcoat to seal your design.\nDone :D