NTNA Challenge #2
This weeks sponsor was Akzentz, and we were asked to interpret our favourite board game in 3d gel on a set of 10 tips.
This is the first time I have ever attempted 3D Gel, and wow it's much more difficult than I had even imagined!
The first thing I did was go and buy some akzentz gel to get myself started.
In the beginning I had a few thoughts on what board game I should attempt, but when Jumanji was brought to my attention I knew this was the board game I wanted to showcase.
I decided to recreate the Jumanji Board from the 1997 Robin Williams movie as the pieces are so detailed and interesting..
I always loved Robin Williams movies growing up and feel like this has a strong connection to my childhood.
Almost everything on top of my tips was made from gel and gel polish, with the exception of my game pieces which I hand made with modelling clay, then covered with gel polish and scraped out the clay, and the vines which are gel covered wire.
I added a small LED light under the Jumanji centre piece, which can be turned on and off, and as an added feature the tiled path glows in the dark!! So my creation has an eery look when in the dark!
I spent a lot of time on this challenge, and it really had me out of my comfort zone, but I am happy with the end result! And hope the judges agree that I have done the Jumanji board game justice.
Sarah :-)
Step-by-Step Nail Art Tutorial
1
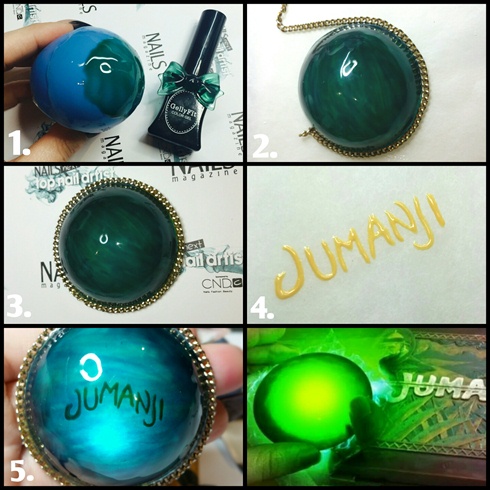
I half covered a small balloon with gel top coat, and layered blue and green sheer gel polish over the top.\nI painted Jumanji in yellow gel polish and gelled it to the underside. I added a small LED light underneath to illuminate the word Jumanji.
2
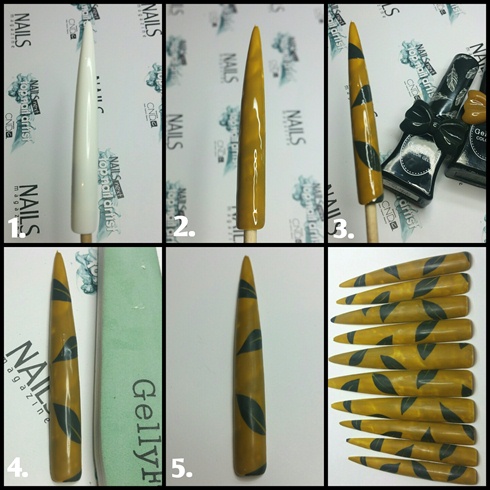
Here I painted the tips a murky mustard colour, and painted dark green leaves. Similar to the Movie Board game. I lightly buffed them so as to give a matte finish.
3

Using my Akzentz Gel I created the tile path. I used Akzentz 'lights out' as a top coat to make the path glow in the dark.
4
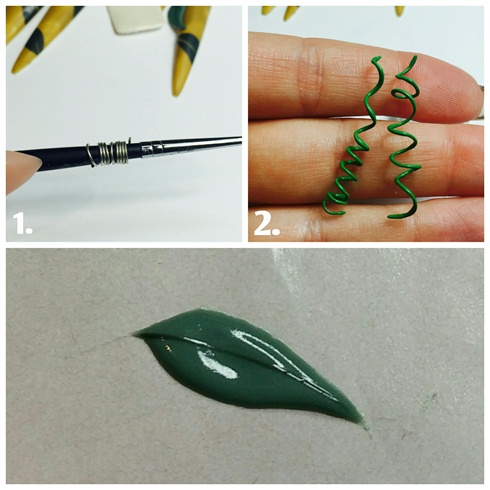
Here I twisted some wire and painted it with green gel polish to look like coils of a jungle vine.\nI also made some 3d leaves with my Akzentz gel mixed with green gel polish.
5
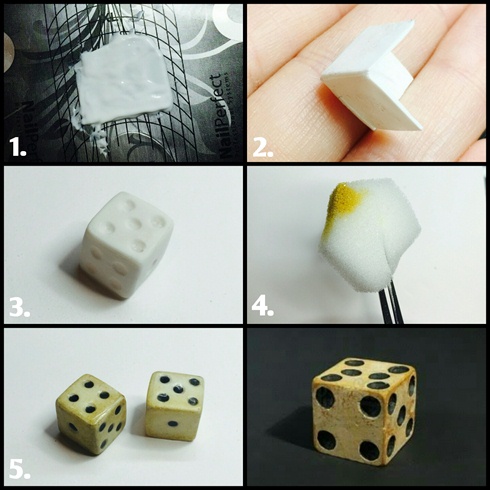
This is how I created the dice.\nI made 6 flat square pieces with Akzentz formation gel, and then glued all the side together. With an e file I carefully made the number indents and with a dotting tool painted them with black gel polish.\nI aged the dice using a sponge and some yellow and brown gel polishes.
6
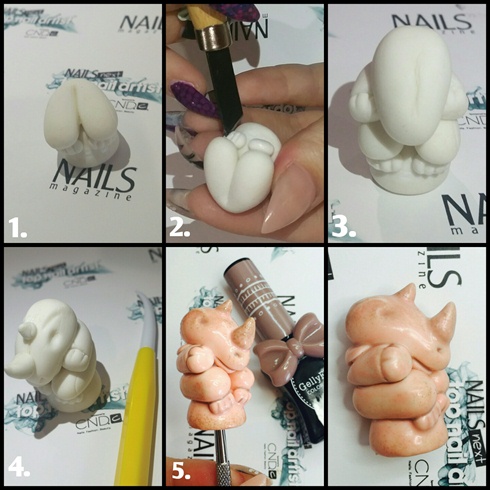
Here is how I created the game pieces. Using polymer clay I built up in layers, and cut indents for the toes and eyes.\nI put around 4 layers of gel polish on the game pieces.
7
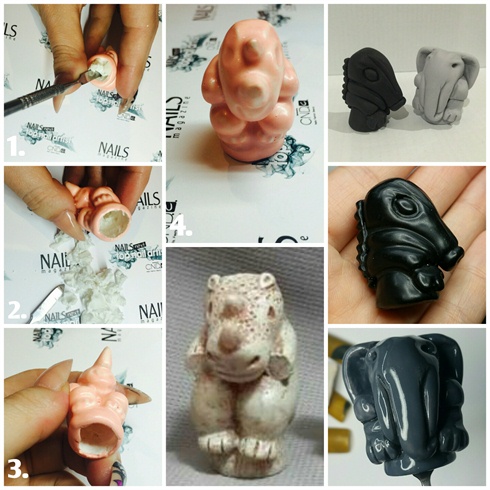
Once the gel was thick enough I could scrape out the clay.\nHere you can also see the Elephant and Crocodile which were made the same way.
8
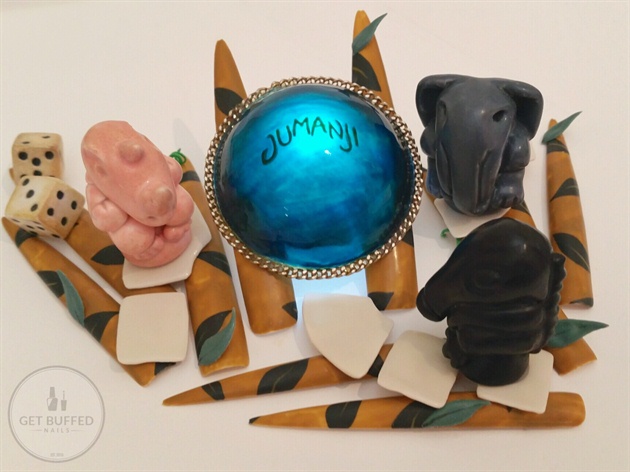
Here is the entire piece in natural light, with the LED light shining through.
9
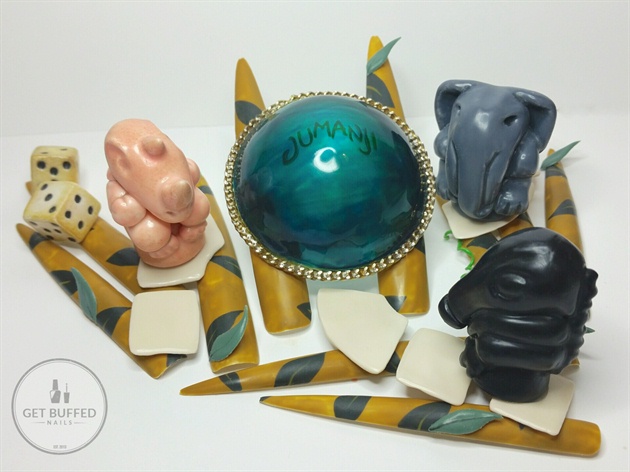
White Light, you can see more detail on the game pieces.
10
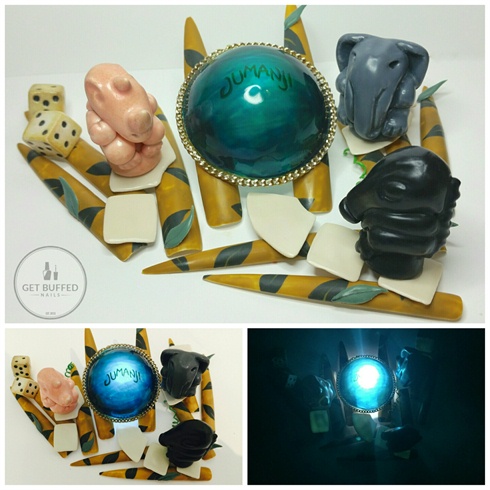
Here you can also see how it looks in the dark.
10 Artists like this Photo
Write a Comment
Submit