I loved the theme of the 1st pre-challenge – Bewitching hour sponsored by Swarovski. We were asked to create Halloween inspired nail art on 5 nail tips inspired by our favourite witch incorporating Swarovski crystals, a mix of hand painted and 3-D elements.
The first witches that came to my head were from one of my favourite films: Hocus Pocus. Immediately I thought of a witches hat and how I could make the nail tips into the shape of this. The cauldron, spell book and black flame candle were a big part of the film so I wanted to incorporate these into the design as well as using the gorgeous orange Swarovski elements to create the infamous sunrise scene from the film at the graveyard with Thackery and Emily Binx. The orange and purple Swarovski elements went perfectly with the colours of the Sanderson witches from the film. I added potion bottles with Swarovski crystals tumbling out and spells winding around the design. I then used 2 long square tips to create 2 floor boards which were parted and mounted on a piece of acrylic – all painted with gel paint to look like floor boards which would be the base of the design. I encapsulated purple netting in clear acrylic and adhered this to the back of the design for spider webs beneath the floorboards. I think the use of Swarovski elements really gave the design a magical feel to fit the film.
Step-by-Step Nail Art Tutorial
1
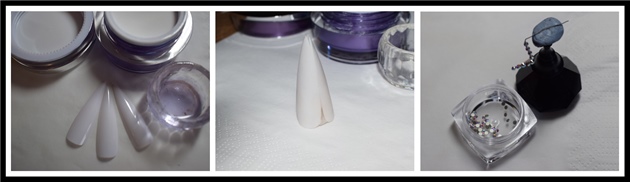
1)\tWitches Hat: I attached 3 pointed nail tips together using acrylic in the shape of a witches hat. To make the hat in the shape of Mary Sanderson’s witch hat shaped hair, I applied acrylic on the end in the ‘lop sided’ point’ I filed and buffed into shape then painted with Black Top Gel. The base of the hat was created in the same way and the two pieces stuck together with acrylic. I used purple and grey Swarovski elements to create the hat’s ribbon. Magic is a big part of the film and a lot of scenes feature Winnie Sanderson’s long nails and ‘lightening’ coming out of her hands when performing spells. I shaped some wire into the shape of lightening and used gel to adhere AB Swarovski crystals and a star. I then adhered this to the back of the hat with acrylic.
2
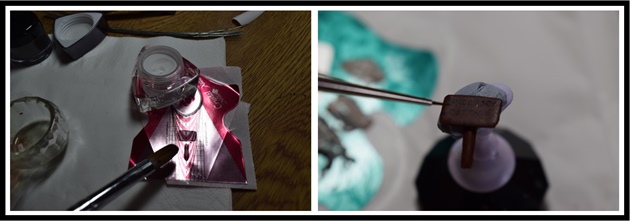
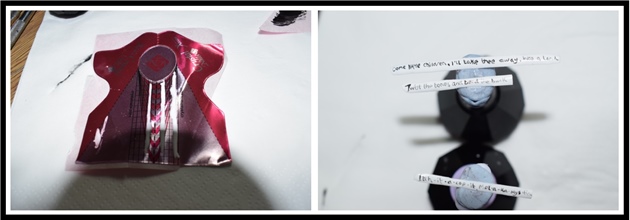
2)\tFloorboards: To create the floor boards and platform for the design to sit on, I used two long square tips and used gel paints to create the wooden floor board effect. I then moulded a piece of black acrylic onto a nail form, filed and painted as above for the tips to sit on. I finished the floor boards with matte top coat. I adhered the tips to this platform with acrylic. I created the spiders web backing by encapsulating purple and silver netting in clear acrylic, filing into shape, top coating and adhering behind the nail tips with acrylic.
3
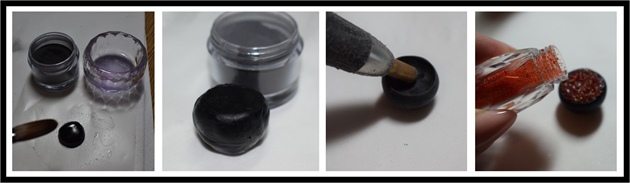
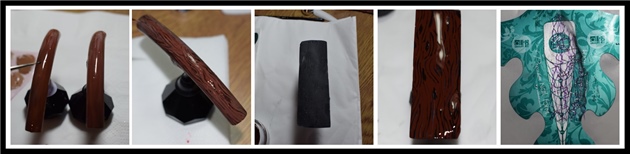
3)\tCauldron: I made the cauldron using black acrylic on a nail form and kept building this up to get the height. Once I was happy with the size and shape, I filed it and used an e-file to carve out the inside. I used matte top coat to give this an older look. I then used gel and filled this with orange crystal pixie to create the look of a ‘bubbling’ cauldron. I shaped the handle with wire and used black Swarovski beads adhered with gel and finished with a star shaped crystal.
4
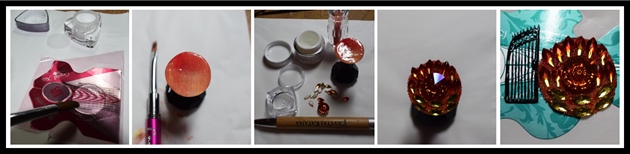
4)\tSunrise and Graveyard Gate: To create the Swarovski crystal sunrise for the infamous sunrise graveyard scene, I shaped a circle in clear acrylic on a nail form. I filed this and applied matte top coat and used gel paints in red, orange and yellow to paint an ombre background. I used gel to adhere orange and yellow Swarovski crystals to and crystal pixie around these. I placed this as if it was rising behind the witches hat. To create the gate, I used black gel on the back of a nail form. I adhered Swarovski black beads at the top of the gate to add detail and also a Swarovski crystal as a door handle of the gate. I adhered this next to the sunrise as if it was opening to reveal the sunrise.
5
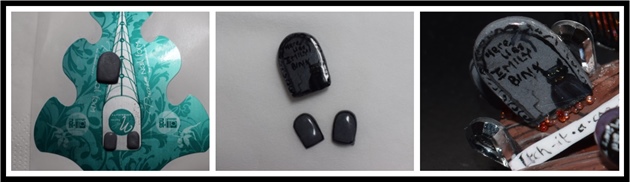
5)\tGravestones: To create the gravestone of Emily Binx, I made the shape of the grave stone, along with two smaller ones using grey acrylic on a nail form. I filed these and used acrylic paint to add detail such as the cracks on the grave stone and paint ‘Here Lies Emily Binx’ and the cat of Thackery Binx at Emily’s gravestone. I added some Swarovski crystals as additional gravestones and applied them into gel.
6
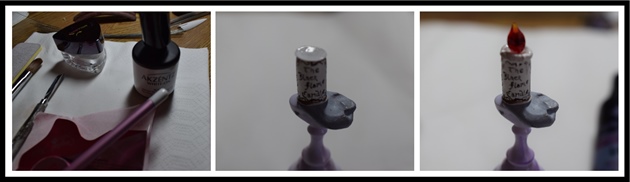
6)\tThe Black Flame Candle: Using a c-curve stick, I applied white gel around the end to create the shape of the candle. Once this was cured, I removed this from the c-curve stick with a needle tool and applied more gel at both ends to create the base and top of the candle. Using black acrylic paint, I added the detail on to the candle and applied top coat to finish. I continued adding white gel to the top of the candle to create the melting wax. I then attached an orange Swarovski crystal in the top for the flame.\n
7
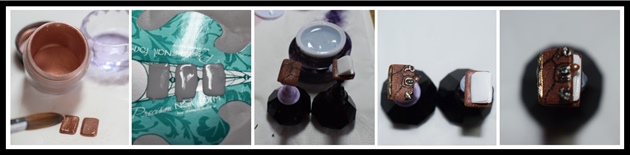
7)\tThe Spell Book: I created the spell book cover using gold acrylic on a nail form. I filed this smooth and applied matte top coat. Using clear gel, I created the detail such as the snakes and the eyeball. I then added detail to these using gel paint and acrylic paint and using acrylic paint drew the stitching. Using gel, I attached a gold Swarovski bead as the lock of the book. To make the pages, I painted white gel onto a form. After curing, I filed into shape and adhered in-between the two book covers using acrylic.
8

8)\tPotion Bottle: To make the potion bottle I moulded blue tac into a bottle shape, rolled in cuticle oil to help removal and coated in clear gel. Once cured, I removed the blue tac and buffed smooth. I then filled with purple Swarovski Crystal Pixie and painted the ribbon and label ‘Dead Man’s Toe’ with acrylic paint. I sealed the design with gel top coat. I applied the bottle on its side to the floor boards using gel and applied more crystal pixie to look as if it was spilling out of the bottle.
9
9)\tSign post: I created the sign post with clear acrylic on a nail form, filed into shape and painted in gel paint. I then painted ‘Sanderson Cottage’ using acrylic paint and added detail to the wood. I finished the sign post with a Swarovski crystal and once adhered to the nail tips some orange crystal pixie flowing from the cauldron to add a touch of magic.
10
Spells: To create the spells I painted white gel on a nail form and filed into shape. Because the gel was so thin, I was able to bend this into the shape I wanted so it would wind round. I used black acrylic paint to write the spells of The Black Cat Spell. I adhered one by the spell book and potion bottle with some additional crystal pixie and a star Swarovski crystal to add the magic and the second by the gravestone with Thackery Binx.
11 Artists like this Photo
Write a Comment
Submit