This is my entry to the first pre-challenge of Nails Next Top Nail Artist competition 2016, sponsored by CND.
I immediately tought of my school when I read the title "Creative play." I attented to Steiner school, where art and culture are present all the time. The usage of different art materials was part of our daily curriculum; water colors, aquarells, pastels and oil paints, of which oil paints and aquarelles are closest to my heart. Luckily gel paints are similar to oil paints in many ways, so I got to choose some of my favourite artists to be part of my project, like Van Gogh and Monet.
I think of the whole history of art as a continuum, never ending creative play. I decided to create a linear history of art on these five nail tips, starting from a cave painting and ending in modern surrealism. I enjoyed working with this project very much, although it was really challenging to create water marbling, since nail polish isn't my strongest area. This work also reminded me why I love nail art so much, I fell into my stress free zone as I painted such highly detailed and colorful paintings. That's why I keep on playing.
Step-by-Step Nail Art Tutorial
1
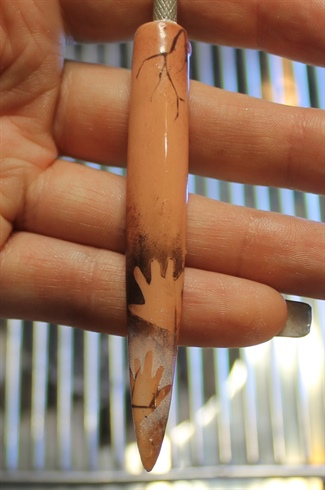
The cave men used to put their hands on the rock and blow pigmented dust around the hand. Draw a hand on a nail form with a permanent marker, cover it with a piece of tape and cut it to make a hand template. Tape it on the nail and blow and pat pigment around it. Paint the animals and layer gel paint to create the cliff (as seen in the picture of the finished work).
2
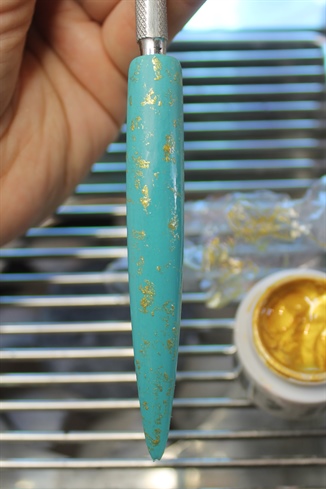
The base of the jade stone is made by tapping gold gel paint on the nail with cellophane. Cure the paint and add top coat.
3

Fill a bowl with warm water and put drops of black nail polish in it. Then spray the polish with some hair spray. Hair spray breakes the surface and all you have to do is to dip your nail in the polish. Let the polish dry and seal it with top coat.
4
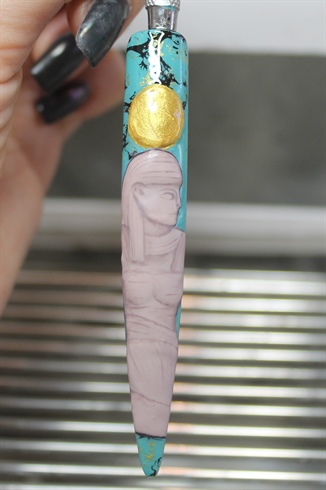
The Egyptian statue is made with multiple layers of gel paint. Add shadows and painted details. Add matte top coat to get the sandstone effect.
5
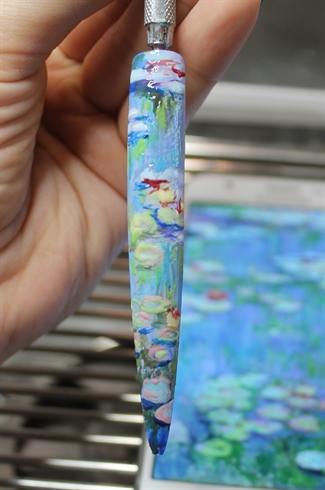
Gel paint acts like oil paints in so many ways, it is thick and easily blended. This Claude Monet painting is made by using multiple layers of gel paints. As base I used lavender after which I continued with blue tones. I worked my way to greens and then to lighter colors.
6
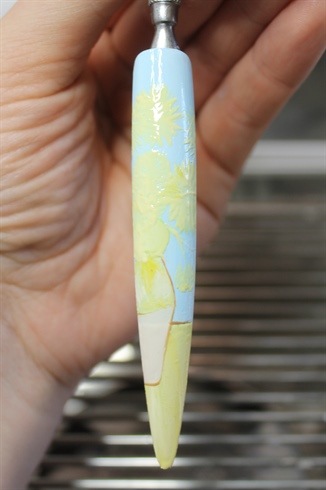
Vincent van Gogh was also an oil painter. First I painted the blue and yellow base. Then I made the light yellow base for the flowers.
7
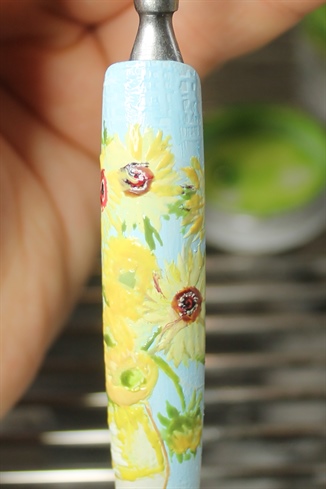
To get some authentic look to your nail add a crisscross of gel paint on the background.
8
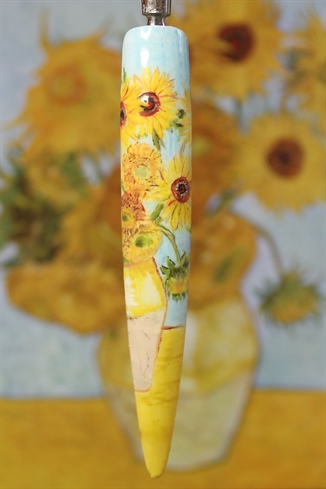
Paint the details with strong pigmented colors.
9
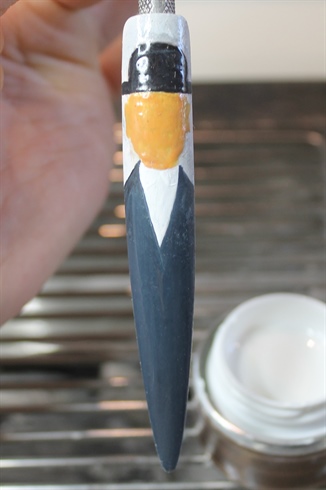
I started my Magritte painting like the other paintings, with strong background colors. Use a sponge to make the clouds in the sky. Dip the sponge in dark paint and pat it on the nail.
10
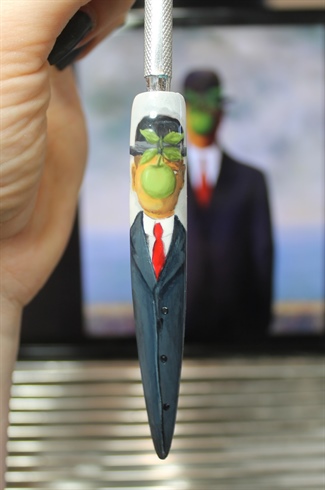
Pay attention to the details, especially to the shadows.
9 Artists like this Photo
Write a Comment
Submit