Nails Magazine Next Top Nail Artist top 10: See You on the Backside (Sponsored by Minx)
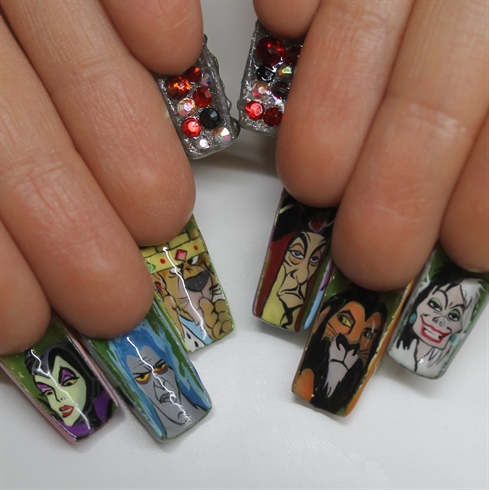
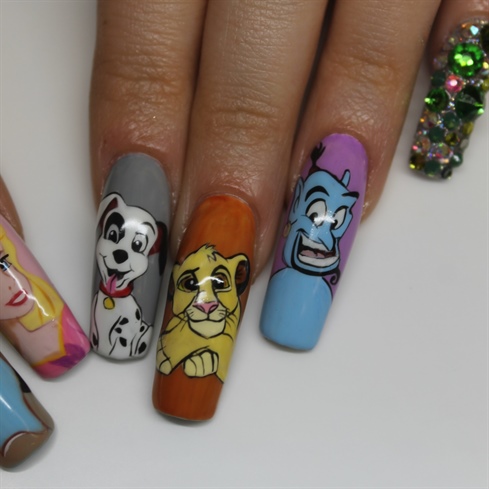
I wanted to stay true to myself and create a set with multiple characters, something that I love to do. This set was incredibly fun to create. I paired every good guy with a villain, heroes on the top and villains under the nails. I really wanted to challenge myself and decided to free hand paint the characters under the nails.
Free hand painting characters isn't easy and it's something that you learn to do with time. I made two step-by-step tutorials of the characters, Simba from the Lion King (my absolute favorite film as a child) and Maleficent from the Sleeping beauty.
Step-by-Step Nail Art Tutorial
1
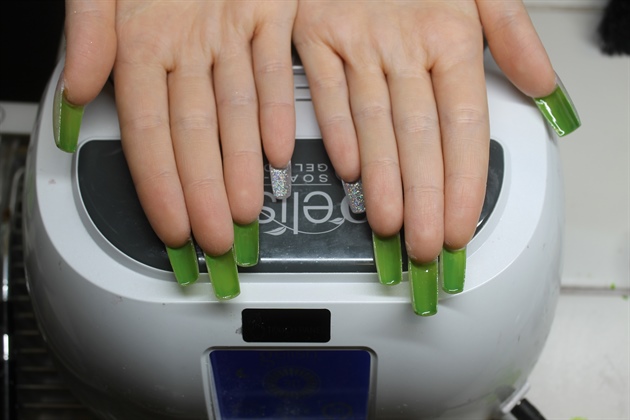
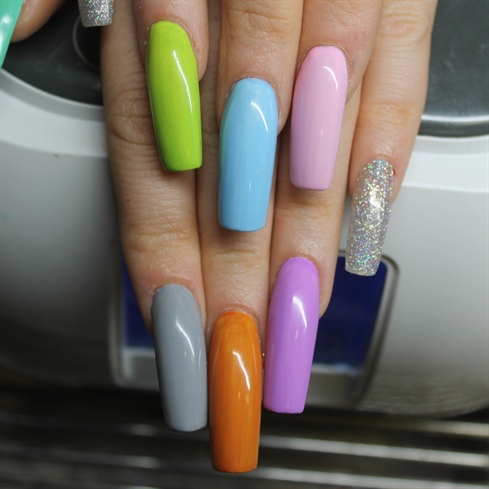
First I painted the nails green on the back side. I always use holographic glitter underneath the crystal "treasure nails". That way the crystal nails look more solid.
2
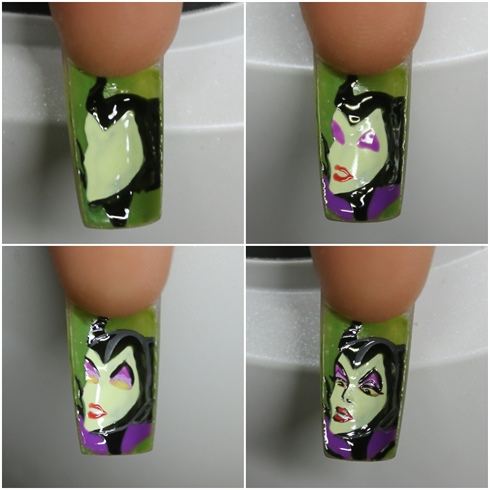
First step is to paint the large areas, face and the headpiece. I used gel paints to create the characters. Then cure in the UV-light. Then paint the second largest areas, eye shadow, collar of the cloak and the red lipstick. Cure before next areas. Paint the shadows, gray areas on the head piece, yellows of the eyes and the white teeth. Cure. Then add black lines.
3
All of the characters are painted like the Maleficent, starting from the larger areas and finishing with the small ones.
4
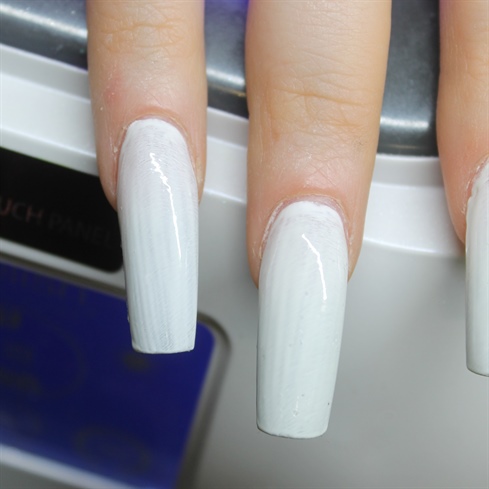
Add a layer of white gel polish on top of the nails before adding the colors, that way the green tone underneath wont show through the colors.
5
I chose the colors based on the characters and the color scheme of the movies.
6
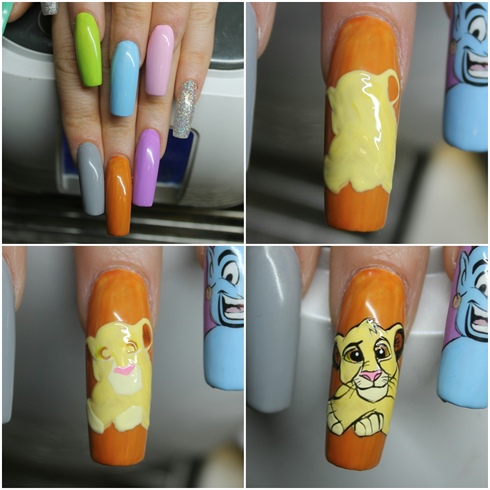
The Lion King has very bright colors, so I painted Simba's background ocher yellow. First I painted the large areas with pastel yellow, then added shadows, Simba's white chin, brown ears and pink nose. Last step was to add the black lines.
7
Add a layer of white gel polish on top of the nails before adding the colors, that way the green tone underneath wont show through the colors.
10 Artists like this Photo
Write a Comment
Submit