Our first pre-challenge was creative play, we had to think "outside the box" and create a hand-painted nail look in five tips. We were allowed to use only polish ,gel polish and acrylic paints. I tried to think of something different, weird and funny at the same time. I believe that sometimes things are not what they seem and you need to take a second look.So i decided to create designs that you can see in two different ways with different emotions. In one way you see a man and when you turn the tip upside down...can you see a woman? I used polish for the base of the design and acrylic paints to finish my design.I had so much fun in this challenge, hope you like my creation! Good luck to everyone!
Step-by-Step Nail Art Tutorial
1
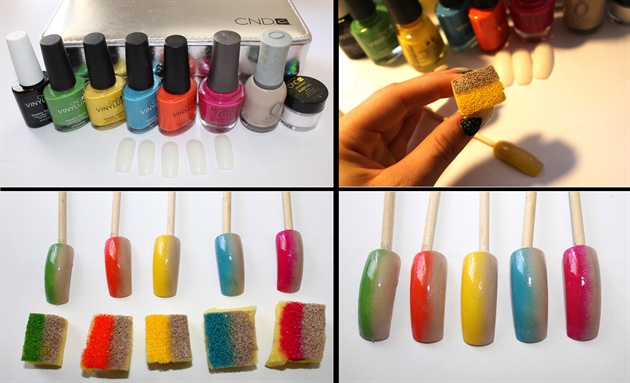
For the base of the design use polish.First start with base coat. Cut a sponge in five pieces and paint each side with different colours, then stamp the nail with the sponge.Repeat twoo-three times.Then add white pigments at the edge of each tip.Apply top coat and now i am ready to start with my acrylic paints.
2
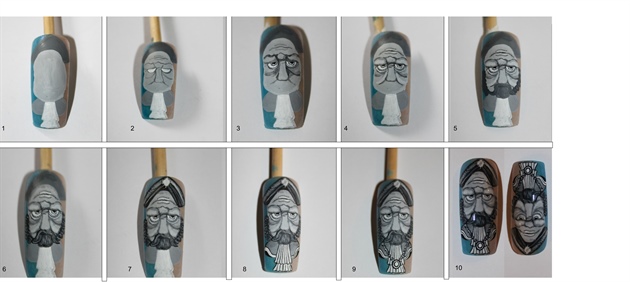
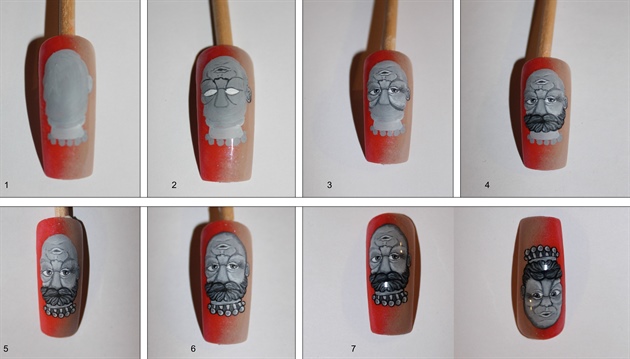
1.Use light colours for the base of the design.\n2.Start the basic lines of the face with dark grey (eyes,nose,forehead) It's important to think how every line is going to look like when you turn the tip upside down.\n3-4. Add more details at the eyes and some dark and light shadows at the face.\n5-6. Paint the beard with dark grey and add some thin lines with black and white.\n7.Paint the hat with black colour and use white for the shadows and the rhombus.Use a dotting tool fore the details.\n8-9.For the scarf add thin lines with black first and then start the necklace\n10.Apply top coat
3
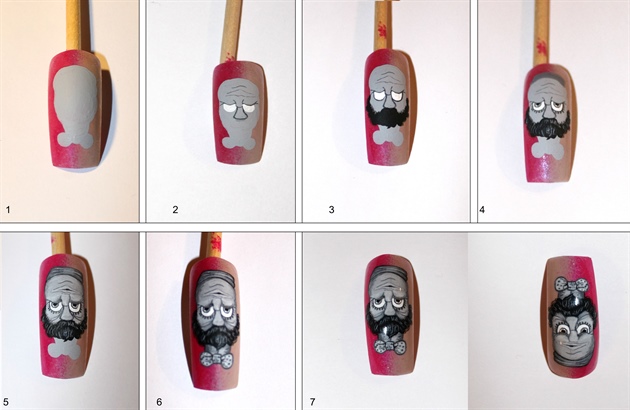
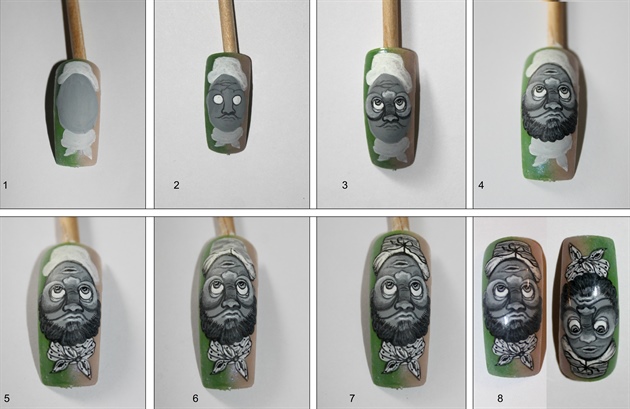
1.Use light colours for the base of the design.\n2.With grey add eyes,nose and wrinkles.\n3-4.Use black for the beard,white for the thin lines.Draw the details in the eyes and use dark grey to paint the hat.\n5.Add more wrinkles with grey and finish the hat with details.\n6.Use grey for the bowtie and a dotting tool for the dots.\n7.Apply top coat.
4
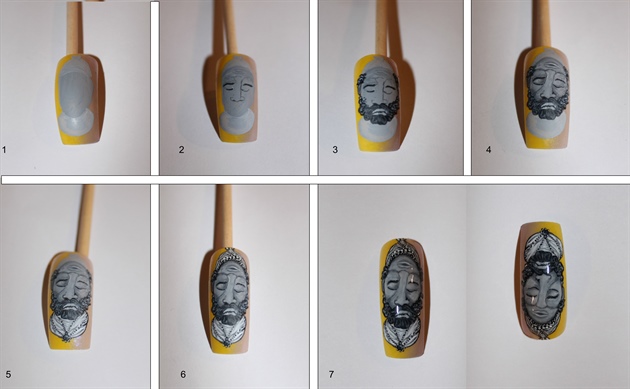
1.Use light colours for the base of the design.\n2.Add the eyes,nose,eyebrows and wrinkles with grey.\n3-4.Use black colour for the beard and white for the lines.Add shadows on the face\n5-6.With white colour paint shadows in both scaves (neck and head).Use dotting tool for the details.\n7.Finish with top coat.
5
1.Use light colours for the base of the design.\n2.With dark grey add the details on the face, use white for the eyes.\n3.Paint details and shadows with grey and white.\n4.Use dark grey for the beard and for the thin lines use black and white colours.\n5-6.Add black outlines to the collar and some dark shadows at his head.\n7.Apply top coat and turn the tip upside down.
6
1.Use light colours for the base of the design.\n2.With dark grey add the details on the face, use white for the eyes.\n3-4.Add details and shadows with grey and white.Use black for the beard and for the thin lines use grey and white colours.\n5.To finish with the scarf use a dotting tool for dots and then paint thin lines with black colour.\n6-7.Use light grey for the hat and black colour for outlines.\n8.Apply top coat.
7
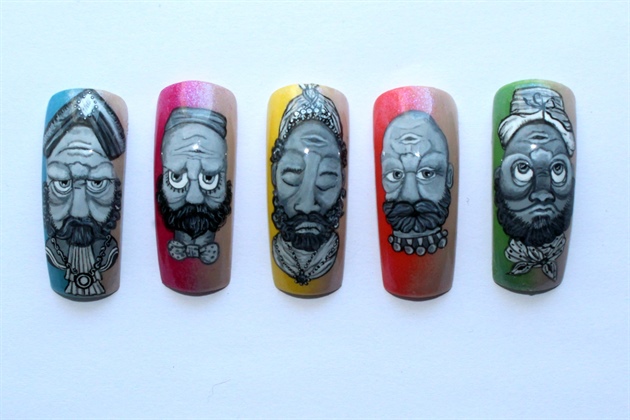
You can see how the five faces look together..but when you turn them upside down...
8
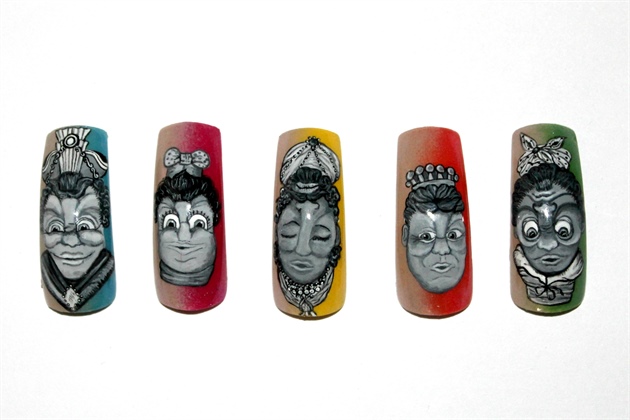
.....Ta-daaaa!!!
15 Artists like this Photo
Write a Comment
Submit