I chose Bellatrix Lestrange as my witch for the Bewitching Hour Challenge. I chose her because she is very passionate in what she believes in, and focus’s all of her energy into her cause. She is very family oriented like myself. She is a beautiful witch from a wealthy family, and would probably always have her nails done in a fashion forward way. She went down a dark path, and that let me portray her style with Swarovski Crystals while adding a dark twist to the design. She will always be one of my favourite witches!
Step-by-Step Nail Art Tutorial
1
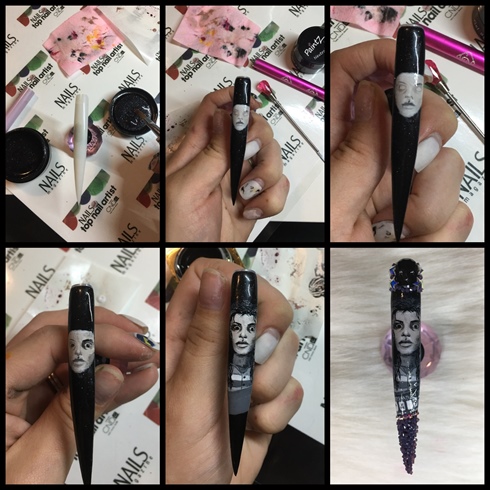
I painted the entire tip with Lovers Lane from Light Elegance. Then I used Fuzion and Crystal Nails gel paint to start her mug shot. Add lots of layers to add dimension and realism. Once the face was completed, I added a tackless top coat and the surrounding Swarovski Crystals.
2
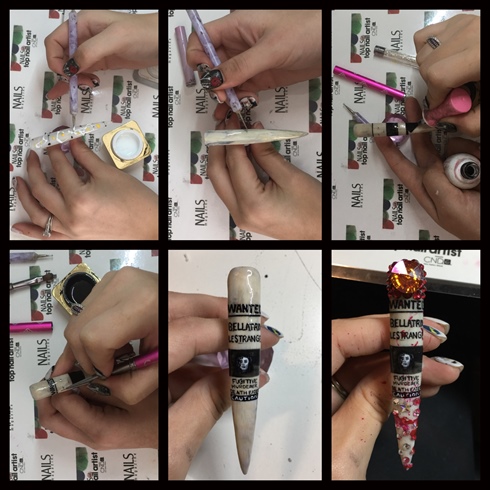
I splattered a few colours of gel paint to get an old, textured look. I mixed the colours together and then tackless top coated the nail. I find the gel paints don't move after I do that. Once I was happy with my wanted poster, I added Swarovski Crystals and splattered red Vinalux polish on it to look like blood.
3
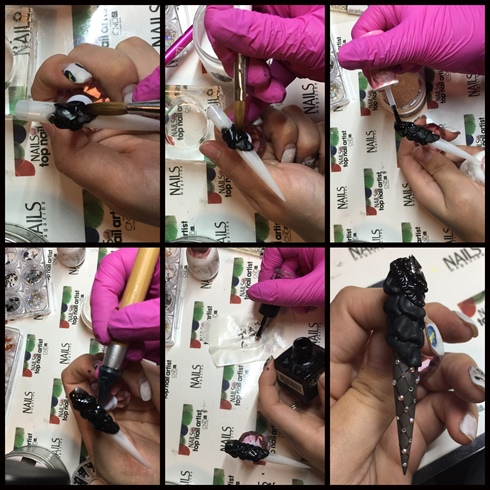
I started by sculpting ruffles out of Ugly Duckling acrylic, moving up the nail. I attached Swarovski's to the top finishing the "dress" look. I watered down black Ugly Duckling gel polish to make the stocking effect. I finished by painting the lines with Fuzion gel paint and adding the final crystals.
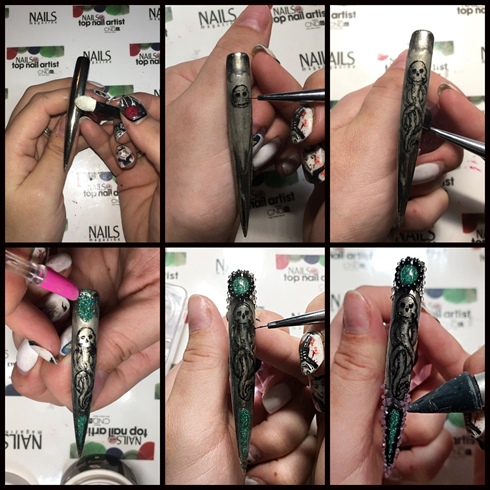
4
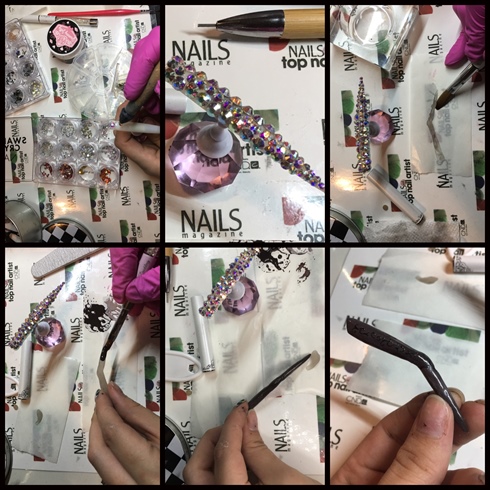
I applied Swarovski AB Crystals to the entire base of the nail. I planned my 3D wand by keeping the tip close to measure. I made the wand out of Ugly Duckling clear acrylic and after hand filing, I painted it with Fuzion gel paint.
5
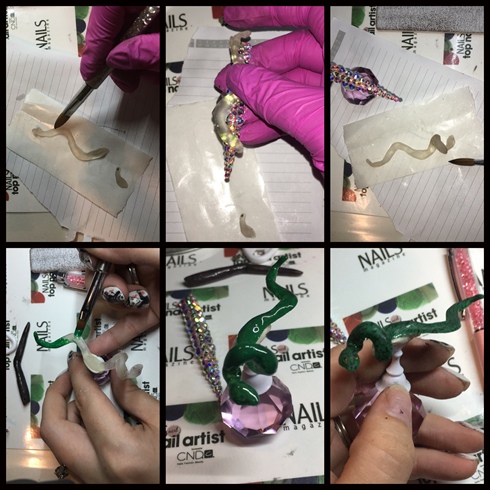
I started the snake the same way I did the wand, and it is also made of acrylic. Once I knew it was going to fit on the nail, I painted it with Fuzion gel paint and finished with a matte top coat.
6
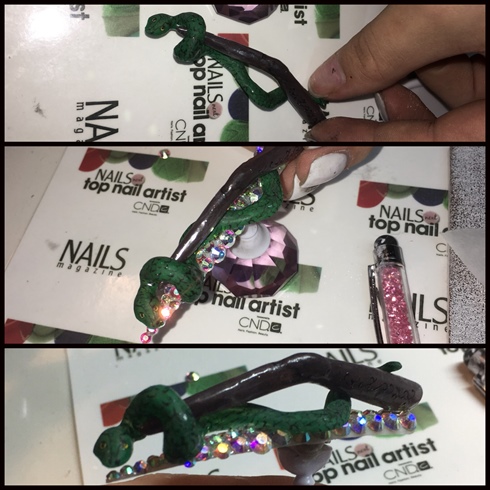
I carefully pushed the wand into the snake until it was fitting snug. I then glued it onto my Swarovski encrusted nail tip.
7
I painted the nail black with gel polish and used a chrome powder as my background. I used a builder gel and applied a raised area for my dark mark. I painted the dark mark with Fuzion gel paint and applied a top coat. I wanted to add some green, so I made a faux gem with sparkles and builder gel. I surrounded the two faux gems with Swarovski Crystals. I also added some more outline to the dark mark after the top coat had been applied to give it a 3D/holographic look.
7 Artists like this Photo
Write a Comment
Submit