For this challenge we were asked to bring it back to the 50s. The nail form was first patented in 1957 by NSI founder Thomas Slack. That same year, Dr Seuss wrote the Cat in the Hat! I wanted to show that the 50s aren't just about "Grease", poodle skirts, diners, and checkerboard floors. We don't realize a lot of well known things today have been around longer than we think!
Step-by-Step Nail Art Tutorial
1
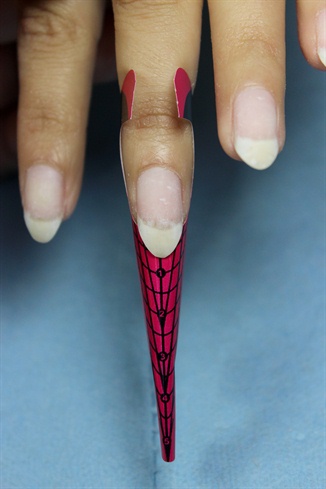
Prep the nail for acrylic application. Apply your forms to all nails. Since these will be almond shaped, remember to slightly angle your form downwards so the nails appear straight instead of growing upwards.
2
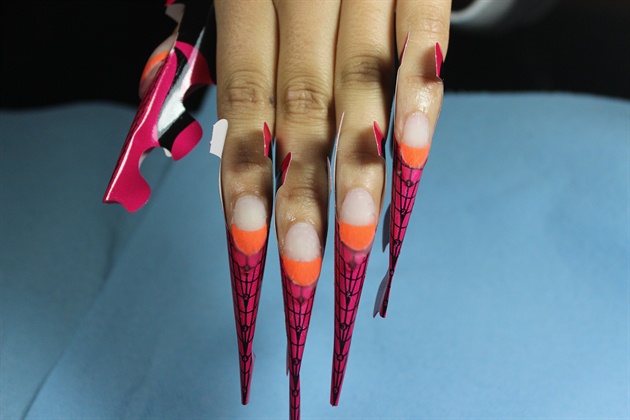
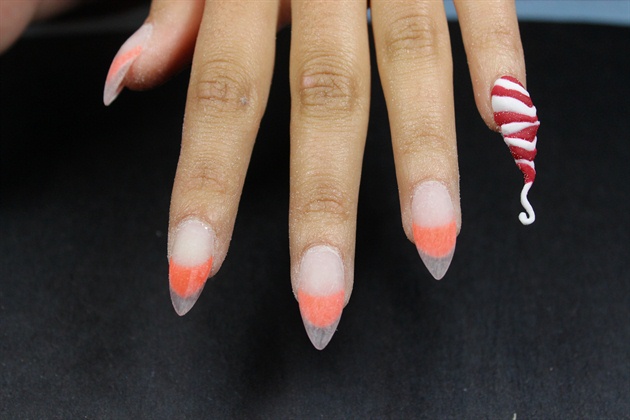
**((For the purpose of easy removal after the tutorial I applied nail appliques, so ignore the orange tip underneath.)) \n\nUsing clear acrylic, sculpt a basic almond nail. For the pinkie, use sculpt a very thin layer of acrylic to act as a base. We will put putting more acrylic on top as part of the design.
3
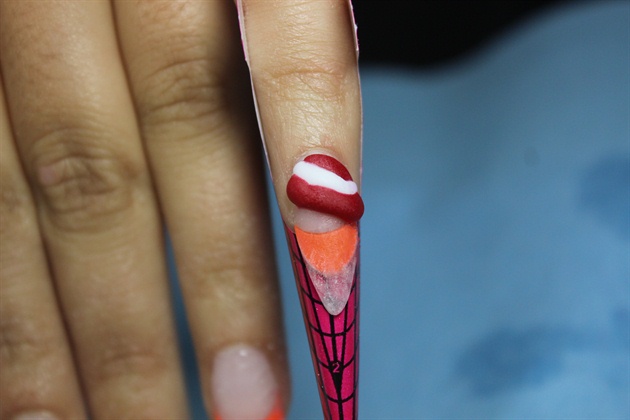
Using red and white acrylics begin sculpted the different layers of the pinkie. Use a very small bead and mold it into each swirl. Make sure to let each piece dry before you move onto the next.
4
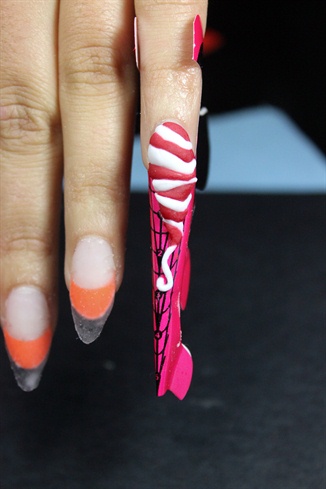
Continue the same technique down the rest of the nail. Narrow out the shape as you reach the bottom. Bring the last bead into a swirl on the tip.
5
Once your acrylic has hardened on the rest of the nails, remove the forms and file to refine the shape.
6
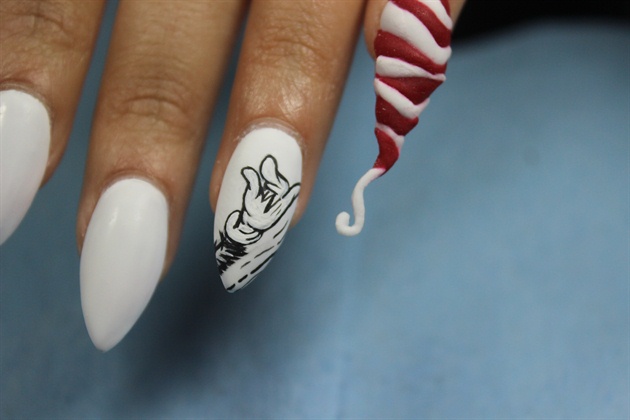
Paint the rest of the nails with white gel polish and cure. Buff to a matte surface so you're able to paint on top. Using black acrylic paint, draw the hand of the cat. Leave some space at the top to add the 3D elements. Top coat each nail once you're done so you don't ruin them.
7
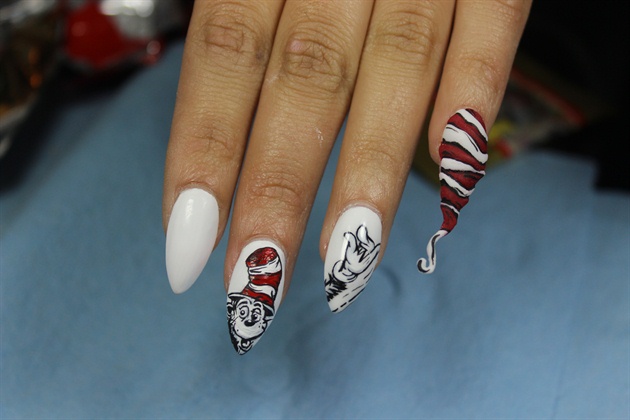
Paint the cat on the middle finger, the fish bowl on the pointer, and add some details to the pinkie. I outline each section and added some lines to give it a cartoon appearance.
8

For the thumb, use a fan brush to create the cartoonish fur lines of the cat. Use black acrylic paint and sweep inwards towards the center.
9
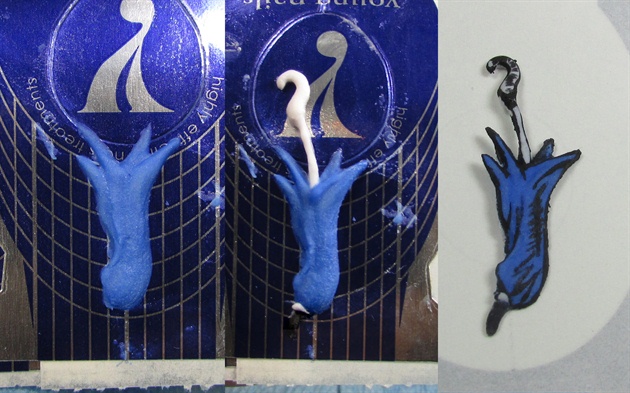
Using another form, begin to sculpt the 3D designs. Use blue acrylic to sculpt the base of the umbrella, white for the handle, and black for the knob at the top. Add in the cartoon details with paint or polish.
10
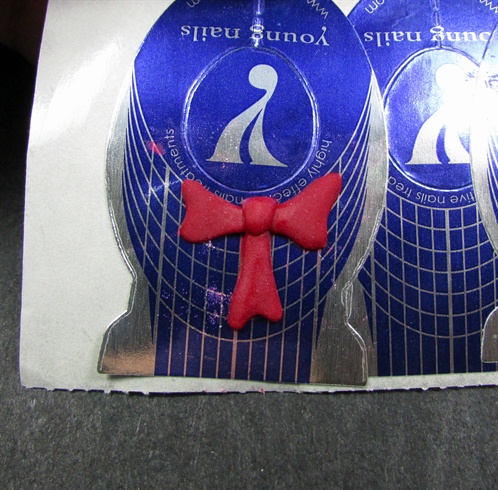
Using red acrylic, sculpt a big red bow on the form. Out line in black once it hardens.\n\nAdd your 3D designs with nail glue or clear acrylic and you're done!
33 Artists like this Photo
Write a Comment
Submit