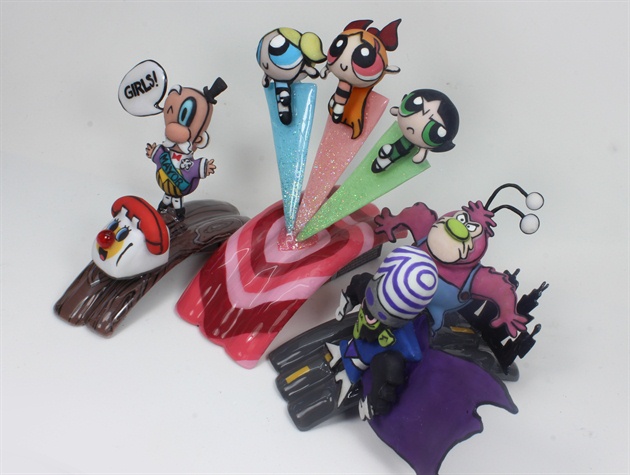
The city of Townsville.. is under attack by Mojo Jojo and Fuzzy Lumpkins! The mayor rushes to the hotline to alert the girls of danger. Blossom, Bubbles, and Buttercup fly off to save the city. They see Mojo and Fuzzy terrorizing the town! The girls kick their butts and stop them from destroying the whole city. Once again, the day is saved thanks to the Powerpuff Girls!
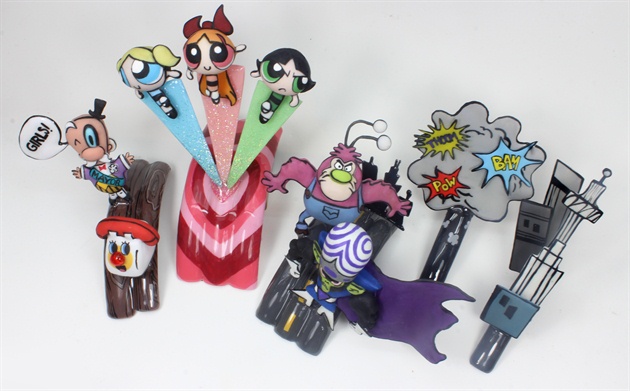
It's no secret that the Powerpuff Girls are my favorite superheroes, but they also have some of my favorite villains. I've never gotten a chance to showcase them so I wanted to dedicate this to the villains. I chose 2 of my favorite and most iconic villains from the show. Everything is hand sculpted and painted using colored acrylics, gel polish, and acrylic paint. The first frame which showcases the Mayor and the Powerpuff hotline is complete with red blinking light. I used a soldering gun to hook up all the wires inside the phone. The next frame is the flying Powerpuff girls, leaving a trail of glitter. I sculpted their bodies around a small straw. I also used clay in some parts as a platform for the larger pieces of the characters heads and bodies.
Step-by-Step Nail Art Tutorial
1

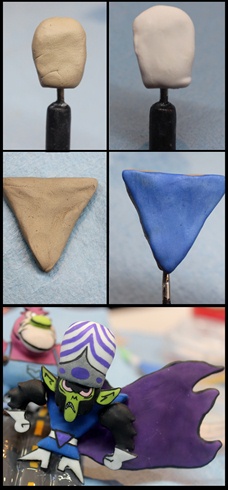
I used the same basic technique for all of the characters.I created the basic body shape with clay and covered with colored acrylic. \n\nFor the Powerpuff Girls, I started with clay as a base for the head. I covered with colored acrylic and removed the clay once it dried. I sculpted their hair with colored acrylic. I used a straw to create their bodies. I used white acrylic and used gel polish to add color. I added their legs and arms with wire and painted on details with acrylic paint.
2
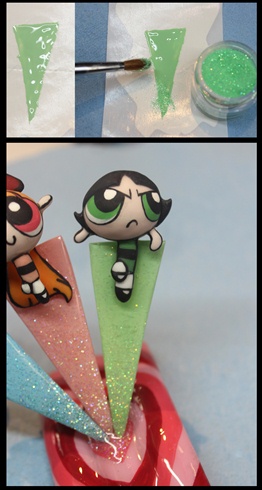
For the trails of glitter I used gel polish on a piece of wax paper to draw out my shape. I cured and added a glitter fade. I then sealed with a thick layer of builder gel so they would be strong enough to hold the girls.
3
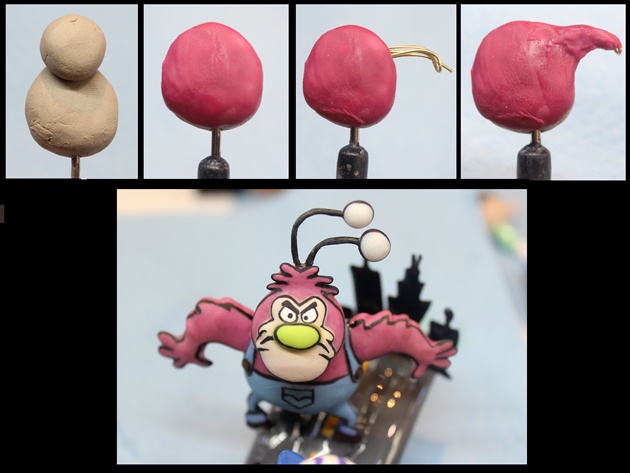
For Fuzzy Lumpkins I used wire as a base for his arms and continued to build them up. I sculpted his face and overalls with colored acrylic and added details with acrylic paint. I used gel polish on wax paper to create the city silhouette behind him.
4
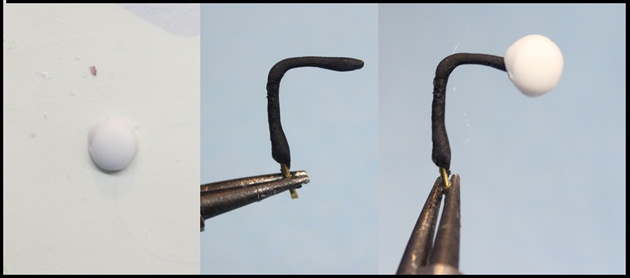
For Fuzzy Lumpkins antennas I covered wire in black acrylic and sculpted the ends with white acrylic.
5
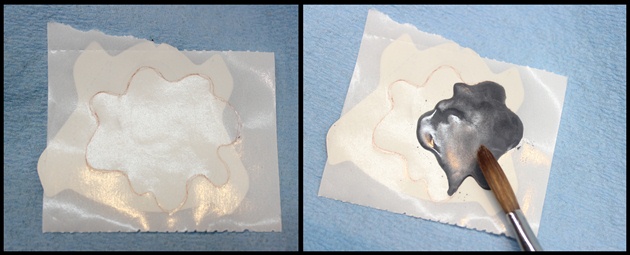
For the fight scene nail I drew out my cloud and burst shapes on wax paper and filled it in with color acrylics. Add detail with acrylic paint.
6
Once again shaping the base with clay and covering with acrylic. I used wire for his arms as well. I used the same technique as the fight cloud to create his cape. I molded it while it was still pliable to look like it was flowing.
7
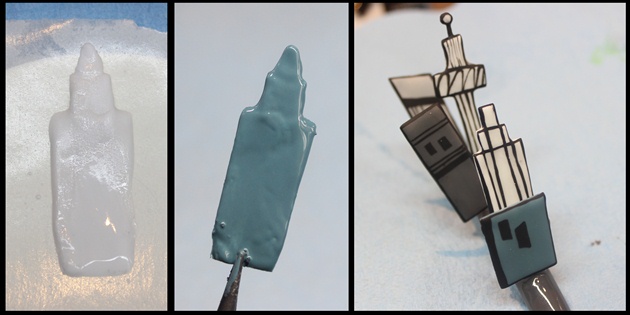
For the city nail I created multiple buildings. I used white acrylic on some wax paper to sculpt the shape of the buildings. Once they dried I filed to perfect the shape and painted with gel polish. I then added details with black acrylic paint, topcoated with matte and placed them on the nail.
8
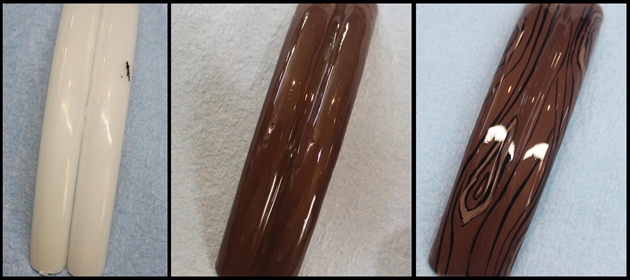
For the bases of each frame I glued 2-3 nail tips together. I then covered in gel polish and painted on my scenery. In this case I painted a wooden floor for the mayors office.
9
I used a blinking light inside the phone since it blinks on the tv show when there is an emergency. Since I didnt have a red bulb, I added a tint of red to some builder gel and made a casing to go over the bulb. When the light shines through it will appear red.
10
I secured everything to my base used acrylic and matte topcoated to bring out the details.
20 Artists like this Photo
Write a Comment
Submit