Pre challenge #1 'Drop dead gorgeous' sponsored by swarovski and the theme was 'day of the dead'. I did some research into this and looked at a lot of imagery. I wanted to do something truly beautiful and dedicate this piece to my Grandma who passed in the days after I received the challenge.
Day of the dead is a Mexican celebration, and is a day to celebrate & remember those who have departed. Living alongside death means that Mexicans have to learned to accept it within their lives.
Here is my hand painted mural over 5 nail tips, encrusted with swarovski crystals. I hope you enjoy it as much as I enjoyed creating it.
Step-by-Step Nail Art Tutorial
1
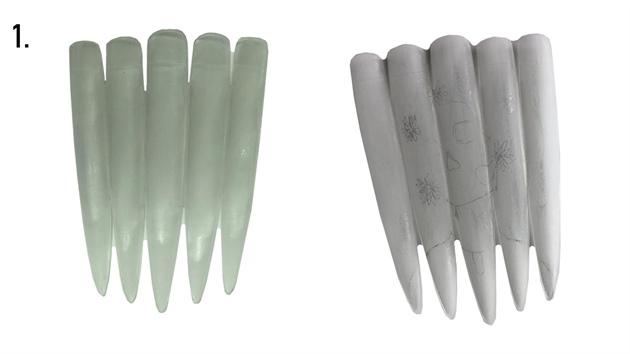
Selecting tip sizes and arrange them in a way that suits the design idea best. I used clear acrylic to bond the nail tips together, once the acrylic had set I went ahead and filed and buffed the nail tips and removed the shine. This makes it easier to sketch out the design and also apply the acrylic and gel paints. Once I had finished filing and buffing smooth remove the excess dust and begin to sketch out a rough outline of the design.
2
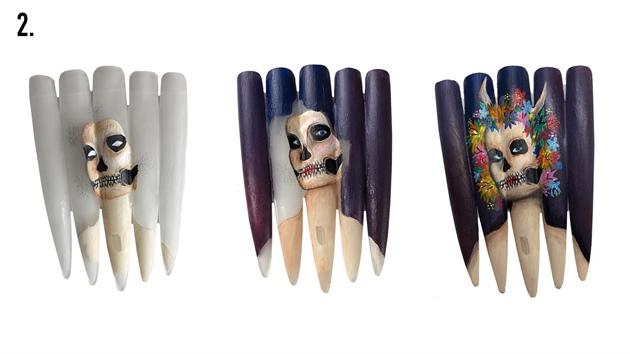
Fill in the sketched design with acrylic paints building up details. Keep the acrylic paint thin so I doesn’t add too much texture to the image. Once I had got the majority of my day of the dead lady together I went ahead and filled in the background using Purples, reds and blues as an ombre. I then painted individual flowers and leaves for her flower crown with acrylic paint and a detailing brush. I added the basic shape for horns. I will add more details to the piece as I go along but it’s about getting the basic shape first.
3
Add a basic off the shoulder dress with ruffles using acrylic paint. Add more details to her horns and begin the base for the candles. Also did repair and move the eyes a little further down and on a better angle. Its never too late to change something you are working on so don’t be afraid to make amendments along the way. After the base for the dress had dried I went ahead and added lots of tiny lace swirls and details using a really fine nail art brush and white acrylic paint.
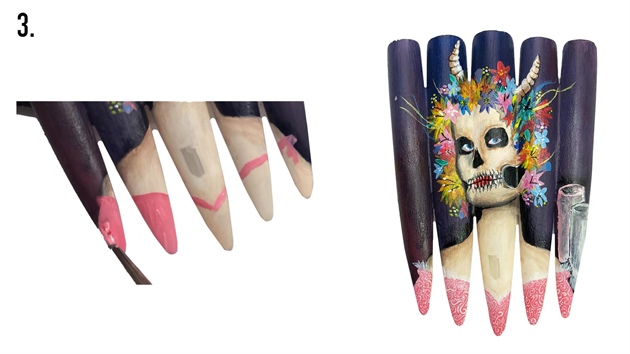
4
Step 4 - First I top coated my whole design ready for gel paint details. Next I began adding crystals. I used a mixed variety of flat backs and adhered them in position using my Krystal Katana to help me pickup and place my crystals. I used acrylic to adhere my larger stones in position and Builder gel for the smaller stones sealing everything in with a no wipe top coat and detail brush. First I started with her Bling Skull crystal layered crown and her necklace jewels.
5
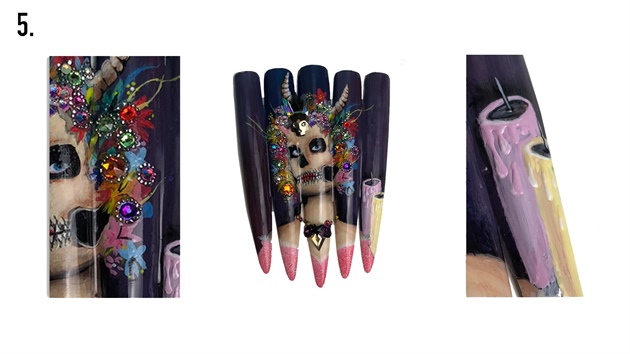
Next I added a mixture of flat back stones and crystal pixie to the flower crown to really pick out the bright colours of the flowers and add extra glam and sparkle. Each flat back crystal is surrounded by precisely placed crystal pixie beads. I also focused onto the candle details, I added gel paints to fill them in and add depth, then for the wax dripping effects I added 2 coat of gel but cured it as it was raised up to make a slight 3d effect and give depth to the candles.
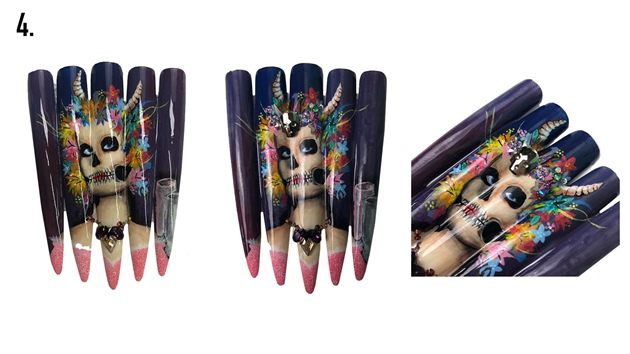
6
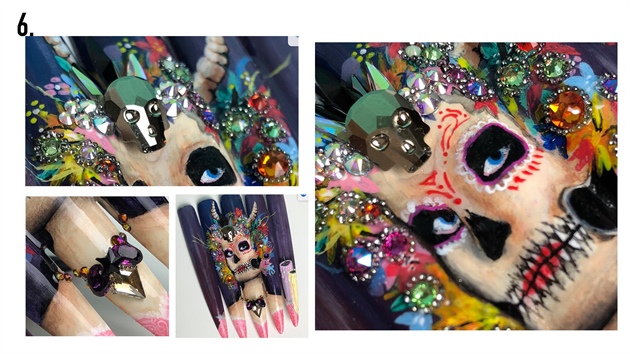
Next I came in with red white and pink gel paints and began to paint on the sugar skull makeup. Families and individuals who have lost loved ones celebrate by painting their faces as iconic sugar skulls of the day of the dead celebrations.
7
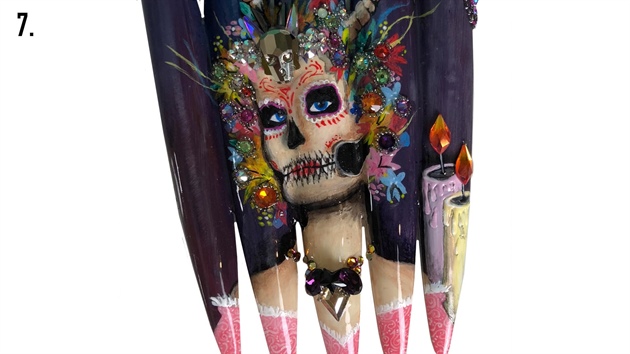
I added ombre flame crystals to the candles.
8
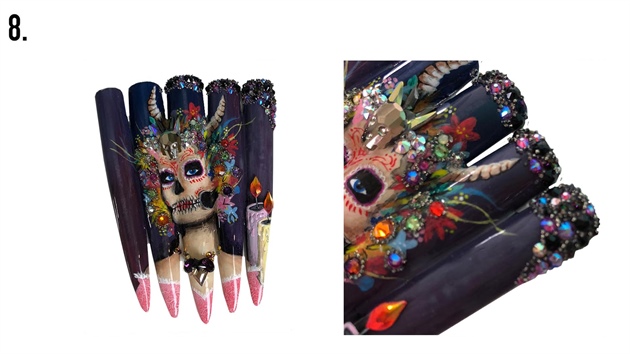
Next I began to add pixie crystal and flat backs to the top portion of my design. I applied these using the crystal katana and secured them onto the design with a thin layer of builder gel.
9
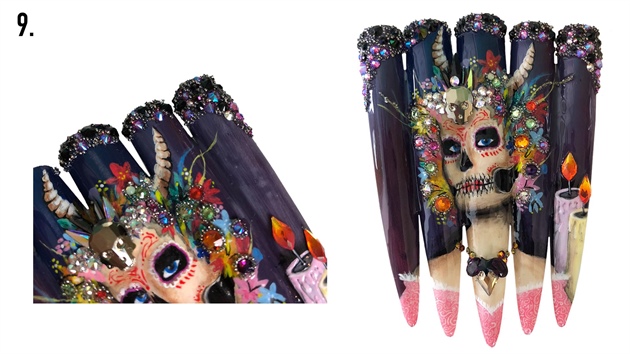
I finished adding the crystals to the top portion of my design and then sealed everything in with a no wipe top coat and detail brush for around the crystals.
10
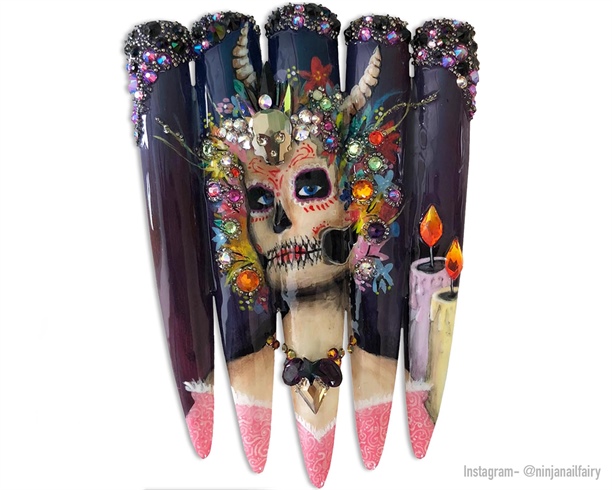
Here is my final piece. I hope you like it and enjoyed my step by step :)
11 Artists like this Photo
Write a Comment
Submit