Sponsor Orly: Pastel City. Street Art inspired nails.
When I hear the term "street art" I instantly think of stencil art and graffiti tags. I decided to combine these concepts with my favorite artist Salvador Dali. If he were a street artist what would his work look like? In this challenge we were only allowed to use pastel colors which worked out well for me because Dali's pallets are generally in the pastel range. He is well know for his melting clock paintings and use of butterflies so I incorporated these elements into my nail design. I "tagged" two of the nails, one with his name and with Orly, our sponsor this week. I then added stencil-like 3d elements and handpainting of clock gears, his portrait, and butterflies.To tie in the graffiti elements I also added splatter painting, and a brick wall pattern.
Step-by-Step Nail Art Tutorial
1
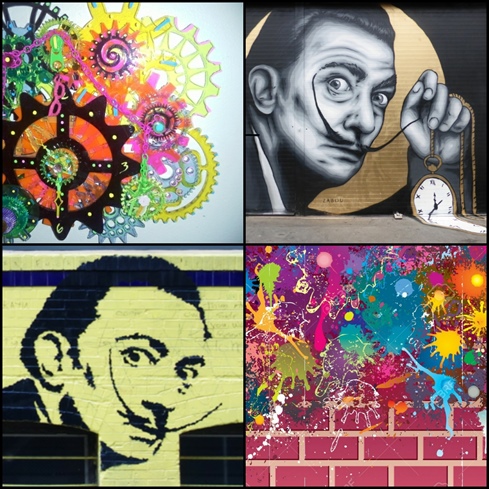
Inspiration photos. I used a combination of regular polish and gel polish for this set.
2
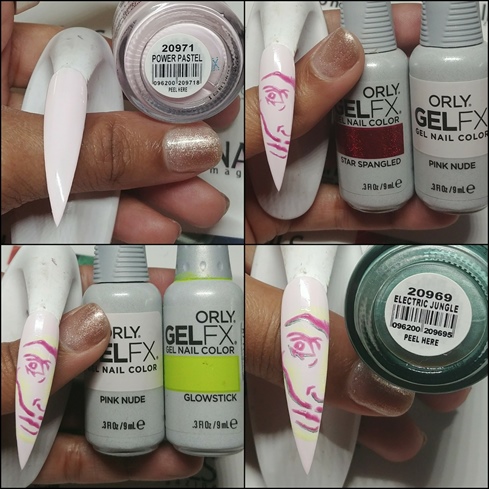
1. Base color: Power Pastel. 2. Combine Pink Nude with Star Spangled to create a rose mauve color, and paint the stencil-like portrait with two coats. 3. Add yellow highlights to the portrait with a color combo of Pink Nude and Glowstick to create a pastel yellow. 4. Add shadows using Electric Jungle.
3
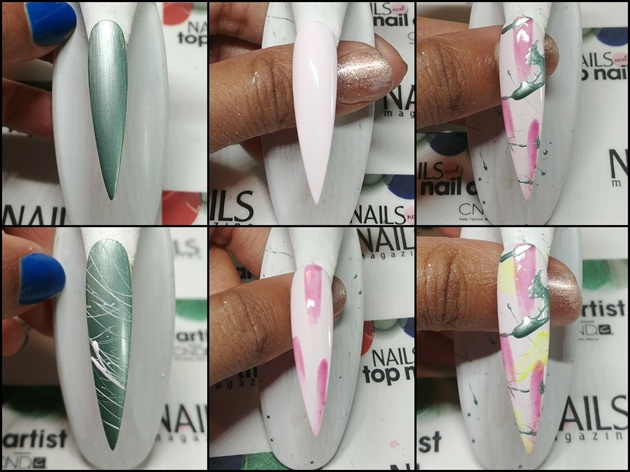
1. Base coat the splatter paint nails with Power Pastel and one with Electric Jungle. 2. On the green nail, splatter paint with Power Pastel. 3. On the light pink nails, add brush strokes using the same rose mauve combination. Splatter paint these nails with Electric Jungle, and then sponge paint with the pastel yellow.\n(tip: To splatter paint nails, use a business card and roughly flick the bristles of the brush against the card and above the nail so that the paint falls downwards.)
4
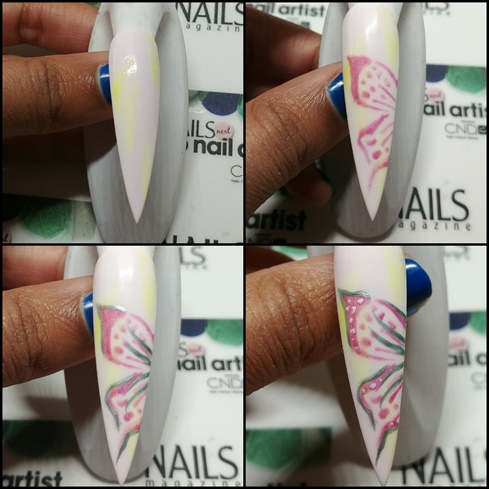
1. Base the nail with Power Pastel. 2. Add brush strokes with pastel yellow. 3. Paint butterfly with 2 coats of rose mauve color combo. 4. Outline butterfly with Electric Jungle. 5. Add dots around the edges of the wings using Power Pastel again. 6. Paint the 3D butterfly wings, seen in step 6, with these same techniques but base the wings with Electric Jungle, paint details with Power Pastel, and outline with rose mauve. (tip: when painting over gel polish with regular polish remove the tacky layer with a dry wipe so the paint will stick better.)
5
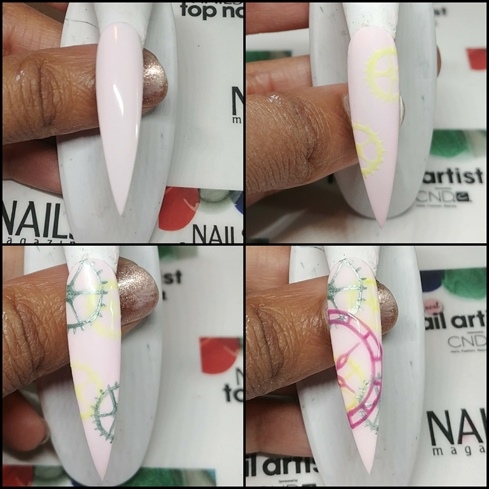
1. Base color: Power Pastel. 2. Paint gears with pastel yellow color combo. 3. Paint more gears with Electric Jungle. 4. Paint a stencil-like clock outline with 2 coats of your rose mauve color.
6
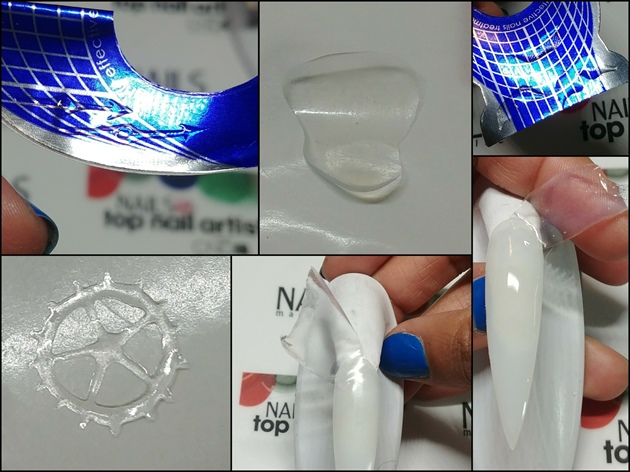
1. Paint 3d elements (clock gears, butterfly wings, brick walls, melting clock, clock hands) onto a form using Orly's Peel It Off Base Coat. 2. Once cured, peel each piece off of the form. 3. First attach brick wall/background pieces to the nail using Orly base coat.
7
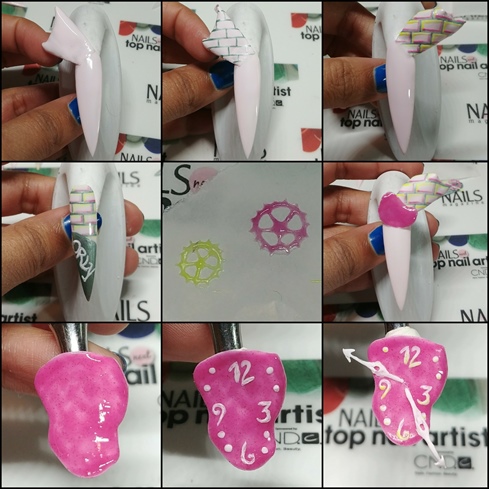
1. After attaching the 3D backgrounds to the nails, paint with Power Pastel. 2. Paint brick pattern using Electric Jungle. Outline the brinks with both pastel yellow and rose mauve. For the Orly tagged nail, only paint the top portion with the brick pattern and then paint the tip with Electric Jungle. 4. Paint the gears with Electric Jungle, pastel yellow and rose mauve. 5. On the clock and tagged nails, Paint the lettering and numbers with Power Pastel. Then use the yellow along the bottom of the letters/numbers to add a graffiti-like effect.
8
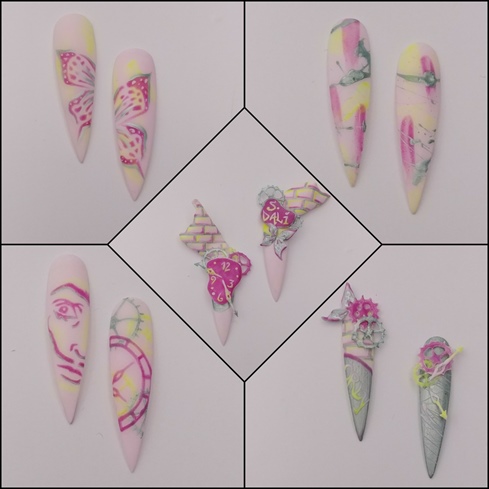
Once all your 3d elements are painted and dry attach them to the nails using Orly Base Coat.
7 Artists like this Photo
Write a Comment
Submit