We were asked to create our interpretation of making it to the Top 12. And we were asked to answer this question as well: How does it feel to be one of the Top 12?"
When I got the e-mail about this amazing news from Beth I could not believe this is happening with me. It was absolute unreal and I will be honest, still it is.
I am very busy since then I left my job and now I am working on my own business and I can focus on my own career. I had around 8 incredible training days with super talented educators in the last few months. I spent every single minute of my free time working on the pre-challenges and dedicating it to the competition. Literally every single minute, day and night was spent working on the pre-challenges and essays.
A few month ago I hesitated a lot to apply my entry for this amazing competition. Making an introduction video in English was the hardest part to me. English is my second language and I don’t always feel confident that I can get my point across. I checked some weekly challenge from the previous series as well. I was thinking a lot to apply my entry, because I do very different nail designs than the competitors did earlier. But I love challenges and pushing my balances, so that was the perfect opportunity. Why not, what can I lose if I enter?
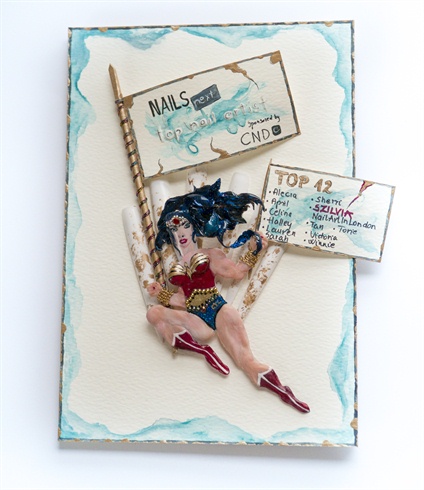
Everything just happening so fast around me. That gives me the idea to display how I feel myself right now. :) When I got this amazing news I felt like a Superhero for a moment. Or one day. Or maybe two… :D A hero usually possessing extraordinary talents. I did not think that I have this special talent, because there is going to be someone who is doing something better than you or has better idea, etc.
But if I work hard like so far or more, I have a chance to reach my goals. For a few days I felt I can do anything if I really want and I can fly to reach my goals like my Wonder Woman in my interpretation. And I feel more confident as usual. My real “superpower” is that I am pertinacious. This is not only just a job for me, technically this is my whole life...
I hope that you will enjoy this tutorial. ;) If you have any questions feel free to ask them.
Step-by-Step Nail Art Tutorial
1
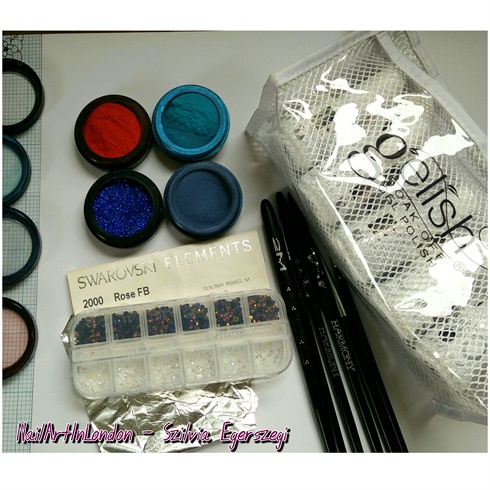
Prepare your tools and products. I used the following materials and products. ******** MATERIALS: acrylic paints, watercolour paints, normal nail polish is various colours, Harmony and Nail-Artsts acrylic cover pink powders and Harmony Prohesion monomer, extra long natural tips, various Gelish gel polish colours, Gelish Top it off, NSI Glaze 'n go finishing gel, Swarovski crystals, Nail-Artists sapphire glitters, ******** TOOLS: Harmony 18G LED lamp, Moyra and Nail-Artists fine detail brushes, Harmony gel striper brush, files, buffer, kitchen foil, wood stick
2
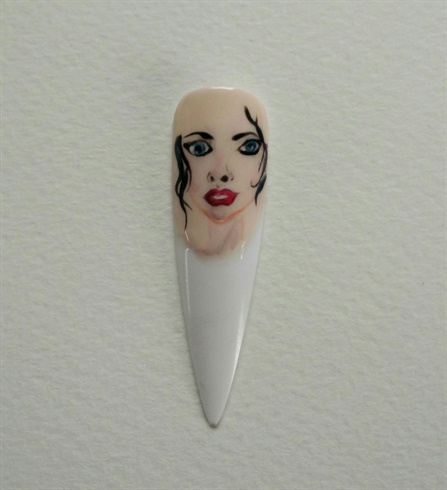
The centre of my design is the Wonder Woman comic character. Her face was painted using Gelish and small Moyra detail natural hair brush. ***** Arctic Freeze, Black Shadow, Tan My Hide, Tex'as Me Later, All Dahlia-ed Up
3
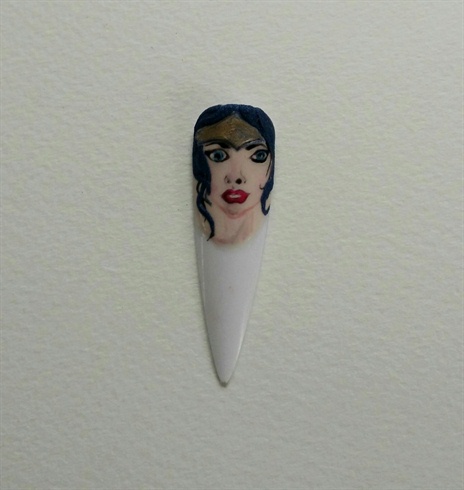
The hair were made using various Nail-Artists blue acrylic powders. And the base of the "tiara" were painted using gold nail polish.
4
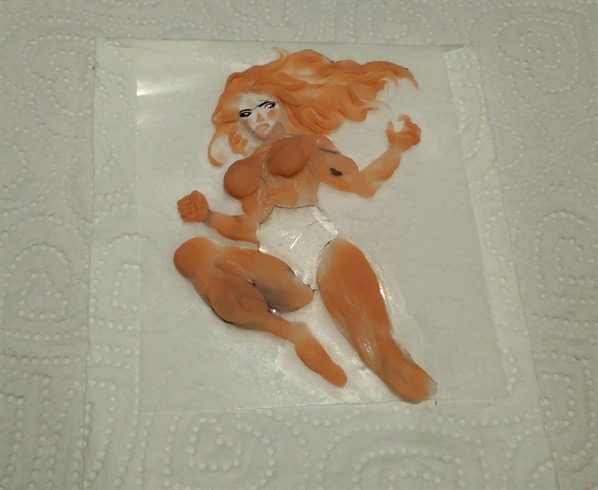
I sculpted the body. As I said before, everything happening so fast around me, I totally forgot about the step by step photos. ;) But on this picture you can see the way, how I made it. ***** Method: 1. You need some clear sheet. I used a small piece of projector transparency film. 2. I did a quick sketch with black alcoholic ink 3. And after then I sculpted the body with Harmony Prohesion Studio Cover Pink. It was made used acrylic sculpting brush.
5
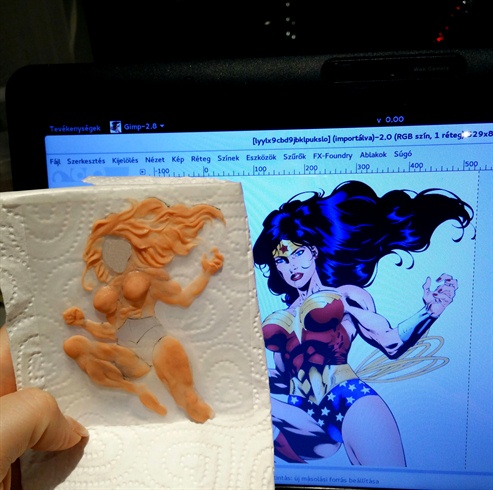
What do you think about my naked Wonder Woman? ;) I hope you like it! :) ***** You can see on this picture how the character looks like. ;) And you can see as well, I made this nail art in the middle of the night. As usually... ;)
6
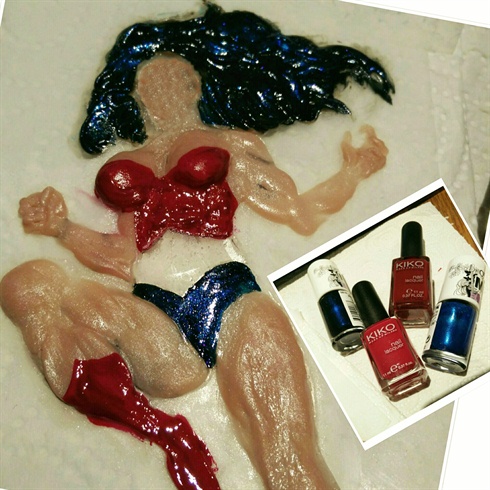
The base of hair, clothes and boots were painted using regular nail polish. After then I shadowed with acrylic powders. I used various blue and red colours. For the panties I used Nail-Artists sapphire blue fine holographic glitters.
7
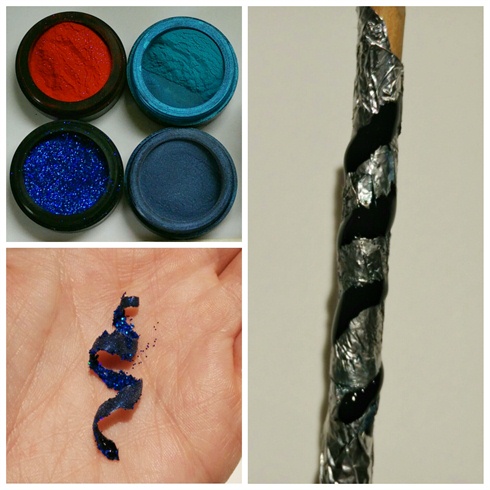
How to do 3D curly hair? I'll share with you my technique. ;) 1. Wrap a orange wood stick with kitchen foil 2. Paint very thin "swirl" with black gel/gel polish 3. Flash cure for a few seconds in LED lamp (or 30 sec in UV lamp) 4. Hint with various blue acrylic powders. 5. Cure in lamp 6. Remove the unnecessary powder with a dry brush. 7. Remove the cured swirl very gently from the wood stick. (I can use a cuticle pusher if it's necessary.) 8. You'll have a sticky layer on the back layer. Hint with some fine glitter. 9. Cure in lamp. 10. Smooth the edges and trim with scissor the small pieces. 11. Apply gently this soft swirl to the base 3D hair. 12. Close with finishing gel. 13. Cure in lamp. have to be careful after than, because after using the finishing gel you'll get a very thin but rigid surface. ;)
8
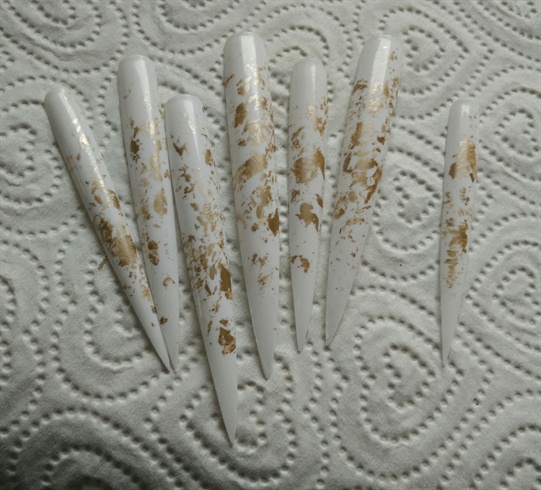
I used special long natural nail tips for the base. I started applying the base colour, I used regular white nail from Sally Hansen. After it dried I created a marble effect using the "kitchen bag" technique. I used Cheeky gold normal nail polish for this. ***** Do you want fool-proof marble nails in just a few minutes? Get thee to the kitchen, because a roll of plastic wrap is about to become your new best friend from now. This is a little bit messy but stunning technique. ;) I just love it and it gives me a perfect background. :)
9
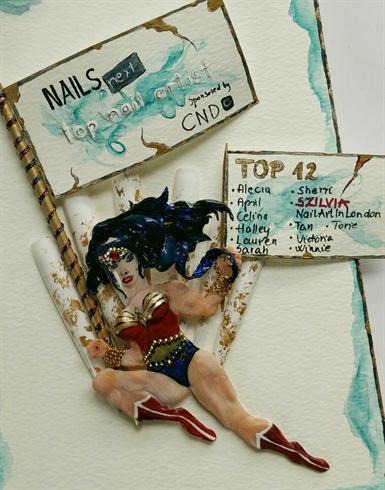
Close up from the fine details. FLAGS: 1. I made a very thin layer from acrylic and I trimmed with scissors. 2. Glued a piece of paper, the same as I used at the background. 3. Painted a similar design as the Nails Ntna has this year. It was made using watercolour paints. FLAG HOLDER: 1. I painted a orange wood stick with gold nail polish. 2. wrapped with fine wire. SIGN: They were painted using acrylic clack paints, white gel polish and white acrylic powder and gold nail polish. CRYSTALS: Some crystals and small studs, pearls were added to complete the design. CHAIN: The bracelet were made using gold chain.
10
I hope that you enjoyed the tutorial. ;) If you have any questions feel free to ask them.
2 Artists like this Photo
Write a Comment
Submit