Day Of The Dead, or Día de Muertos (All Souls Day), is a traditional Mexican holiday to honour family members and friends who have passed on. When researching this theme, I was inspired by the makeup and costumes worn during this celebration, specifically Sugar Skulls makeup, and ornate headdresses incorporating fresh flowers. Because this challenge occurs during Halloween, I incorporated a UV reactive and glow-in-the-dark effect for added spooky vibes.
This challenge was sponsored by Swarovski, and Crystal Katana.
Step-by-Step Nail Art Tutorial
1
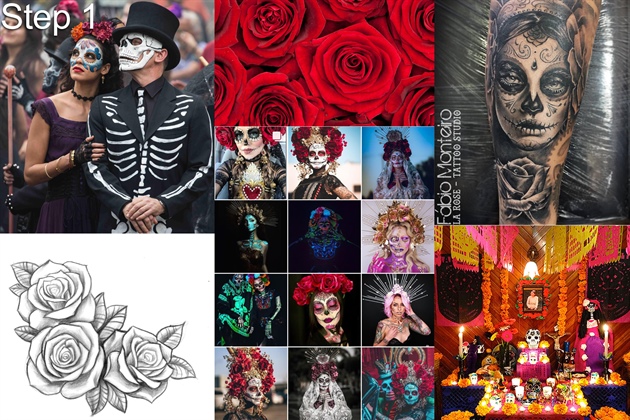
I gathered inspirational images to help me create my design. I was particularly inspired by Sugar Skull makeup, and tattoos of Sugar Skulls.
2
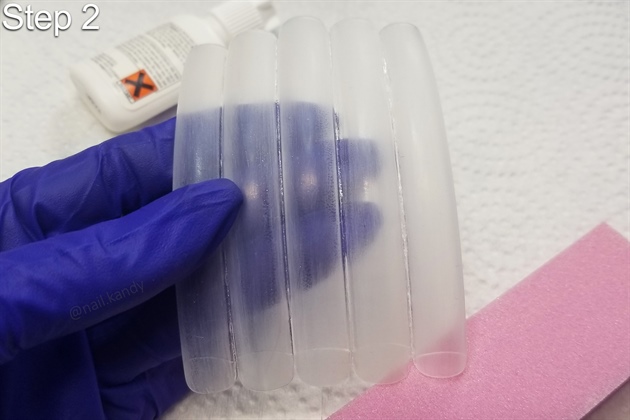
Glue together 5 nail tips to create a the canvas for your mural, and buff the surface to remove the shine, so that you will be able to sketch your image on top.
3
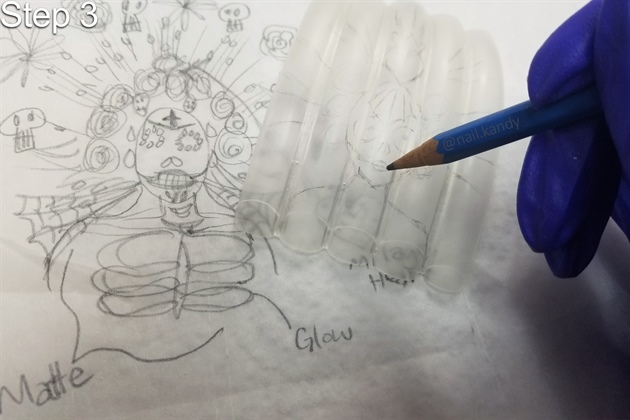
Using a rough draft sketch as reference, trace the outline of the design onto the mural.
4
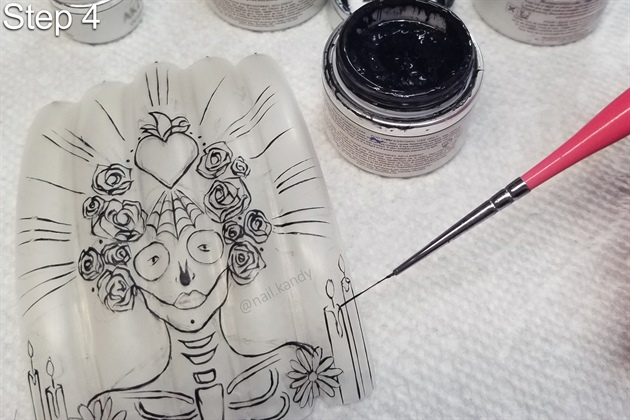
Once you are happy with the sketch, paint the outline using gel paint and a fine nail art brush, curing in a UV lamp as you work, to prevent smudging the image.
5

Using transfer foil glue and a small detail brush, paint glue where you would like to place metallic foil. Ensure the glue dries thoroughly before pressing the transfer foil down.
6
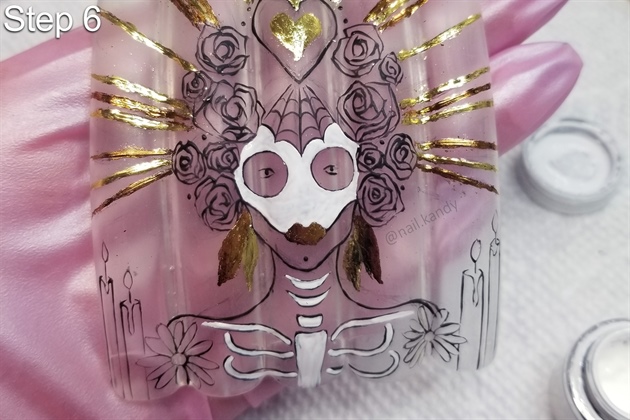
Fill in the rest of the design with gel paint colors of your choice, curing in a UV lamp as you work, to prevent smudging the image.
7

To add a glow-in-the-dark effect, spread glow pigment onto the dispersion layer of specific areas you would like to glow, curing in a UV lamp as you work. (The image on the right shows the final mural design in the dark, illuminated with UV light.)
8

Add any final touch-ups and small details using gel paint and a fine nail art brush, curing in a UV lamp as you work, to prevent smudging the image.
9
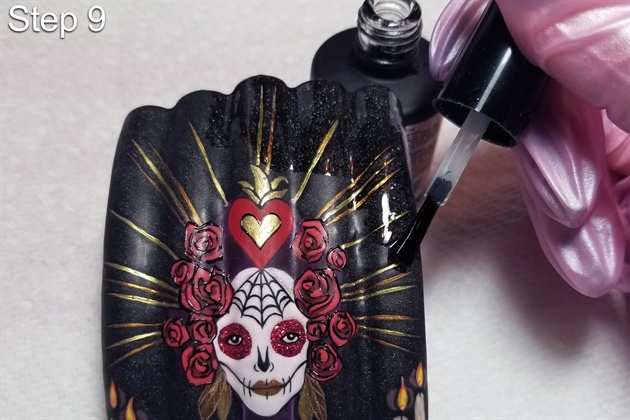
Seal the entire design with top coat. For this specific design, I used a combination of gloss and matte top coats, to enhance specific elements of the design. Cure in a UV lamp, and wipe the dispersion layer if necessary.
10
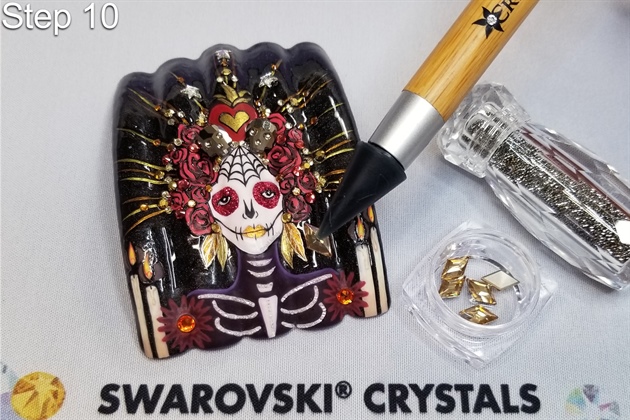
Using a Crystal Katana tool, place Swarovski Crystals onto the design, using either top coat, rhinestone gel, or nail glue to adhere the stones. Cure in a UV light and wipe the dispersion layer if necessary.
10 Artists like this Photo
Write a Comment
Submit