I chose the Wicked Witch of the West (Wizard of OZ) for our first pre-challenge for season 5 of #NTNA . Swarovski crystals is our sponsor and Swarovski challenged us to create Halloween nail art inspired by our favorite witch. Nails should be spellbinding, complete with the Swarovski items sent to you and a mix of hand painted and 3-D elements.
Step-by-Step Nail Art Tutorial
1
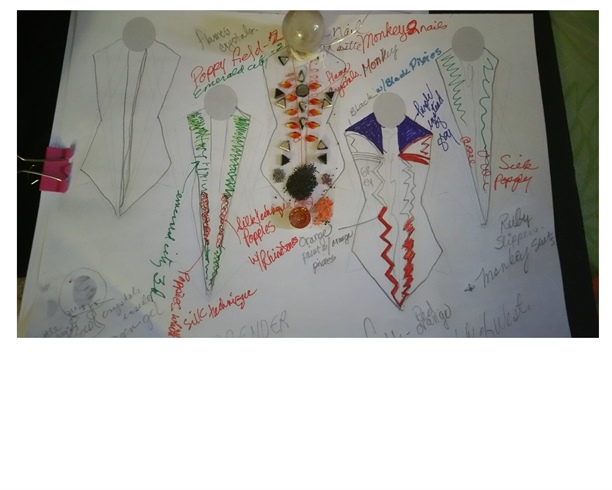
This is how I start: I use a color wheel to find the colors I want to add to a piece and do a story board. Things change as i go sometimes!
2
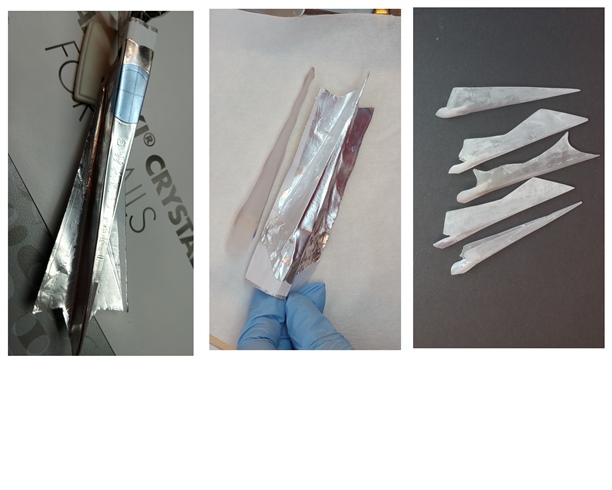
I created custom foil forms with a home craft cutter because I sculpted an extreme shape on full coverage nail tips. These are 3 inches long approximately. I sculpted them from acrylic and filed them to shape.
3
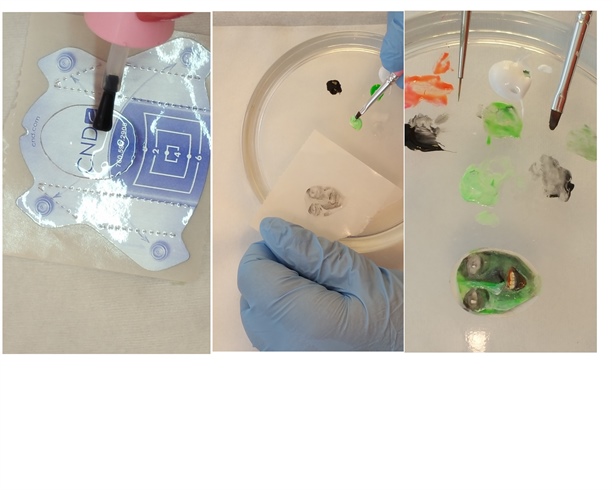
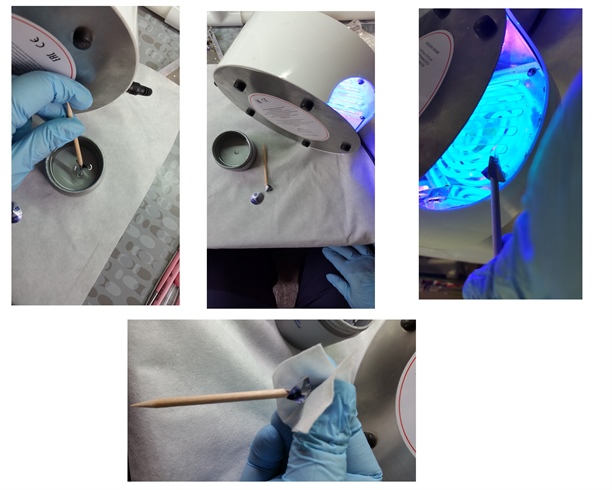
I used a non tack top coat to make an oval shape and cured it.This will be flexible so I can insert it into my globe. Then using UV gel paints I started with black that was also thinned with tackless topcoat. This gave it a watercolor effect. I overlayed the colors little by little using neon green, white,black,and a touch of neon red gel paints for her lips, keeping in mind this was going to be inside a globe so the painting had to be altered to show well through the globe and look airy and ghostly. The neon accents helped make the green pop in the pictures. I used my UV curing lamp to charge the finished globe just before snapping the photos.
4
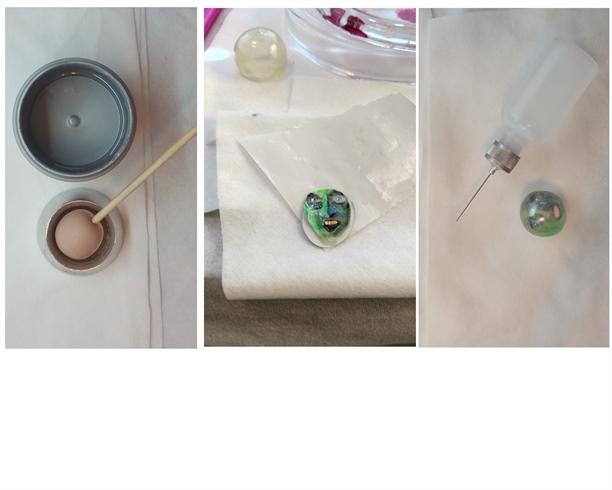
I used hobby clay to make my sphere for the globe. I dipped it in UV hard gel allowing for a small opening near the stick to remove clay after curing. Then removed the clay with an orange wood stick and a small metal spatula. I used cotton swabs and remover then alcohol to clean the inside. I made a small acrylic stop for the hole after the face was inserted and secured the face with a drop of glue to where I placed it. I angled it in the globe so that it would appear to be floating and filled the globe with water so that it magnified the face somewhat.
5
To make my torches with the Swarovski flame crystals in them I used a stick with a folded sculpting center on it . I think they really look like flames after I painted them with a little neon orange UV gel paint.
6
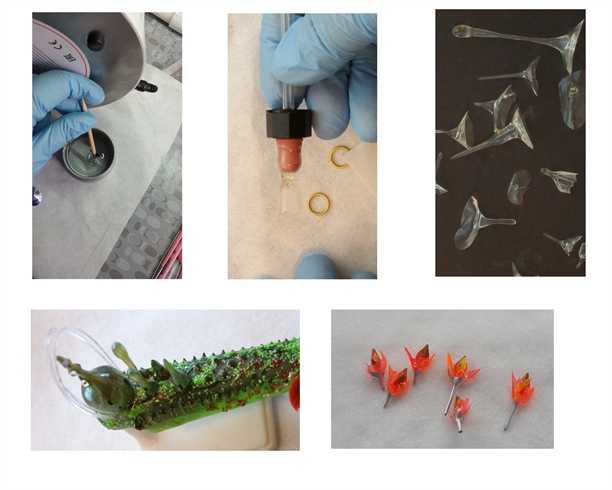
I also used a dipping method with hard UV gel to make the dome and spires for the Emerald City. I used a tiny eyedropper covered with a small amount of cuticle oil for easy removal of the dome from dropper. It is easy to cut the fine spires with a cuticle scissor or nipper to desired height for piece. I then painted them to match the green nail and added a transparent chrome pigment to give it the shine.
7
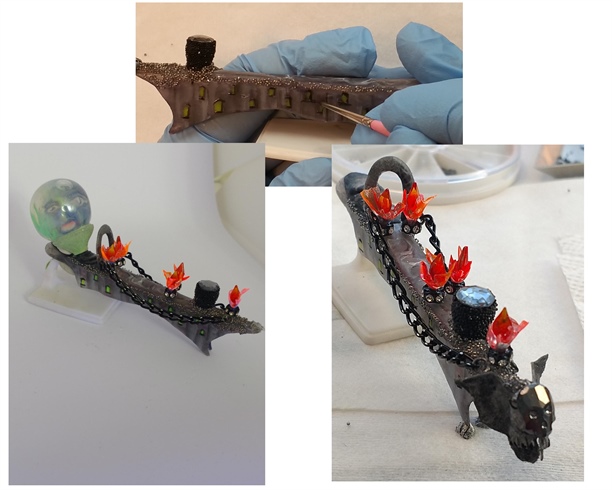
I have to do mock ups as I go to see how things are fitting and working together. Editing my original idea as I go .I hand painted neon green"windows" and accents on the sides of the evil castle, added studs, a chain , and a turret with Swarovski crystal on top and black crystalpixies on the sides. I used Swarovski rondelles for the base of the torches that I added flame crystals.
8

I cut a basic stencil for the zigzag design with a craft cutter so that my design would be uniform.Then I over painted the stenciled background with UV gel paints. I cured in between colors and then applied a sticky gel for setting the Swarovski Fruity Orange CrystalPixies to add the excitement to the design. I added Swarovski Blossum Purple CrystalPixie edge to the shoulder of the nail to compliment the desing.
9

To make the "sleepy" poppies that the Witch put a spell on to stop the seekers of Oz . I used acrylic colored polymer and monomer with a small 3-D brush to make the petals for the poppies . I used the underside of form made for 3D work so that the petals would look real. I used a coral and red with a 2 color loaded brush and a touch of black for the centers. I added black Swarovski CrystalPixies to the centers on the finished piece. I added orange neon UV gel paint to the edges of the poppies for some glow under a black light.
10
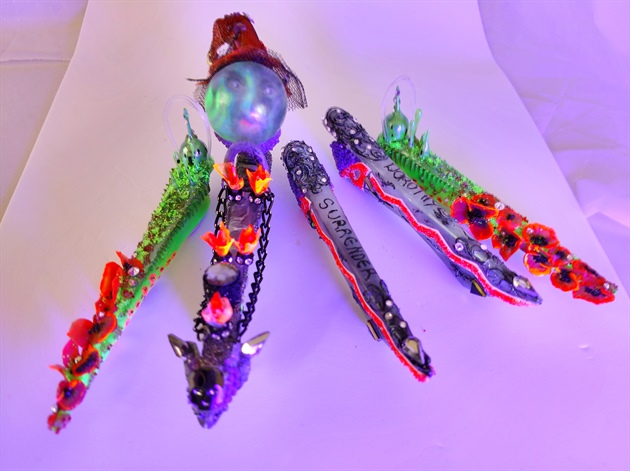
This picture was shot with a blacklight only to highlight the neon elements. I added an arch and a gargoyle on the castle nail. The gargoyle has wings with Swarovski crystals, Swarovski Blossum Purple CrystalPixie edge around the skull for his face,I also used neon matt glitter to accent the poppies and imitate grass. I made the Witches hat out of holograpic gold foil covered with black netting and embellished with Swarovski Blossum Purple CrystalPixie edge and star crystals . I hope you enjoyed this tutorial and maybe learned a trick or two! I had a lot of fun doing these wearable nails. Happy Halloween!!
5 Artists like this Photo
Write a Comment
Submit