My favorite witch?
Maleficient,
A pure-hearted witch who was betrayed and hurt by her first love. In order to protect herself, she hardened her heart.
There nis a saying: ''love and hate are not far apart''... her story is exacty that
Every individual has the choice, the choice to be good or bad. However, we can also be a little bit of both. Nothing is ever just black or just white. Why? Because behind every face there is has a story and those stories make us who and what we are.
So, with that in mind, I depicted the two poles, one where greed, hatred, the quest for power, evil and suffering are the dark side… A side where she uses her magic to assert her power, but when one says revenge, one does not always realise the weight of its consequences...
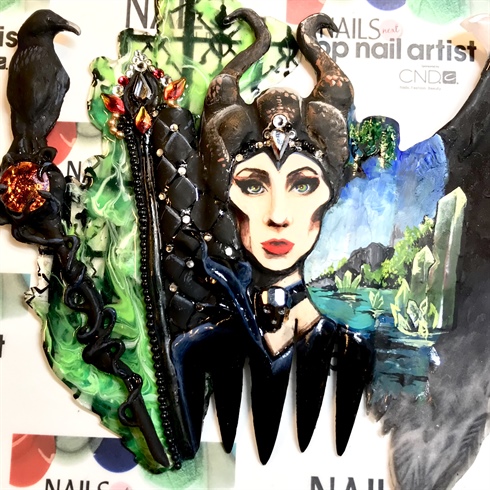
She has her wings pulled out and in order to see further, she manipulated a raven so that it became her own wings, perched on her magic sticks in the service of Maleficent. The green smoke is the fate she gives to Sleeping beauty, the tiles behind her are the windows of the castle, and we can see a piece of the throne that represents power.
On the other side i depicted happier days… days were she was a pure hearted girl, were she still had her wings, queen of her kingdom, filled with magical creatures, she respects her environment, a time were she could fly over her enchanted forest and her jewels pool.
Maleficent is the image of polarities; she alone represents good and evil. She is the complexity in both ugliness and beauty. It is the tug between the being and the ego.
This is why I chose her as my favourite witch, because she alone evokes our inner struggle.
I hope you will like her as much as id enjoyed creating this piece 😉
Step-by-Step Nail Art Tutorial
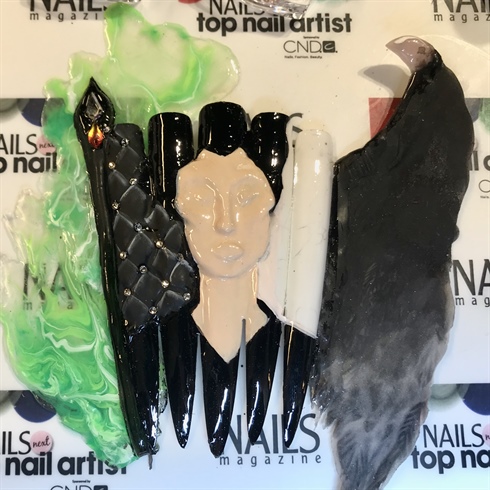
1
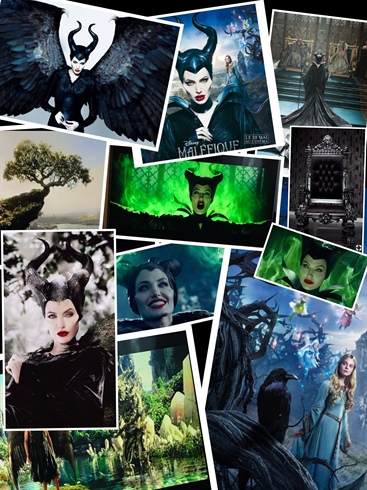
1. I started by doing research on the web. I found what inspired me and from there, I created a mood board.
2
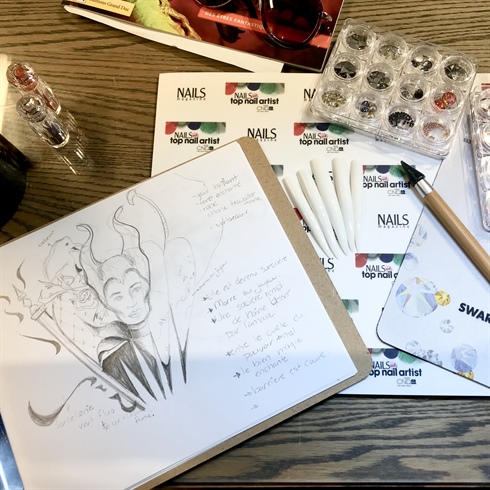
2. I then created a sketch to check the balance of my drawing. Then, I wrote down my ideas.\n
3
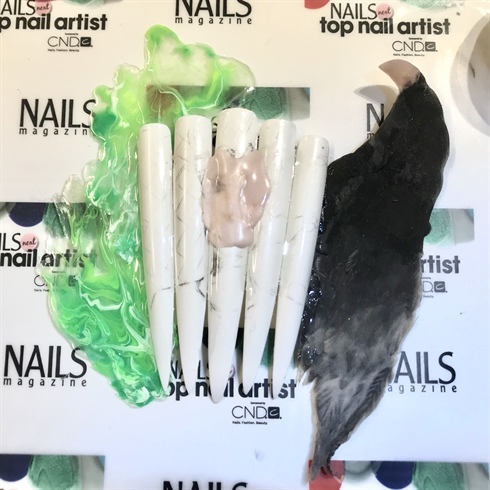
3. I drew on the prosthesis with a wooden pencil to center my drawings and I made my magic flames with colored uv gel and a no wipe finish.\n \n4. I made my wings with acrylic to give them the dimension and texture I wanted them to have. I had previously drawn my wings on a sheet that I inserted into a ziploc bag; this allowed me to be sure of my proportions.
4
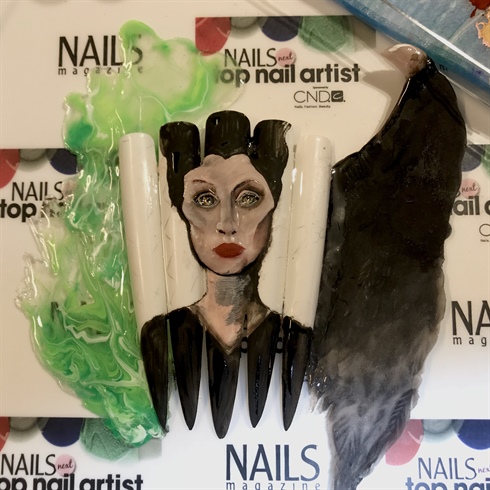
5. I created Maleficent’s face with acrylic. Then I painted over the acrylic oufff … not quite what I had in mind so… I started all over again LOL 😂
5
6. I created the padding, like those we see on thrones, using polygel and then I painted.
6
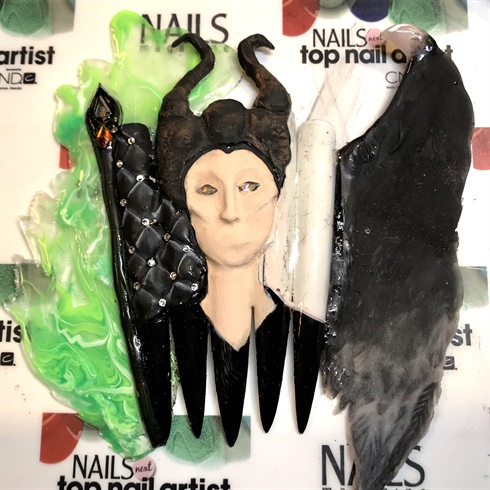
\n7. I created the horns with acrylic. To help me, I created a mould with aluminum foil. I then repainted the horns.\n
7
8. I repainted the face and horns to give them a snake texture.
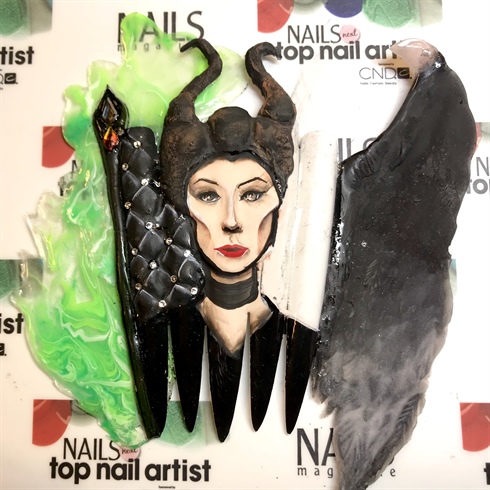
8
9. I then painted the backgrounds…\n \nI started with the magical green stained glass that can be found in castles. This gave the piece dimension. And then I create the magic forest universe of Maleficent. Once that was done, I started adding some Swarovski crystals… ohhh it started to take shape.\n \nBut the height of my misfortune was when I wanted to do add a matte varnish. This caused my paint to crumble. Everything had to be removed and started over. On the bright side, I found that I obtained much better results (proof that one can learn from their mistakes).
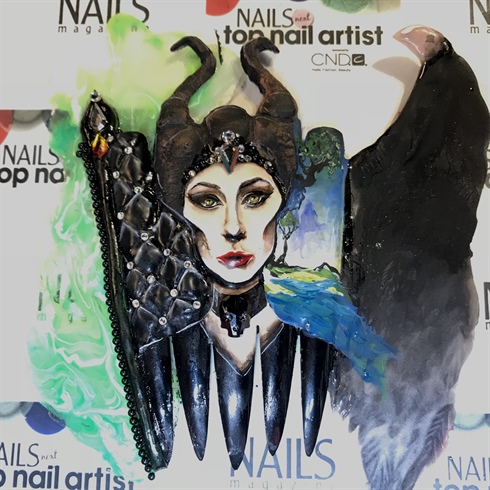
10
10. I then created her magic staff with a flamboyant crystal. This is where I then perched her faithful servant the raven. I carved the staff with acrylic and for the raven I made myself a mould out of aluminum foil.11. Finally, I created the enchanted forest as well as the sacred jewel pool.
10 Artists like this Photo
Write a Comment
Submit