Street art is for me a way to get a message across, to defend a cause, to express an idea ... This art form that comes from the street is a very powerful medium of communication that targets a wide audience.
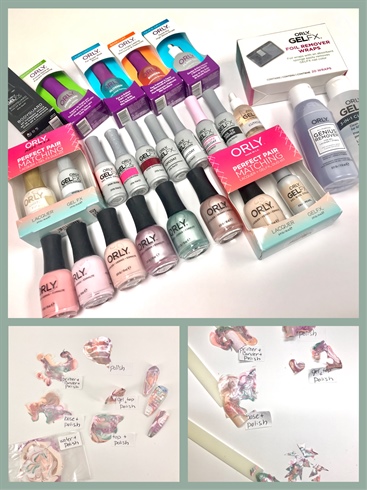
Orly healthy nails is enriched with several antioxidants and vitamins in their polishes and in their gel, Antioxidants Vitamin A & E promote healthy nails. Pro-Vitamin B5 protects nail structure. Why? The reason is simple: to have better products for nail health.
The emphasis on the health gave me the idea to talk about our environment. So, I created my nails with the safeguarding of nature theme, because in the twenty-first century, the protection of the environment has become a major issue
Here is my message:
Let's protect our planet one step at a time. Lets all do our part…. Nothing is more precious than the land and the water are here to remind us how magical nature is and can be.
Step-by-Step Nail Art Tutorial
1
Learn about the wonderful products that are offered to you. Test them, play with them. If you are stuck in your inspiration, please know that there is nothing better than to test the products. Get out of your head and let your intuition take over.\n
2
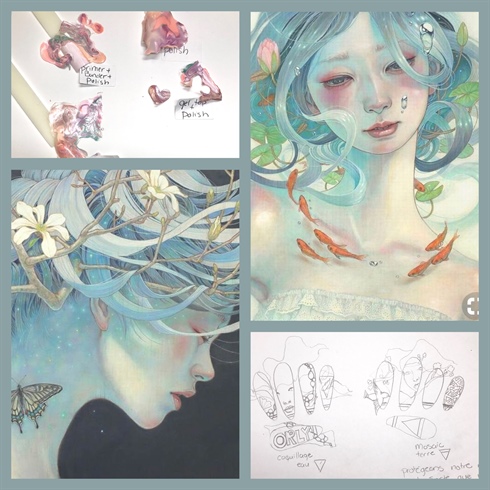
Do research on the internet and create a moodboard. This way you will be able to create a sketch and refer to it if needed.
3

Choose your prosthesis, file the shape and apply the polish of the Pastel City collection.\n\n
4
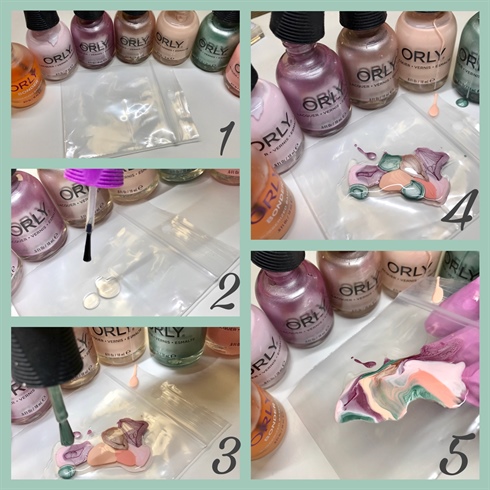
1. Use a plastic bag and choose your colors. 2.Apply a few drops of base coat. 3-4 Randomly add in the basecoat to your favorite colors. 5. Move your nail polish to create beautiful, unique blends each time.\n
5
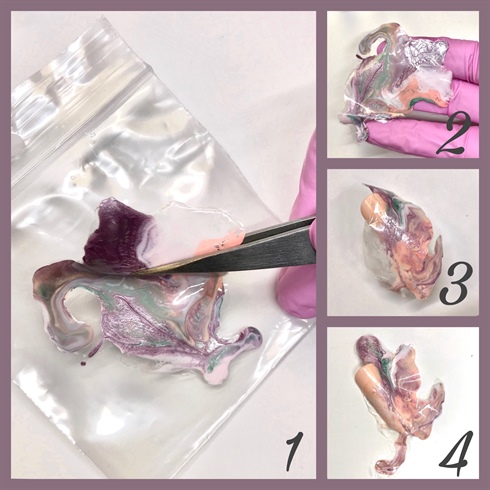
1-2. Allow to dry for several hours and gently peel off the plastic paper. 3. Apply to the surface of the nail that has been varnished. It will fix easily. 4. To give it a form apply the gel FX top coat it will redirect.\n
6
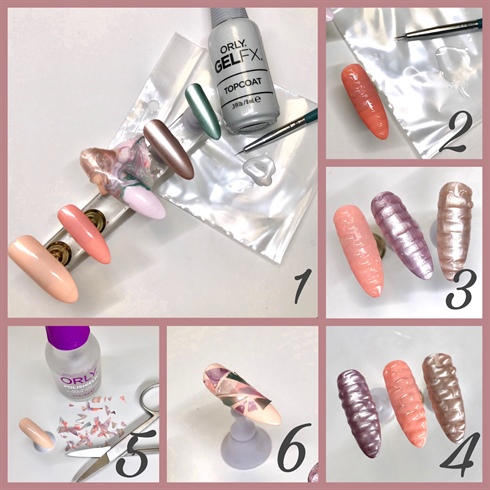
1-2-3 to create your bricks Use your FX top coat gel to create dimensions.\n4. Apply a coat of your base varnish to the bricks. Let it dry and apply the gel FX top coat. 5. Cut small pieces of varnish mix to create a mosaic and apply them on your nail using the top coat.
7
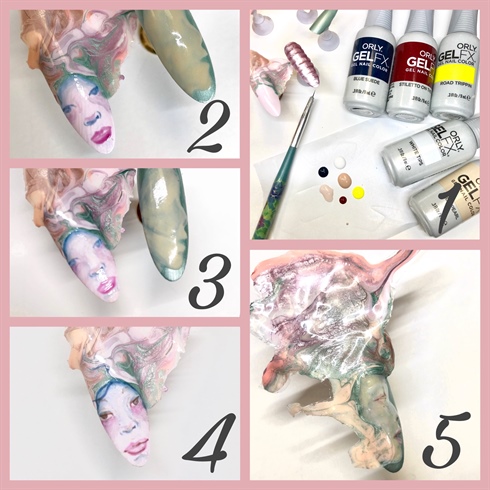
1. Make your Fx gel color mixes 2. Define face contours and fill. 3. Create shades by mixing your FX gel colors with your FX gel top coat. You will work in this way in transparency. 4-5. Define the lines with your detail brush.
8
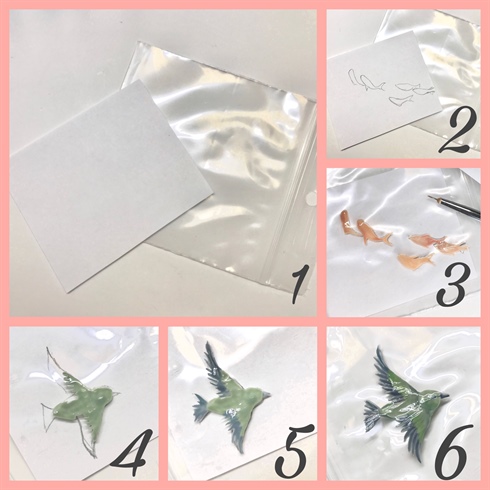
1-2. Using a plastic bag, draw the shapes on a paper and insert them into the bag. 3-4 paint with your Fx color gel. 5-6. Apply shadows and light to give dimension.
9

1-2 draw a pretty branch with your brush details, and check if the shape of it is harmonious. 3-4-5. Apply different shades of pinks while cure in between each of them. 6. Always file around the edges of your creations and create holes in the structure of the head so as to create light spaces as a tree would do.
10
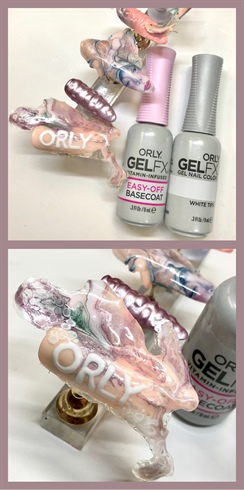
Apply your base coat easy off Gel Fx on the surface of the bubbles you want to create. Then use your white and apply randomly in drop. And without curing re apply drop in your white a drop of base coat. You will see the magic happen.
7 Artists like this Photo
Write a Comment
Submit