In Denmark it´s not a tradition to celebrate the day of the dead, I didn’t even know anything about it and had to search for information. Since we don’t celebrate this day, I had to understand and feel this tradition. It gave space for some powerful feelings related to the death and some of my dearest.
Day of the dead is a celebration of the dead, to remember friends and/or family, who has passed away. On this day there is decorated with things the deceased appreciated, and who might help them on their spiritual journey.
I have painted this living elephant with a mask/sugar skull as a representation of them who already has past away. The elephant is my personal touch to honor my great grandmother, who some years ago passed away.
She loved elephants and had one of wood in hear living room. Me and my siblings enjoyed to play with it and now has many good memory’s attached.
When I read about this tradition. I even imagined this amazing, powerful and relaxed animal, carry my deceased dear ones, back to this world on the day of the dead.
The Elephant is for me also a symbol about my hope to remember and see some of my dear deceased pets, since pets also can have a big space in the harts of a family.
I have painted the flower “tagetes”, since it’s the favorite of the dead, since it helps them finding their way back to the world of the living. I chorused more colors than their original red and yellow shades to emphasize that this day is a colorful celebration day.
The quality and beautiful Swarovski crystals, sponsored by Swarovski, are used to the shadows and finish touch.
Step-by-Step Nail Art Tutorial
1
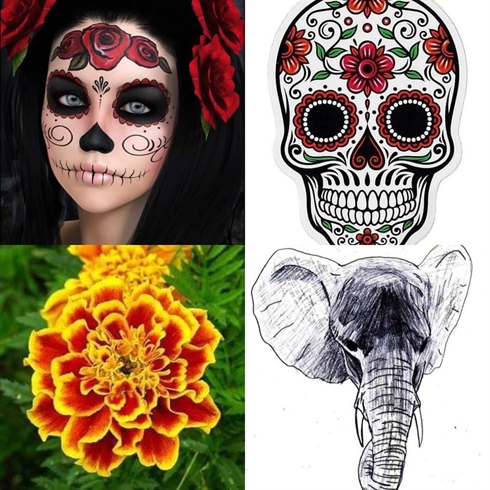
My inspirational pictures.
2
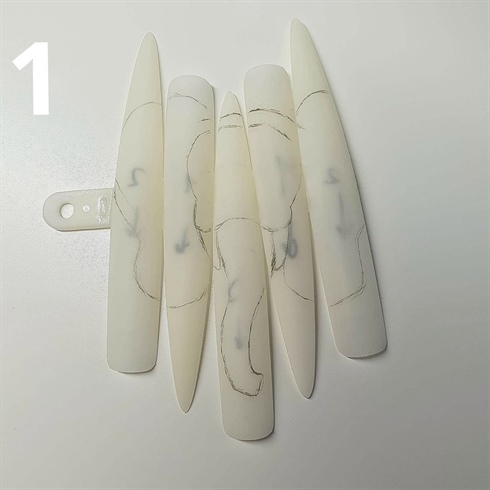
First fill all the tips so they get a mat surface.\n\nGlue the tips together.\n\nDraw with the pencil the subject.
3
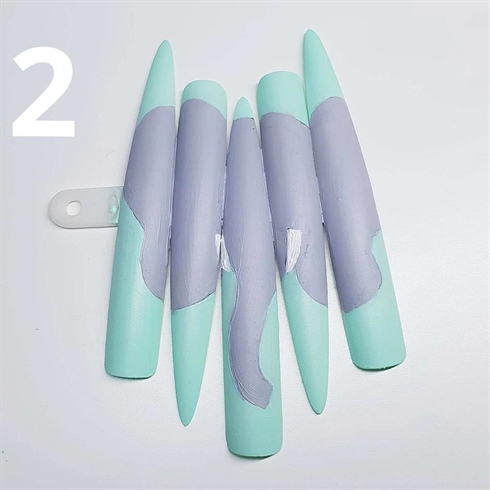
Paint the background with acrylic paint.
4
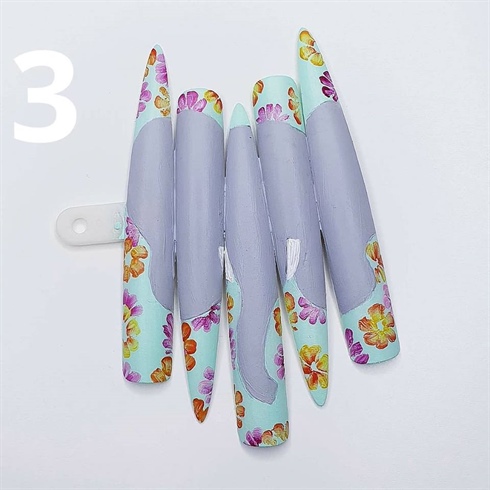
Use the one-stroke method to make the beautiful flowers in the background, with acrylic paint.
5
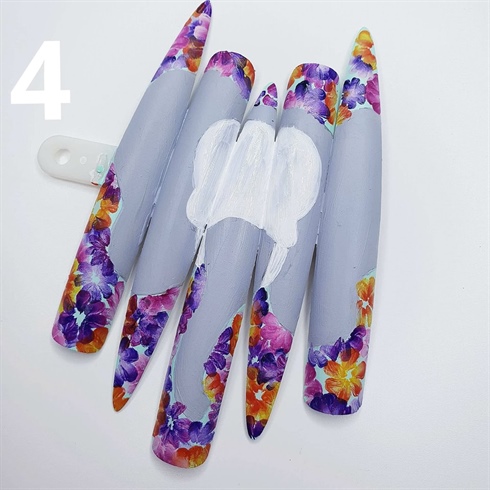
Continue with one-stroke flowers until you are satisfied with the background, tempt multiple times on the same flower to get more effects.\n\nPaint the head with acrylic paint.
6
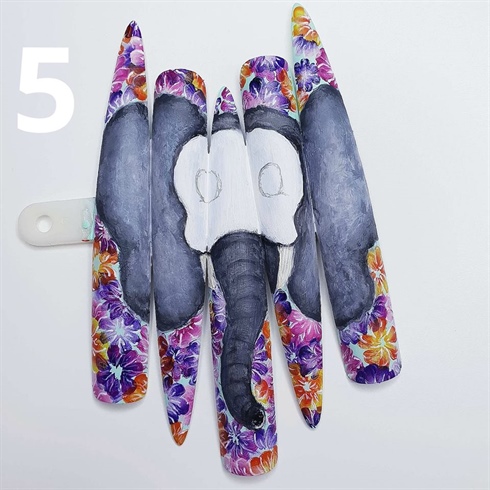
Paint shadows on the elephant so it has more effects. Mix black and white with plenty of water.\n\nDraw the elephant's eyes.
7
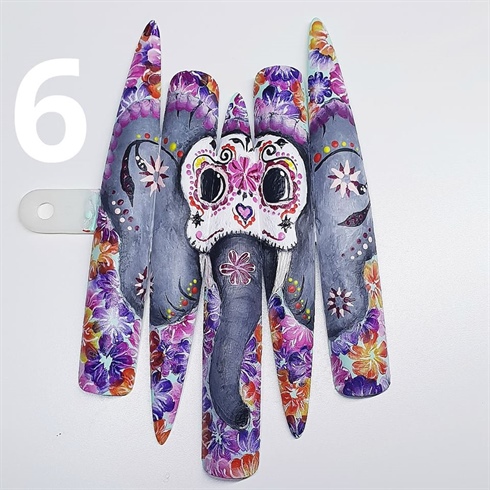
When you're happy with the shadows, paint all the beautiful little touches, with a nice nail art brush and acrylic paint.
8
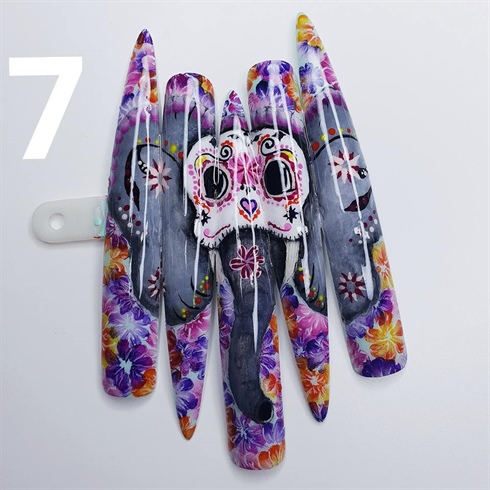
When you are completely done with all paint, encapsulate the result with topcoat.\n\nUv / led lamp for 120 sec
9
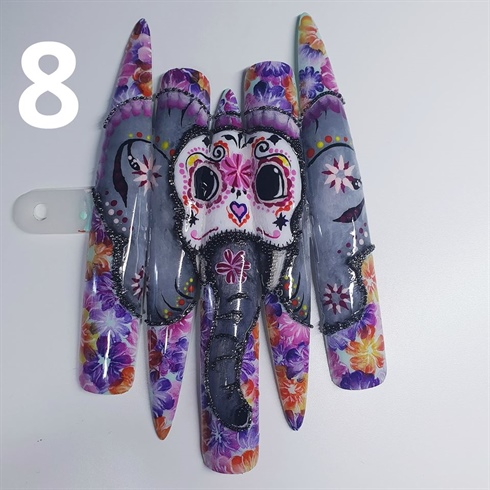
Use topcoat without sticky layer to design the shadows with small crystal pixie from Swarovski.\n\nFlash cures often so they are stuck and do not slip around.\n\nWhen you are satisfied with the design, cure 120 sec in uv or led lamp.
10
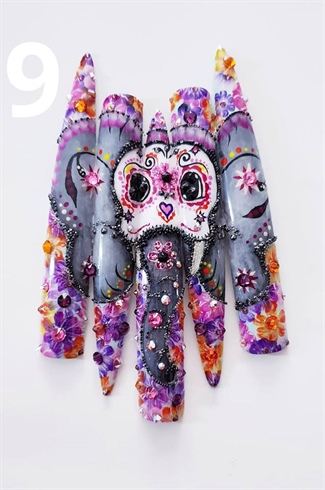
Use topcoat without sticky layer to lay the swarovski stones from swarovski.\n\nUse Crystal Katana from CrystalNinja to take and move on the swarovski stones.\n\nFlash cures often so they are stuck and do not slip around.\n\nWhen you are satisfied with the design, cure 120 sec in uv or led lamp.\n\nFile the part you keep the design on and take a great picture.
8 Artists like this Photo
Write a Comment
Submit