For the NTNA second challenge, we were asked to create a set of wearable nails that not only reflects on the history of the famous Sunset Strip, but which also would be classy and chic enough to get into the club and behind that velvet rope for the true VIP treatment.
Research was crucial for this challenge, as I've never been to LA - my brain was buzzing with all the wonderful sights that Sunset Strip has and continues to bring to us all.
However, It became very obvious early on in my research on what my focus and design would be. I came across images of the Sunset Tower Hotel and was immediately drawn to the Art Deco designs, which really captured my attention. Finding out more about the history, I became engrossed with the detail behind the building.
The Sunset tower was designed in 1929 and was regarded as the landmark of the sunset trip, with famous names such as Frank Sinatra,Marilyn Monroe and even President Bill Clinton having been patrons at one time or another.
This, combined with the iconic images of the sunset and Palm trees of the strip, inspired me to envisage a story, and create this set of wearable nails.
The story begins with a young aspiring singer/actress venturing to Sunset Strip in search of stardom, fame and fortune. She is lively, strong and independent, and one very determined individual. I looked therefore to incorporate the vibrant colours of sunset strip and palm trees on the young lady's nails to match her lively persona. The chevrons in the design are inspired by the windows of Sunset Tower, and I added Swarovski crystals for more of a stand out and to draw extra attention to her desire, as when the light hits the crystals they sparkle and shine - just like the superstar our actress hoped to become. After all, everyone will always look at the shining and twinkling stars of Sunset Strip.
I hope you enjoy my design this week and once again thank you to the team at Nails magazine and this week sponsors, Orly . Until next time.
Step-by-Step Nail Art Tutorial
1
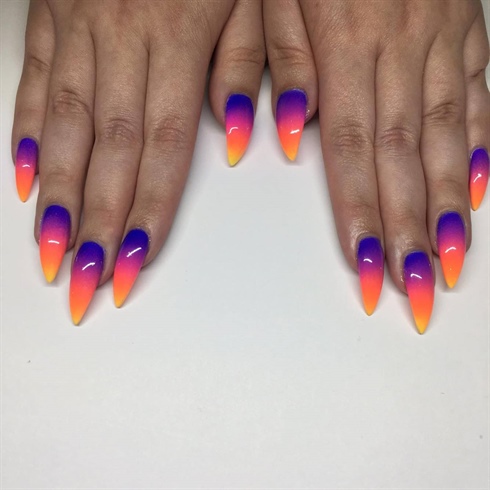
Step 1. For the base of this nail art designs, I took some inspiration from the large Sunset strip sign, as well as the horizon of sunset strip . To achieve this look, I used purple, pink, orange and yellow gel polishes and then blended together with a sponge.
2
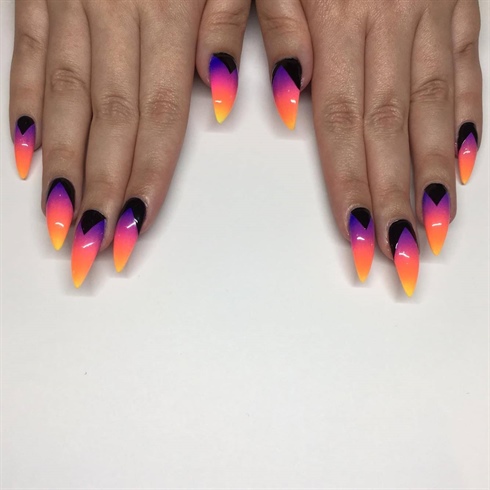
Step 2. I then painted the different shapes of the chevrons inspired by the window design of Sunset Tower.
3
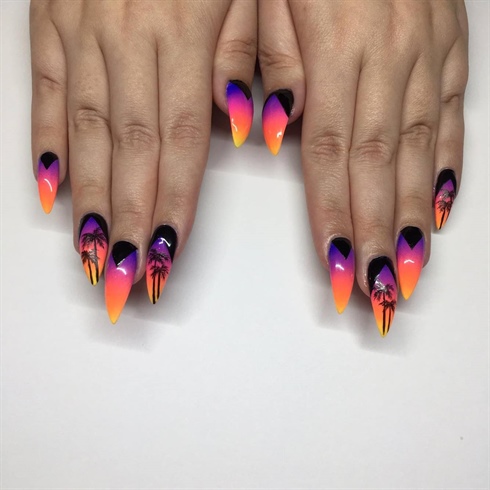
Step 3. Palm trees were added to the nails. I used black gel and drew the main body of the palm trees and added leaf's to the tree.
4
Step 4. I then put focus onto the backgrounds, with the addition of some tiny buildings and windows at the tips of the Palm trees to give it a 'city' sunset strip feel.
5
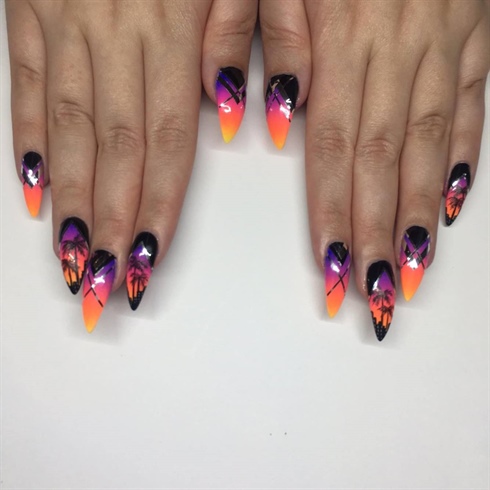
Step 5. I then enhanced the shapes of the chevron using two different sizes of silver striping tape, again inspired by the line work of the iconic Sunset Tower .
6
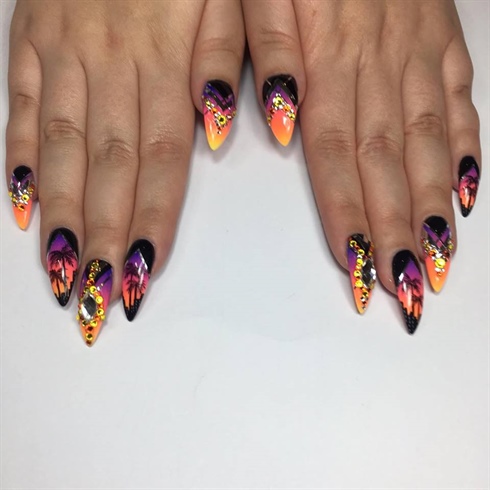
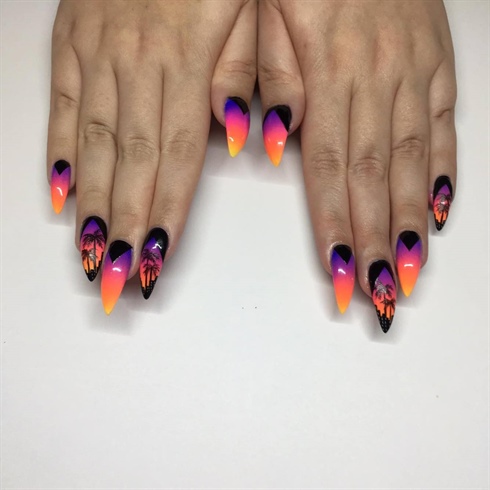
Step 6. To complete the look, I added Swarovski crystals using glue and hard gel and then cured.
7

Here are some pictures that inspired me .
26 Artists like this Photo
Write a Comment
Submit