For the third challenge we were asked to create a set of 10 nails inspired by flowers, with the continuation of the Manus X Machina theme.
With the pictures once again provided by Jan Arnold as our initial points of inspiration, I was drawn to the intricacy from a number of avant garde elements from the designers - in particular those from Marc Jacobs, one of the designers behind the world famous Louis Vuitton, Raf Simons for the House of Dior and Karl Lagerfeld's design for Chanel.
With an eye for intricacy, I am always pulled towards detailing, particularly elements such as layering, cuts and shaping, and colours. Flowers, whilst delicate and feminine, also provide strong emotions in romance, and are almost always pleasing to the eyes.
For the Manus component of this challenge, and taking the critiques received from my previous designs into account, and wanting to continue to learn, I decided to create the flower petals using several techniques such as gel, plastic and foils - among others. I also wanted to introduce a new colour to my portfolio. Red is regarded as rich and opulent and is a known 'power' colour. I also continued to incorporate nude, gold and black to tie in with my previous challenge(s), to add to my created Manus x Machina Nails Collection.
For the Machina component of this challenge, I felt the urge to introduce different jewellery wires and metal pins, as well as continuing my link to Swarovski crystals to make my collection cohesive to the last first and second part of the challenge.
I hope this challenge shown another side of my creativity and versatility. I hope you all enjoy this challenge as much as I did when I was creating it.
Step-by-Step Nail Art Tutorial
1
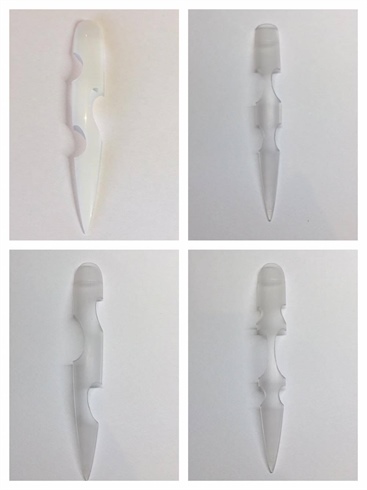
Shaping the nails to a point, I buffed the surface of the nail before creating a cut out. Using an e-file and a fine drill bit, I very carefully cut out the desired shape.
2
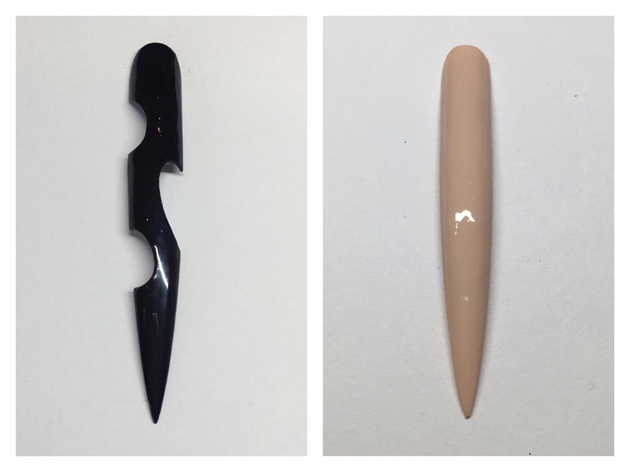
I applied two coats the base of the nail with black and nude gel polishes, curing each layer for 1 minute. I then applied a non sticky topcoat and cured for another 30 seconds.
3
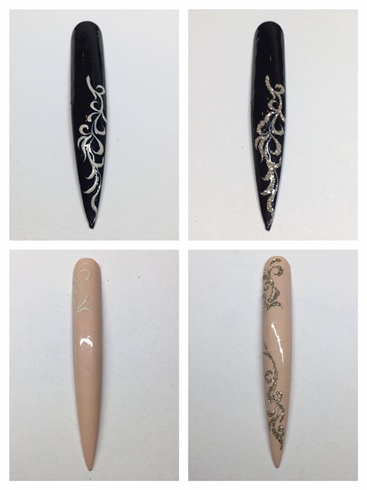
Using a cream colour gel polish and short line brush, I carefully drew out the vein and leaves of the flower. I followed this by sprinkling champagne glitter over the design, and cured for 2 minutes . Once it was set, I used a small scrubbing brush and brush of the excess glitter.
4
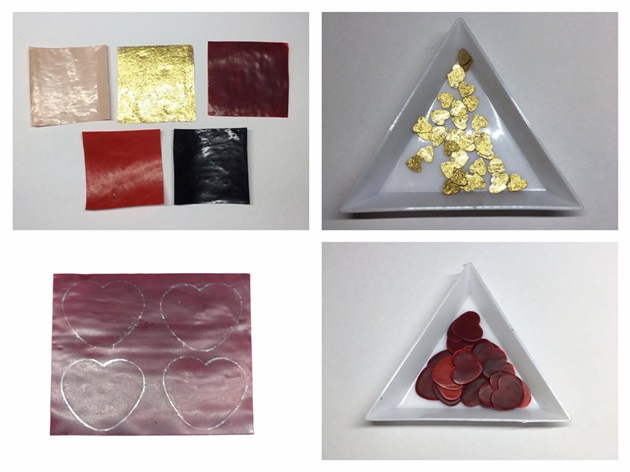
Using hard gel, as well as red, cream, gold and black gel polish, I painted a thin sheet of hard gel, and cured this for 2 minutes. I followed this by painting on two coats of gel polish and cured for 30 seconds each. I then carefully cut out the petal shape. don't forget to remove the sticky layer before cute out the petal.
5
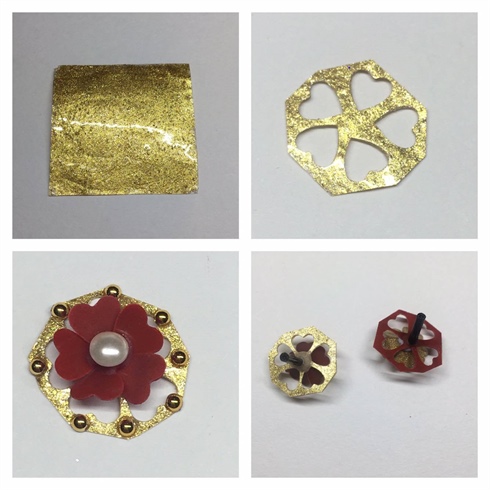
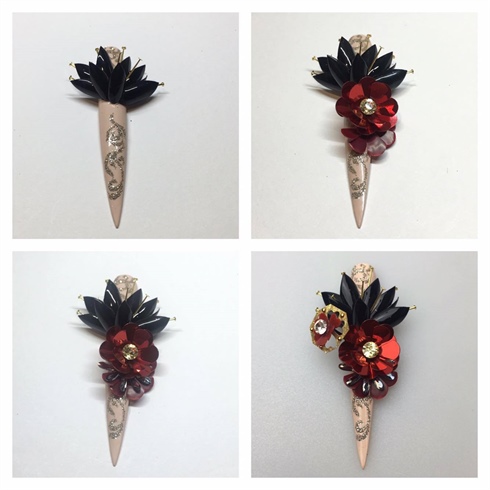
Using a shape puncher, I cut out the gel sheet to form the shape of the flower. I then used scissors to cut out the corner of the flower, and using the cut out petal, I attached it onto the centre with acrylics and glue. I followed this by adding a piece of Swarovski Pearls in the middle and some gold beads to add a vital dimensional element to the flower .
6
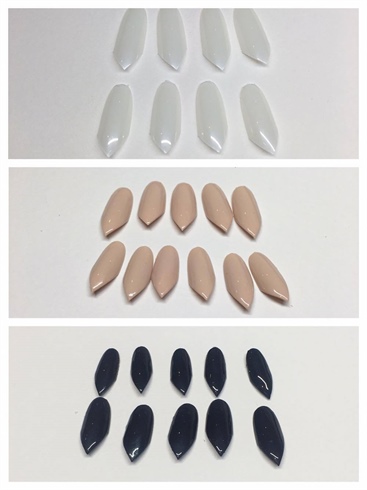
Using size 10 and size 8 of an oval nail tip, I cut one end of the top into a point and then I buffed the surface of the nail. Using a cream gel polish, I applied two coats and cured each layer for 30 seconds. I also applied 'non-sticky' top coats and left the petals to be assembled on the tips at a later stage.
7
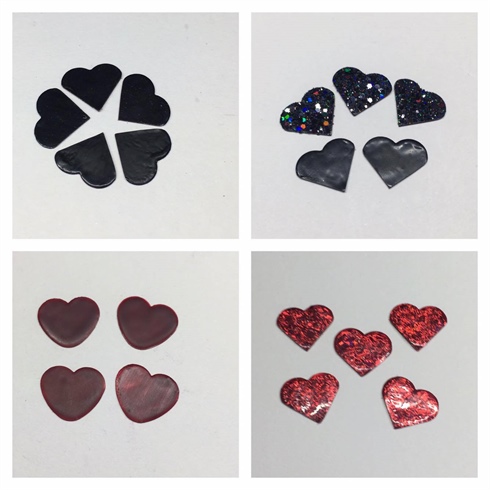
Glitter petals.\nI painted one coat over the petal previously made and cut them out, then sprinkled black, red and champagne glitter over it and cured for 2 minutes. This I feel adds a further 3D dimensional appeal to the petals.\n\nFoil petals\n\nUsing a coat of hard gel, I also painted a thin layer over the petal I made earlier. I cured this for 1 minute and using a piece of foil, pressed this over the petal and sealed it with a non sticky gel top coat.
8
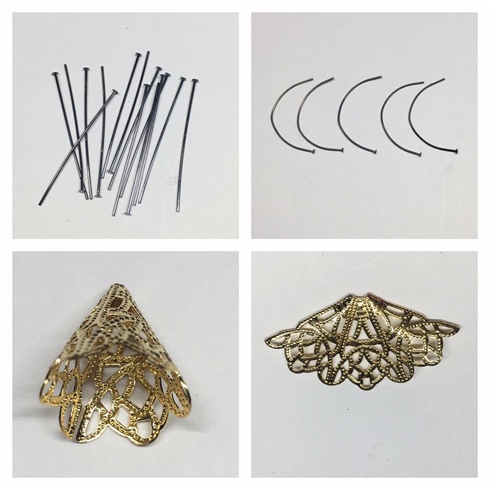
Using wires and small jewellery, I carefully bent the wires and jewellery into the desirable shape. With the wire i used differenct lid from the bottle, I wrapped the wire around it to create the accurate curve - which emulates a machine made process from machine made components.\n
9
Once i made all the pieces, i then assemble them together with a combination of acrylic, gel and glue to complete my design.
10
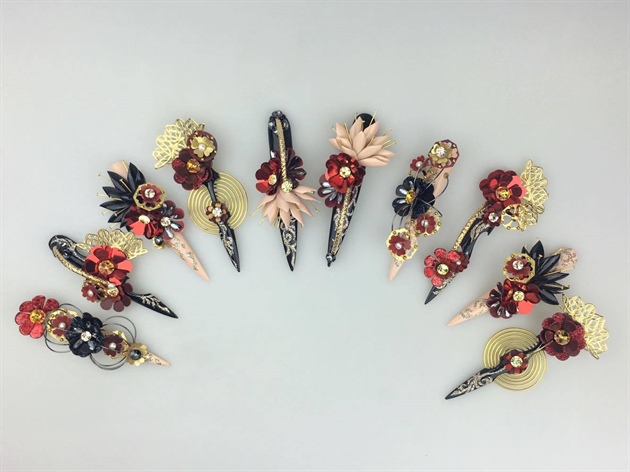
Final art work once it is all assemble.
4 Artists like this Photo
Write a Comment
Submit