I chose Chicago for my next NTNA challenge. I live just 45 mins outside of the city, in Northwest Indiana, close enough to call Chicago home.
The task at hand was to pick a town with a remarkable skyline views, but a town that has epic architecture and skyscrapers to recreate. I think what makes Chicago's skyline so grand is it's correlating shoreline to complete that picturesque finish. Living in Northwest Indiana is such a blessing, for it gives us a different vantage point to view the city on a daily basis. The Steel Metropolis off in the distance perched over a shimmering Lake Michigan is enough to draw any Chicagoan on a long holiday into the country, to view it from a different perspective .
Chicago is a very large city. I knew that I would be very hard pressed to fit the whole city and every skyscraper over ten nail tips. So I picked my favorite view and stretch of Lake Shore Drive to serve as inspiration for my challenge. I knew had to capture Grant Park and Navy Pier, because they are both timeless landmarks. I hand picked each building for its iconic feel. There is no doubt that with one glance you would know that this was The Windy City.
Step-by-Step Nail Art Tutorial
1
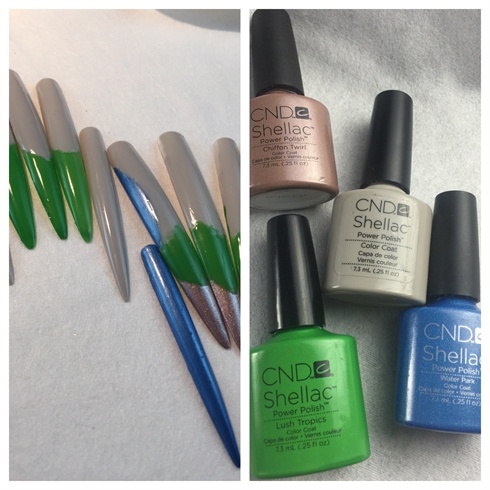
\nI started off with CND Shellac Water Park, Lush Tropics, Cityscape, Chiffon Twirl. My tip arrangement is spread out to cover the areas I wanted to highlight for my skyline, and to follow the shoreline of Lake Michigan. I used Lush Tropics to cover Grant Park, Chiffon Twirl for Montrose Beach, Water Park for the Chicago River, and City Scape to foundations of my skyscrapers.
2
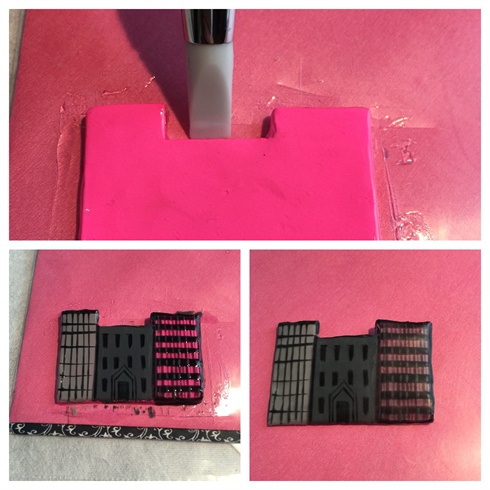
\nTo create my Skyscrapers, I used 4 different techniques. For this particular style I used Silly Putty. I sculpted the putty into different shapes of buildings. I then applied gel to secure my shape with a set of silicon sculpting tools from Wildflowers. (I was very grateful to have received them in time for this particular challenge, for they were a great help for my skyline.) I then applied the appropriate mix of color for the separate buildings. Then after curing I detailed the buildings windows and doorways and finished up with a Matte Top coat.
3
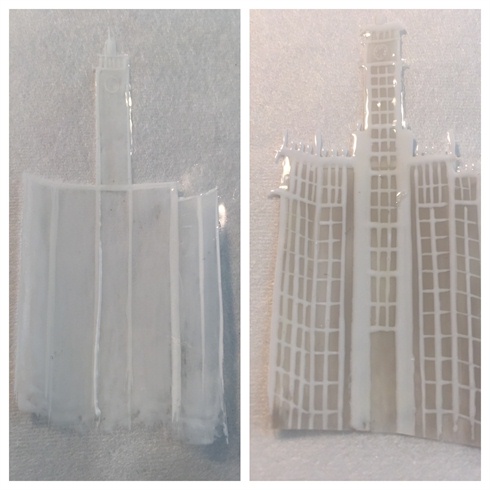
\nAnother technique used to create the skyline was painting the outline of the building over a piece of cellophane. After curing, I made a slightly translucent base for the walls of the buildings, so they can glow when lit. I completely covered over my detailing to create strength.\n\n
4
Another technique I used was to laying out my design over a piece of cellophane. Once it has been cured you can flip it over and trace the cellophane trace your look on the opposite side to create even walls. Then once the walls are in place you then can then seal them together with top coat. \n\n
5
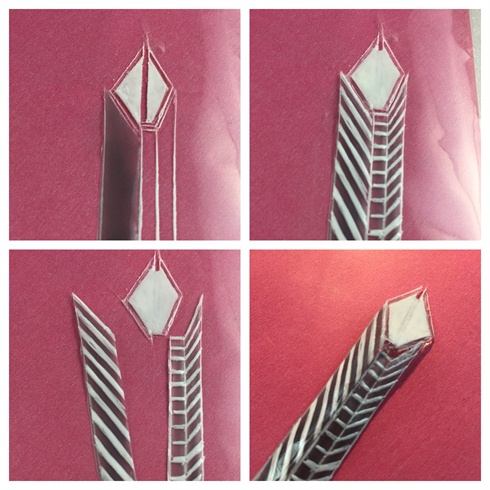
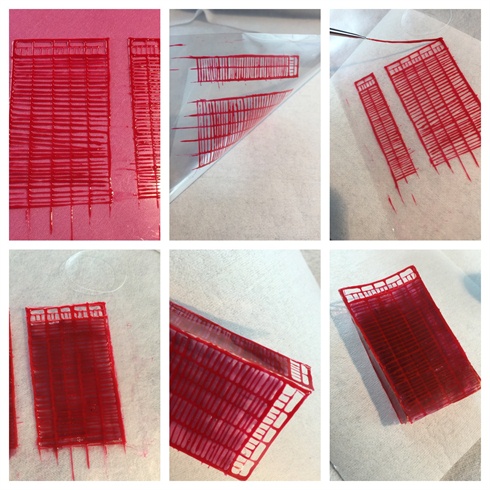
I used the previous technique as step 3> but with this building i cut the away the sides of the building and sealed them back together in a third dimensional shape with top coat. \n\n
6
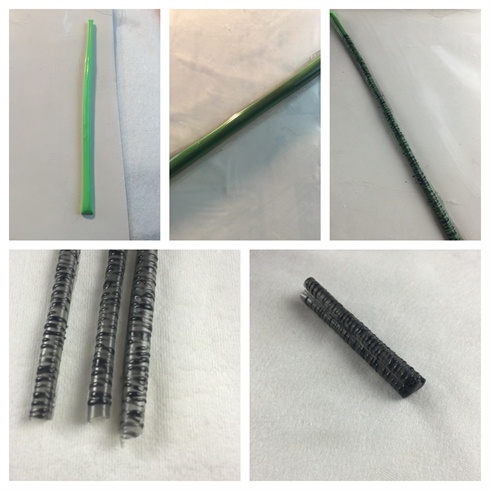
The last technique I used to create a buildings also involves more putty in the shape of a long coil. I then coated the coil with Gell and detailed with black gel. Once it has been cured you can remove the putty from the form\nthat at you have created. I continued to cut the coil into 3rds and sealed the edges together with top coat to create Lake Point Towers. \n\n
7
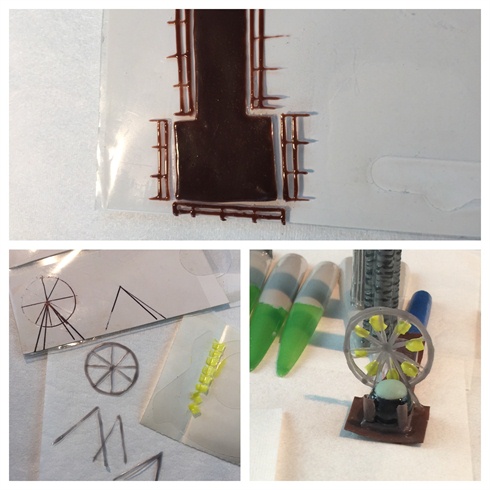
I prepared all the parts for Navy Pier in the same way. Gel in a outlying parts to the Boardwalk and Ferris wheel over cellophane. Cut and assemble
8
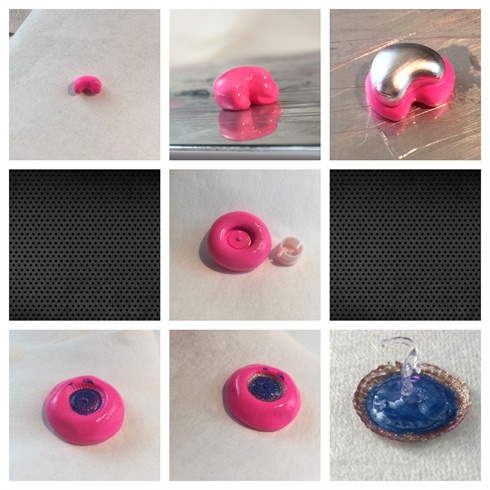
To create my bean in Grant Park I rolled\na piece of putty to shape of a bean. I then drizzled gel on top of the putty. After curing I Applied topcoat and Cured. I used Silver Metallic Gel, hint- wait for your metallic gel to completely turn metal-like before curing. Once metal-like, follow up with top coat and cure. Same rules apply for Buckingham fountain.
9
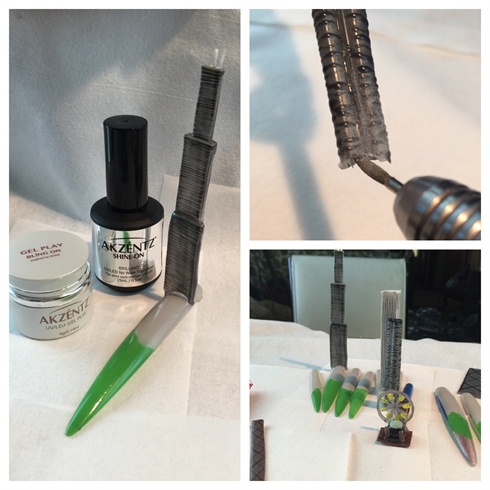
Assembly of the city took place one cure at a time using Akzentz Bling-on & Shine-on product products. I then would size and fit the buildings with some help from my electric file. \n\nTo create some realistic trees, I pulled extremely dry beads of liquid and powder enhancement. This gives the trees a real-life look off in the distance. \n\n
10
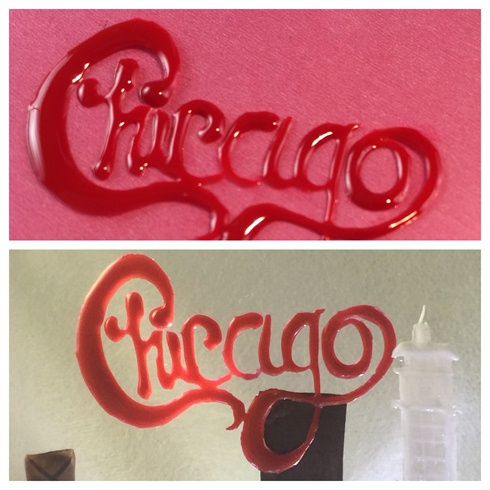
To complete my Chicago skyline look, I wanted to give my NTNA Challenge a postcard appeal by creating a Chicago sign that would hang over skyscrapers.
2 Artists like this Photo
Write a Comment
Submit