For me “Haute Couture” means high fashion. It includes different standards, different vision, unusual shapes, forms, solutions and of course luxury lifestyle. It includes too much of everything, it’s not for usual people, they will not understand it.
It’s impossible to be indifferent to high fashion. You either understand it or not. Couture creations can not be restrained, they are piece of art and individual vision of beauty of it’s creator.
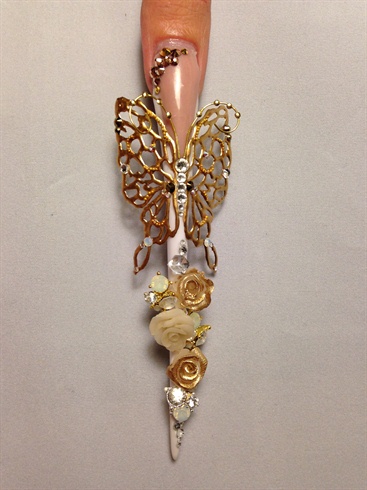
In my work I mixed all of this components – extreme length, luxury, a lot of expensive parts. As you can see I used chains, wire, polymer clay, studs etc. The goal of this nails is not to be loved by everyone but only by those who understand them.
About the colors – I tried to make everything as fancy as possible so I started with white (since it’s pink & white contest). So what’s the fanciest color? Of course it’s gold! Plus I added some red accents to it to make my design complete.
I absolutely adore final look of my nails and hope you’ll be able to judge it and see all of my passion in it.
Finally I had some free days (not like previous 3 weeks) to dedicate myself to this contest, pushed myself to the limit and make a result I’m proud of.
Step-by-Step Nail Art Tutorial
1
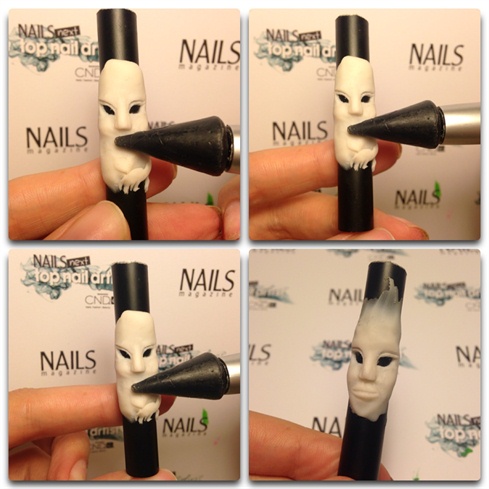
Making mask of polymer clay. And baking it in the oven for 15 minutes with 275 F temperature.
2
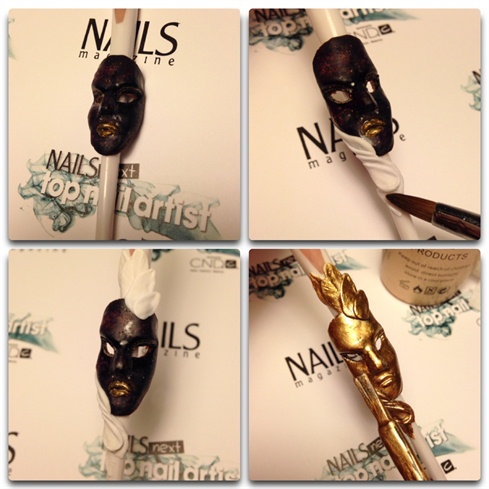
I overburned it so it turned black. So this what happens when you keep it more then 15 mins...plastic burns :) I'm attaching the mask to the nail. Making fabric folds on the mask with white acrylic. Painting it gold using chrome gel polish.
3
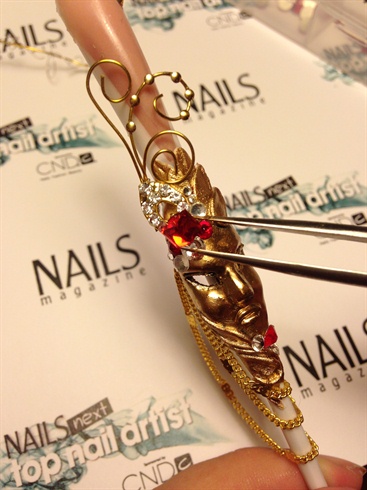
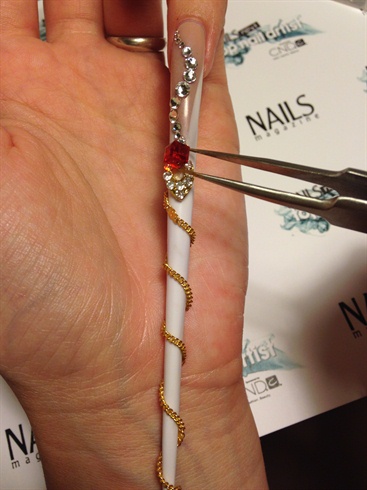
Decorating it with charms, crystals, wire and attaching 3 levels of golden chains.
4
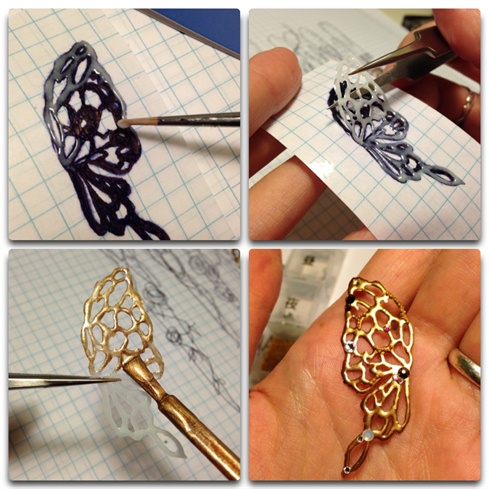
There is butterflies on 2 nails of my design. This is how I created them:\nDrawn a schematics of a future wing on a paper. I put alcohol on a back side of a paper so the drawing will appear on it. it will help to create 2 identical wings - left and right. Put clear tape on both sides of the paper. Applying hard gel on a wing schematics and putting it in UV lamp for 2 mins. Detaching cured wing from paper, painting it with gold chrome and applying crystals to it.
5
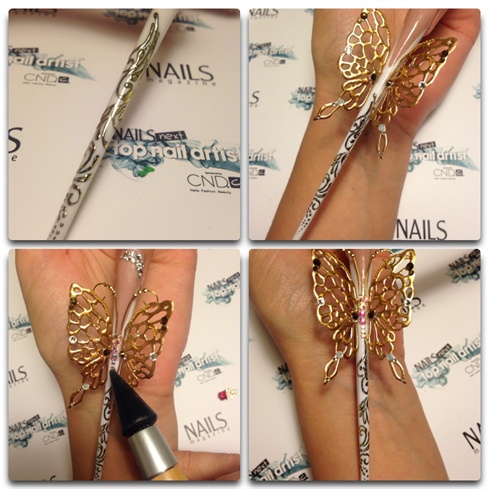
Making golden image - drawing patterns using special black gel for foil, curing it for 2 mins and then stamping a foil on it. Attaching wings to the nail using drops of clear acrylic. Adding a lot of crystals to the design.
6
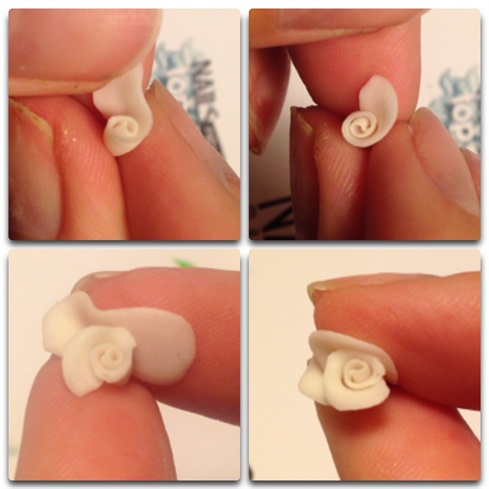
Creating roses with polymer clay.Making each petal separate and attaching it to the bud. Putting it to the oven for 15 mins and this tim not forgetting it so the roses will not turn black like a mask :)
7
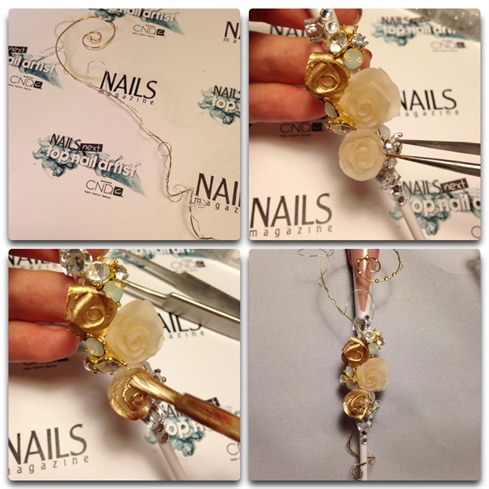
Making imitation of branch with thin and thick wires. Chaotically reeling thin silver wire on a thick golden wire. Attaching prepared roses to the nail and adding prepared charms and crystals to it.\nPainting roses using golden chrome gel polish. After that attaching wire branch.
8
Reeling golden chain around pinky finger and attaching charm to it.
9
On a thumb I used same technology as in steps 4,5,6 & 7.
23 Artists like this Photo
Write a Comment
Submit