I did not know much about this Mexican festival so for me to understand better I done a lot of research online and watched the movie Coco. from this I could see that this was a festival to celebrate the life & death of passed loved ones.
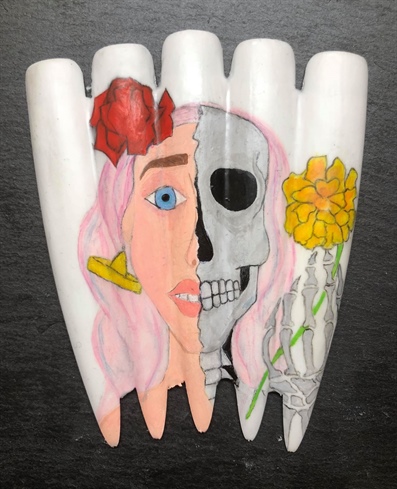
As the Day of the Dead is a celebration of life & death, I wanted to show this in my design. To show the celebration of life side I painted a living lady. for the celebration of death side I painted the other half as a skeleton. I also wanted to incorporate something Mexican with it being a Mexican festival so I painted on a Mexican hat as an earring on the living lady side.
I painted marigold flowers as they are the one of the recognisable symbols of this celebration. For this reason I wanted to ensure I incorporated them into my design as they are said to guide the spirits back to there altars due to the scent and bright colours.
another iconic symbol from this festival are sugar skulls, I added 2 of these to my design. Sugar skulls are said to capture joy while reflecting the happy memories associated to the lost loved ones.
Step-by-Step Nail Art Tutorial
1
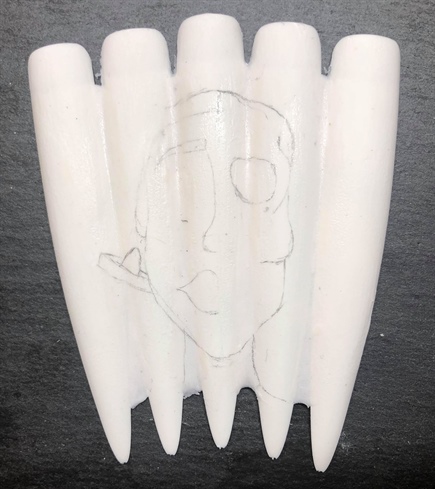
I selected my chosen tips & glued them together. I then sketched on some of my design using a pencil so that I could easily rub out & fix any mistakes. I got all my paints ready ( I used a mixture of one movement paints) & my brushes (a fine liner & few thicker brushes)
2
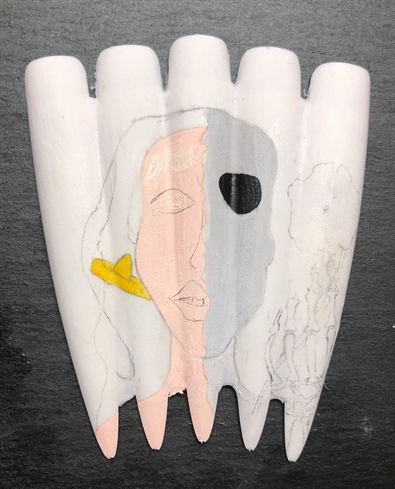
I painted in the base colours for each side of the face. I used a skin tone colour for the living side & grey for the dead side. one side to represent the living & the other side to represent the dead. I also sketched in the skeletons hand holding a marigold flower.
3
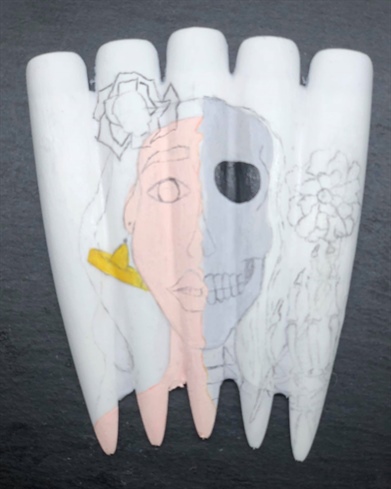
I moved on to sketching a flower in the living sides hair. I then marked out the position of the skeletons teeth & bones in the neck.
4
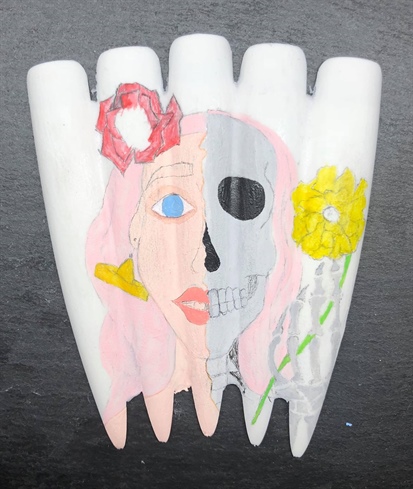
I then went onto adding more colour to my design such as the flowers, eye & lip colour, the hair and also to the hand bones. I then allowed time for my paints to dry.
5
more colour was then added to the hair to give it a more textured look. I gave each of the the flowers more colour so that they had a better coverage. at this stage I went in with my black paint to darken the areas around the teeth & bones in the neck and also added shading to the skull to try and make it look more realistic.
6
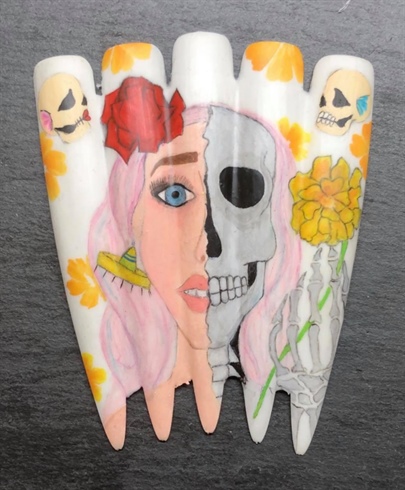
To my background I added in 2 sugar skulls. I then painted on some onestroke flowers randomly. I added some detail to the Mexican hat earring then painted in her eyelashes.
7
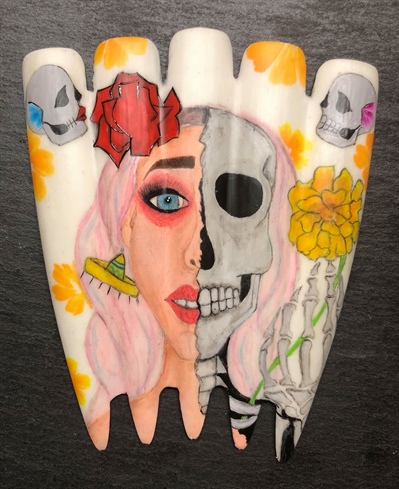
I decided to change the colour of my sugar skulls and then added a onestroke flower to each of them before I added on the teeth, eyes & nose position. I then moved onto painting on her makeup such as her lipstick, eyeshadow & eyeliner. while I allowed that to dry I went in and outlined the flower in her hair. now that the paint was dry I went in with more so that I could add some shading to the living side of my design. once this had fully dried I covered the whole of my design using a top cute which I then cure in my lamp for 60 seconds.
8

I went in with more paint to add some dots around the sugar skulls eyes. It was now time to start adding on the crystals. I secured them in place using a crystal resin. I painted on another onestroke flower to the skeletons cheek bone.
9
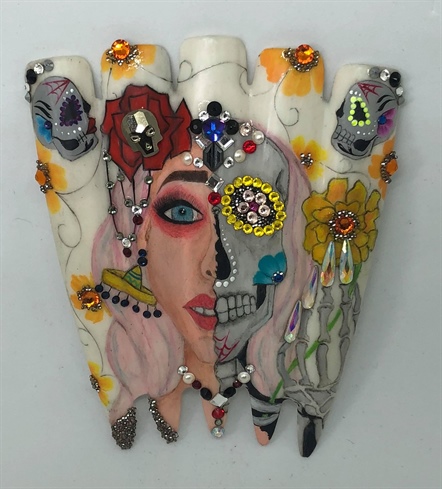
at this point I went back in with paints to add in the swirls to my background as I had seen these on some of the sugar skulls I had seen. I also added in more detail to the sugar skulls and painted a spider web on the skeletons chin. I used my dotting tool and paint to add dots around the skeletons nasal area. I then added more crystals to the top corners of my design.
10
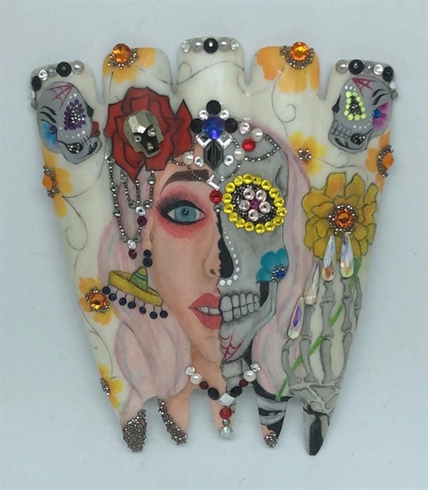
I kept looking at my design thinking I had missed something so I thought it would be best to add on more of the crystals. I added more to the chains hanging from the flower in the living sides hair and also added on chains coming from the crystal head piece. to finish off my design I added a few crystals to the centre of the top of my design. my design was now complete.
11 Artists like this Photo
Write a Comment
Submit