I chose Elphaba, the Wicked Witch of the West from the Broadway/West End show, WICKED! The stories of the Wizard of Oz have always captivated me and I have watched the movies countless times! In 2014, I was very lucky to see the show in the West End of London with my mum and it just blew me away! The costumes, the story, the music, everything! There was not a single doubt which witch I would chose for my challenge. The story of Elphaba begins as her and Galinda, the Good Witch of the North as sisters. Elphaba was different because her skin was green and so she was treated differently from the get go. I feel like I can relate to her because i am the youngest of my sibling and I am the only one to have fled the nest and really “Defied Gravity” by moving from the UK to Canada.
Step-by-Step Nail Art Tutorial
1
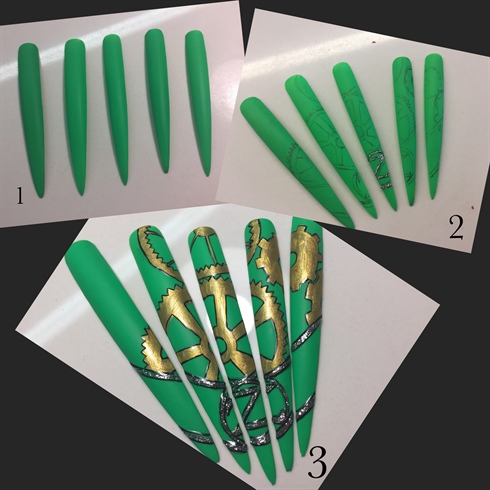
I started by painting 5 extra long nail tips with a bright emerald green gel polish and finished it with a matte top coat.\nI drew on cog/gear details and a representation of the bars above the gates to the emerald city underneath the gears.\nUsing leaf gels for the gates and acrylic paint for the gears, i painted and cured them.\nThese were finished in a gloss top coat to give some dimension.
2
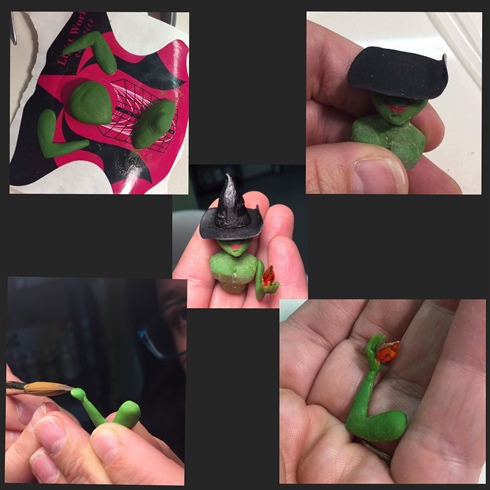
I began sculpting the body parts of my witch, Elphaba, which included arms, upper torso and her head. One of the things that makes her recognizable on posters is that her head is tilted and you can only see her smirk so I wanted my witch to have the same stance.\nI assembled the body parts and began sculpting her hat which has a specific look to it also. Half tilted, half curled up at the edges. \nI used two flame crystals back to back and placed them in her hand, fixed in place with a tiny bead of clear acrylic.
3
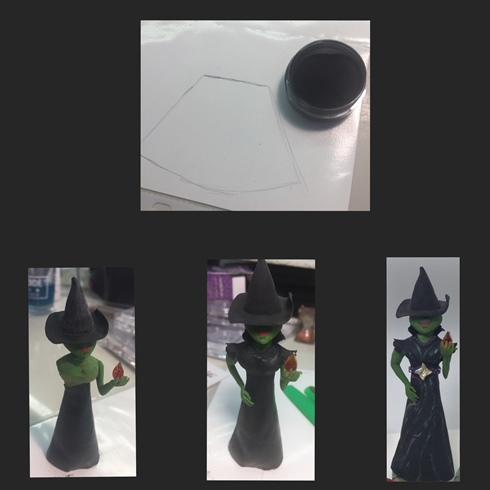
I measured and drew out the skirt portion of there dress and sculpted it from black acrylic. Whilst it was semi cured and still mouldable, I attached it to her upper torso whilst curving around her body. She was starting to come together and I felt excited!\nI continued to sculpt her bodice and to add the lace ruffles around her neck and on the shoulders of her dress.\nUsing a luminous green flame crystal and Crystal Pixie, I created a sash/belt around her waist and gave her a Crystal Pixie necklace.\nI finished of her dress with an iridescent pigment powder to give her dress movement
4
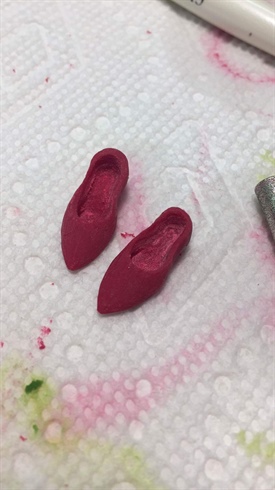
I sculpted the slippers from acrylic. Once they had set, I did some refining work with my e-file.\nI used Scarlett Crystals to make them into Ruby Slippers, these nails wouldn’t be complete without them!
5
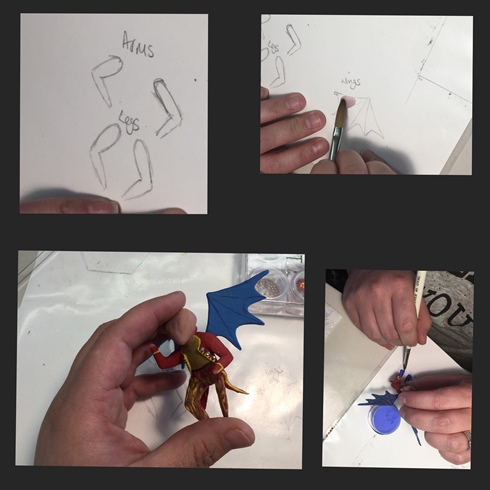
I started out by drawing out the body parts for my monkey including arms, legs and his wings and then sculpted them out of semi opaque acrylic.\nOnce the body was assembled, I added in the coat tails\nI used acrylic paint to achieve all the detailing and took inspiration from a google search to see what the costume was like for the stage show. It is very different from the movie.\nOnce all the painting was done and dried, I added clear crystal buttons down the from and on the cuffs of his jacket.\nI made him a belt from a gold rimmed triangle crystal and some of the 2mm black beads\nI added his feet from sculpted acrylic and painted the details of his face. \nThen, I attached him to one of the posts on the sign.
6
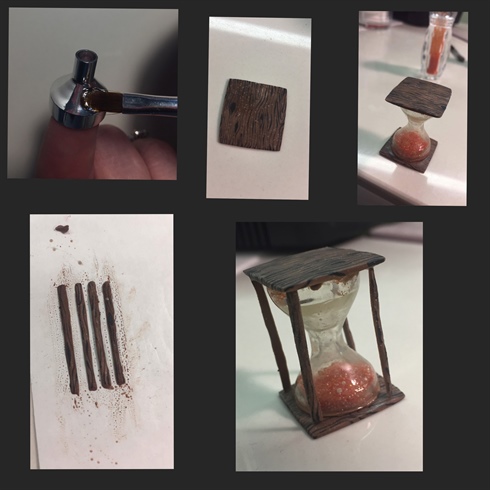
The hourglass is one of my favourite items of these nails! It actually works and times 3 seconds!\nI began by using the funnel from the Crystal Pixie packs and sculpted the two chambers our of hard gel.\nAfter refining and many tests, I finished it with a tack free gloss top coat to give it a glass look.\nI sculpted two squares from acrylic and hand painted the wood grain. This would be the top and the bottom pieces.\nI secured one of the pieces and left it over night to dry completely. I knew if I had not waited, the next step would not go how I would like.\nThe orange Crystal Pixie was the perfect size and look of sand so I part filled one of the chambers of the hour glass before sealing it shut with the other wooden piece.\nI made 4 posts to go on each corner of the hourglass and painted a wood grain into them before securing everything together.\nI finally use 8 of the Rose Gold 2mm beads for the feet.
7
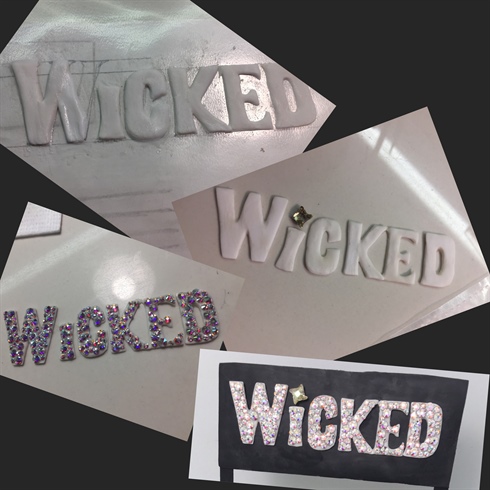
I started the sign by tracing out the letters onto card and then inserted that into a poly pocket.\nUsing white acrylic, I made the letters and then refined them with a hand file before coating them in a matte top coat.\nTaking AB Crystals in SS5, SS7 and SS9, I secured them with hard gel. This was to signify the bright lit up sign outside of the theatre.\nThe Luminous Flame crystals were a perfect finishing touch above the “i”.\nI mounted the letters onto a black ground which I made from the same black acrylic powder as Elphaba.\nTo make my sign stand up, I used thin wooden sticks which I painted black.\nNOT PICTURED: I made a monomer mix of green liquid and a green iridescent pigment and created clusters of “Emeralds” at the base of each post to give some added dimension.
8 Artists like this Photo
Write a Comment
Submit