“Peanut”
The theme of this challenge is “Drop Dead Gorgeous” inspired by the Day of the Dead. Dia de los Meurtos (Day of the Dead) is a time in Mexican culture to celebrate the lives of loved ones who have passed on. People celebrate by having festivals, decorating with bright colors and flowers and most importantly by visiting loved ones graves and bringing them their favorite foods and gifts. Upon googling day of the dead I couldn’t help but notice sugar skulls, in particular sugar skull cats. Being a cat lover I decided to make nails in tribute to my first pet ever, my cat Peanut. We got peanut when I was 4 and she lived to be 20 yrs old! So she was a significant part of our family. Peanut definitely used all nine of her lives. Sometimes she would disappear for weeks at a time, she had a litter of kittens and the day after, had got into our neighbors raccoon poison! Luckily she would be fine but she could NOT breast feed her newborn kittens. We had to bottle feed all 7 of them and they all survived. We kept them all for some time making us the people in the neighborhood with 8 cats. So I decided to make an alter honoring Peanut. I made her into a sugar skull made completely of Swarovski crystals so that she could be the shining star of the nails looking over a cascade of hand painted day of the dead patterns (including all her favorite things) flowers and her seven little kittens.
Step-by-Step Nail Art Tutorial
1
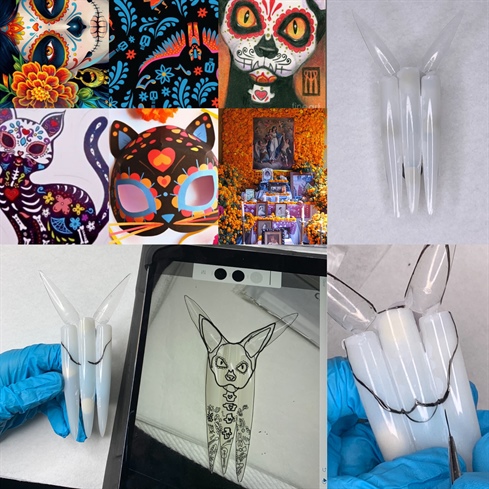
Step 1: Place your tips together in the way you want them and glue them together. I sketched up a rough draft to make scaling my images out easier. Once You know where you want things to go you can start applying an outline. I used black gel polish and a fine nail art brush.
2
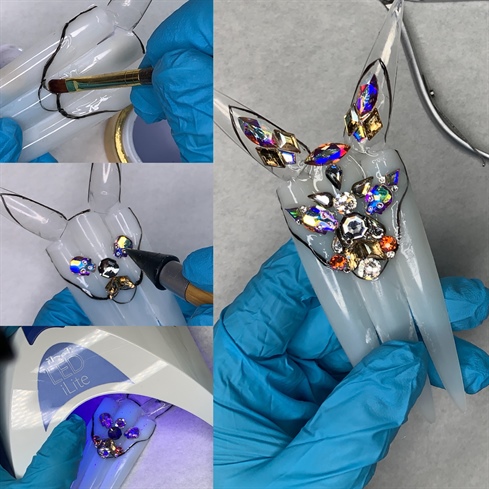
Step 2: Looking back at the sketch and remembering where all the facial features of my cat were, I placed my Swarovski crystals accordingly. I used crystal skulls for my cats eyes and diamond shaped crystals for her lips. I applied all my stones exactly symmetrical as cats faces and sugar skulls always have symmetrical patterns and designs on them. So for every stone I placed on one side I placed a mirrored stone on the opposing side. I even made some flower shaped designs out of my crystals. Applying a generous amount of building gel down where you’d like the stone to go, pick the stone up and place it using the Crystal Katana. Once its in the desired place and position, flash cure it in a UV/LED light.
3
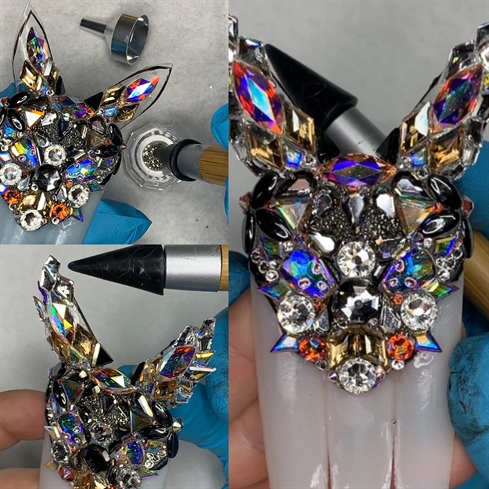
Step 3: Repeat step 2 until your entire cat head is encrusted with crystals. I used some Swarovski Crystal pixies in the rock shock collection colors to fill in some of the blank areas.
4
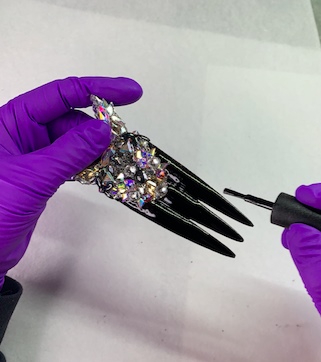
Step 4: Paint a solid color on the lower half of the nails with gel polish. I used CND's BlackPool
5
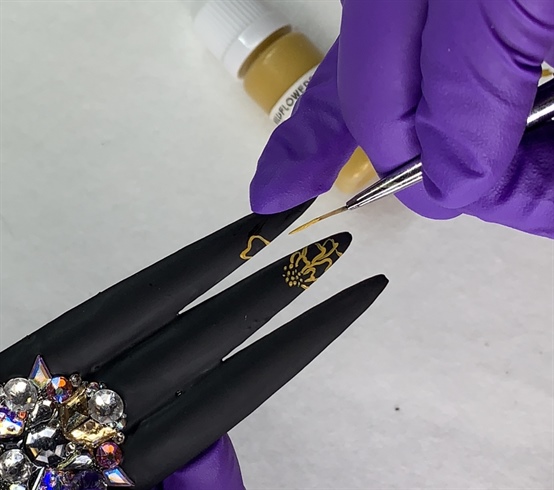
Step 5: I wanted to create a design that resembled a Dia de los Meurtos alter, so I kept my image of my cat (loved one) at the top and center of the alter. Using hand painted techniques I made some marigolds around the edges of the design. In the Mexican culture marigolds or Cempaspuchitls are used to create a bright path and pungent smell for the loved ones spirits to find their way back to their family’s. I started the marigolds by using the color (Marigold) acrylic butterpaint from Wildflowersnails to draw out an outline of the flower pedals.
6
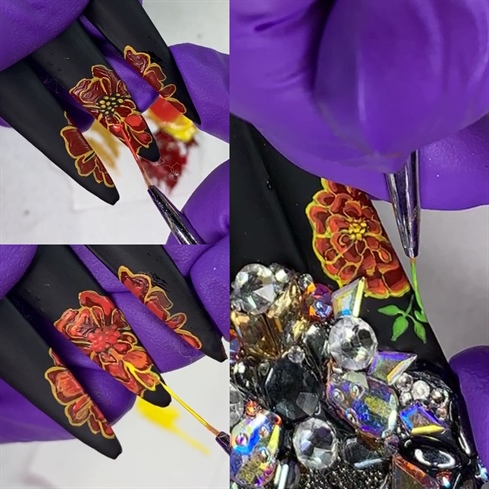
Step 6: Once you have the outline of the flowers you can start coloring them in. I started by using darker shades of red, overlapping that with a brighter red, then orange until I reached my brightest color yellow. This creates depth and shadows in the flower pedals. I finished off my marigolds by surrounding them in vines and leaves.
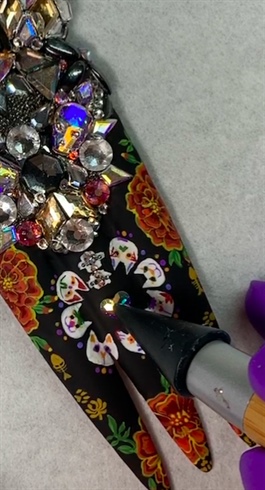
7
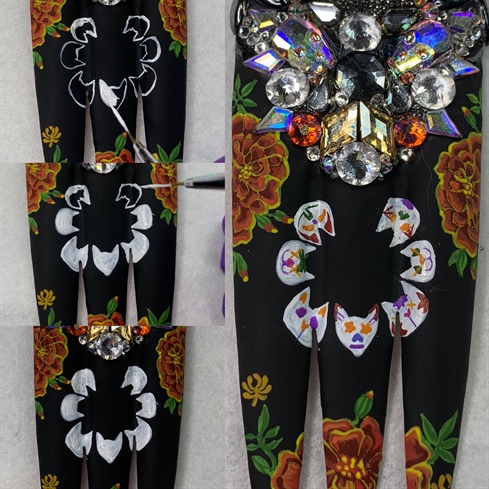
Step 7: For the center of my piece I made seven sugar skull cats surrounding Peanuts heart, representing her 7 kittens. Leading down to the heart I painted some (Pixie Crystal encrusted) vertebrae. I first painted a rough outline of the cat heads, then filled the heads in with white acrylic paint. I made each cats face have different sugar skull designs to represent their individuality.
8
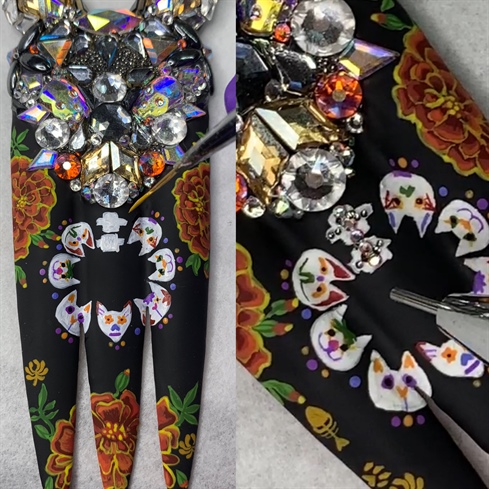
Step 8: Painting the vertebrae with the same white acrylic paint as the kitten sugar skulls, I encrusted them with size 3ss ab flat back crystals and crystal pixies from the rock shock collection. Using the back side of the Crystal Katana is helpful for making sure the smaller crystals are in the correct positions as the back side is metal and they wont pick back up when you touch them.
9
Step 9: For the final and most important step I sealed all of my art in with Wildflowersnails tack-free matte top coat. while the top coat is still wet I placed a single heart shaped Swarovski in the middle of all her kittens.
8 Artists like this Photo
Write a Comment
Submit