The reason I chose the butterfly cover of Nails Magazine is very special to me. Thirteen years ago I lost my 2 year old daughter Gianna in a horrific fire while she was being taken care of by a loved one. I felt like this tragedy was the end of my world, naturally there is nothing more sacred than the bond of a mother and daughter. Thanks to God and the support of my family and friends I was able to make it through this tough time. Gianna, my beautiful angel was infatuated with the song "Butterflies" by Michael Jackson. She would sing all day long. Butterflies became the theme of her services. The day of her service, the most beautiful yellow butterflies surrounded my home, and stayed there almost all summer. Now every year around June 1st, her death anniversary these beautiful butterflies appear. I believe these butterflies are a sign that my daughter is telling me she is ok.
Step-by-Step Nail Art Tutorial
1
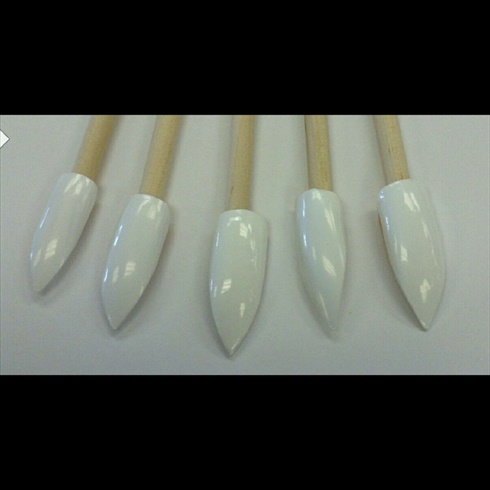
Step 1: Paint each nail with white polish.
2
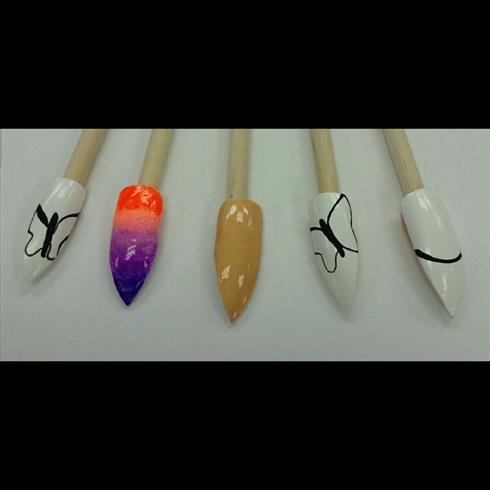
Step 2: Paint the middle finger with a nude polish. Step 3: Ombré the ring finger using bright orange, peach, lavender and dark purple polish. To achieve ombre affect paint colors on top of sponge slightly overlapping previous color. Dab sponge polish side down and apply to nail. Use a thick sponge to get the best ombré results. Step 4. Use black polish to make the hair on the middle finger. Step 5. Use a thin liner brush and black acrylic paint to draw the butterflies and lines.
3

Step 6. Use a polish liner brush to fill in spaces with the same colors of the ombré. Step 7. Use the liner brush to paint the face on the middle finger .
4
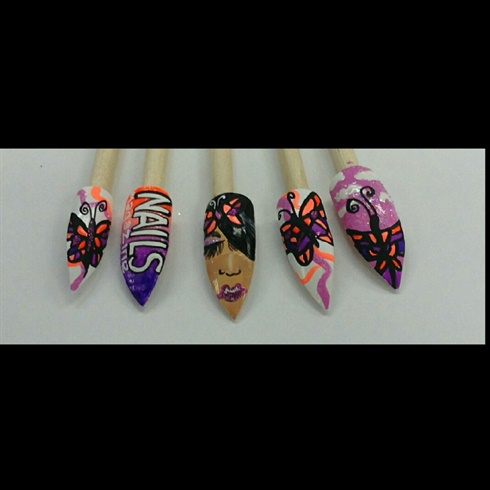
Step 8. Retrace the black lines and outline the word with liner brush. Step 9. Use thin glitter polish to add slight shimmer. Step 10. Apply gel top coat and cure for 2 minutes
5
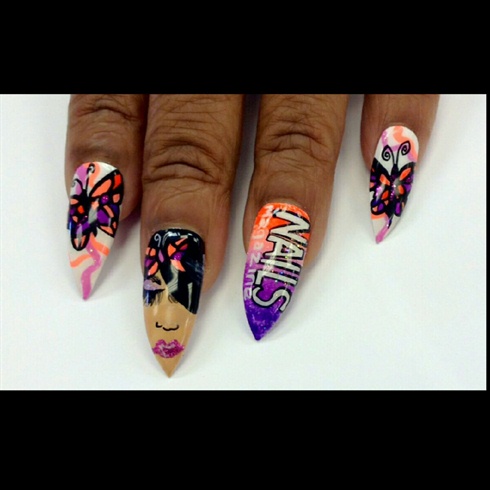
Butterfy Cover Inspired Nails
5 Artists like this Photo
Write a Comment
Submit