This week's challenge, we had to create a 3D Gel piece over 10 individual nail tips, and I picked SIMPSONS OPERATION!
Operation has always been my go to game when I was little. The Simpsons version was released in 2005, and I was all over it....even at this age, yes. Growing up is over-rated!
Enjoy!
Step-by-Step Nail Art Tutorial
1
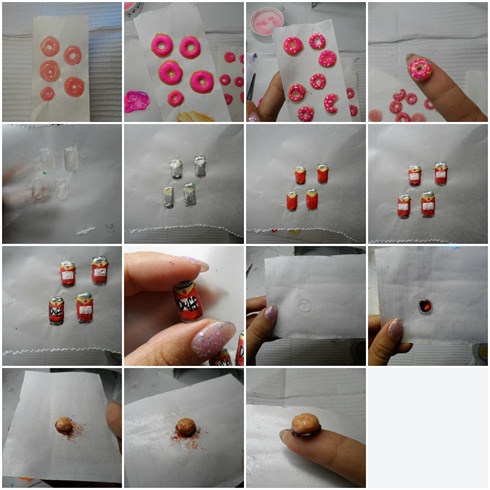
Bits and Pieces- I start out with drawing out the shapes of each item with builder gel and added details with gel polish and acrylic paint. Seal pieces with no wipe top coat
2
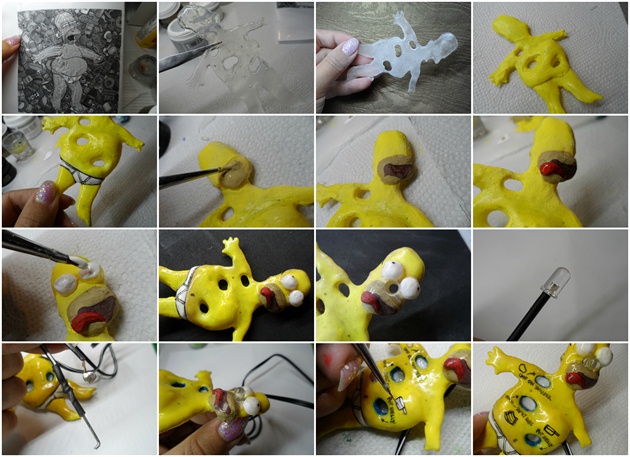
Homer: this is the staple item of this piece! Trace out shape of Homer with builder gel, and add depth and thickness. Drill holes where the "bones" are going to be. Add further details with acrylic paint and 3D gel for depth. I took apart a tiny flash light and rewired them for Homer's nose. Complete the piece by adding description for the "parts" on Homer
3
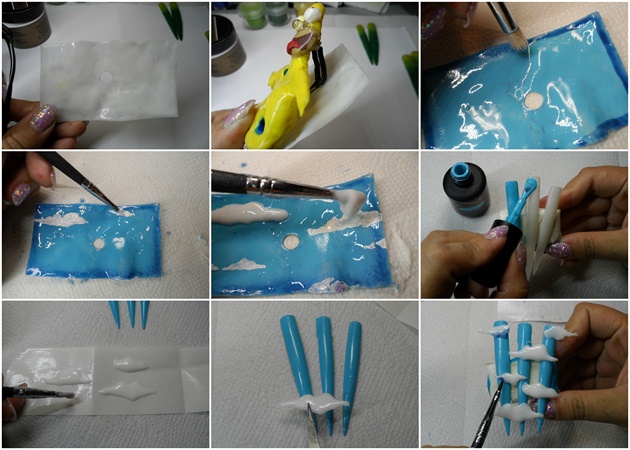
Create a rectangle with white builder gel, and drill a hole in the centre where the wires can thread through. Colour the rectangle blue and add on clouds with white builder gel. Also apply the same technique and design to 3 nail tips
4
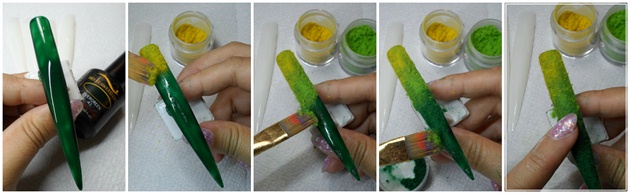
FLOCKING POWDER! Start out by colouring the tips with green gel polish, cure for 10 seconds. Brush on flocking powder in gradient and pat down with finger. Cure for 30 seconds in the LED light.\n\nNow we have grass!
5

Once finished, apply builder gel to the centre nail tip, and attach rectangular cloud. Thread Homer through the hole created earlier and secure. Continue to place bits and pieces onto the 5 nail tips.
6
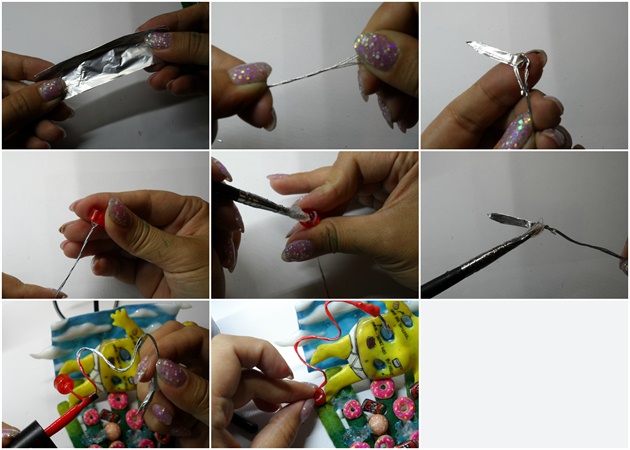
Fold a piece a tin foil, and trim it to the shape of a pair of "tweezers" Attach wires to the end, and connect with the red plastic piece (from the flashlight i took apart earlier). Colour the wires red with red gel polish and attach to the nail tips.
7
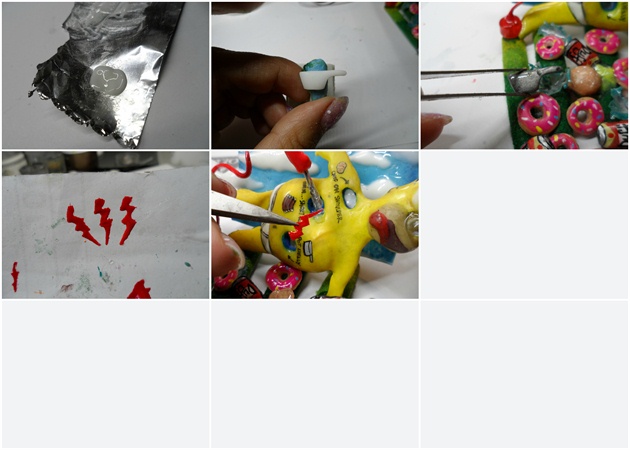
Create the "parts" here you see "chip on shoulder" and "pot Belly". Once that is done, continue to draw out lightning bolts with red gel paint. Cure and attach to Homer.
8

The Simpsons Sign: create the background with white builder gel. Draw out the letter, use straw as handle. Colour, and attach to nail tip.
9
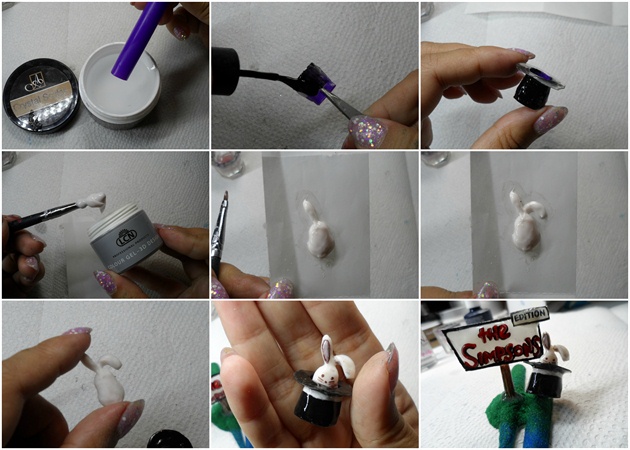
Dip a thick straw into gel, and cure. colour the base of the top hat black and attach rim of the hat created with gel. Using 3D Gel I sculpted the bunny then inserted into top hat coloured and sealed.
10
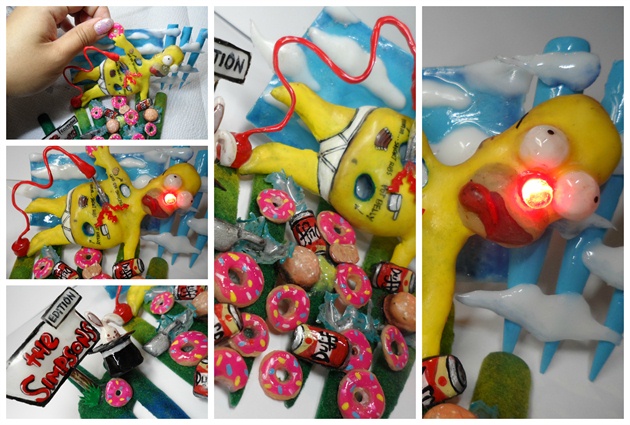
Attach final touches (MORE DONUTS) and connect wires to power source and WE ARE DONE!!! ENJOY!
6 Artists like this Photo
Write a Comment
Submit