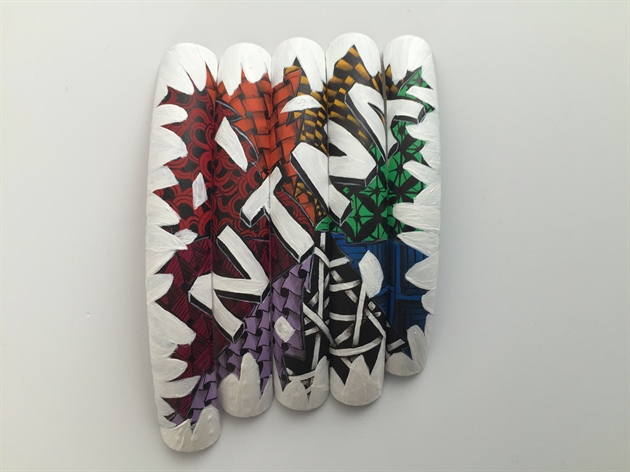
My first assignment from Nails Magazine #nailsntnatop24 "Creative Play" - Play outside the box! The NTNA logo is shattering any creative barriers I may have had. Notice how plain the creative barriers were, just plain white, while hidden behind it is a party of color, technique and possibilities. Using some Zentangle/Zendoodle inspiration I handpainted some backgrounds with shadowing to create depth and interest. Hope you enjoy it. Each element of the design can be used individually for more salon practical art!
Step-by-Step Nail Art Tutorial
1
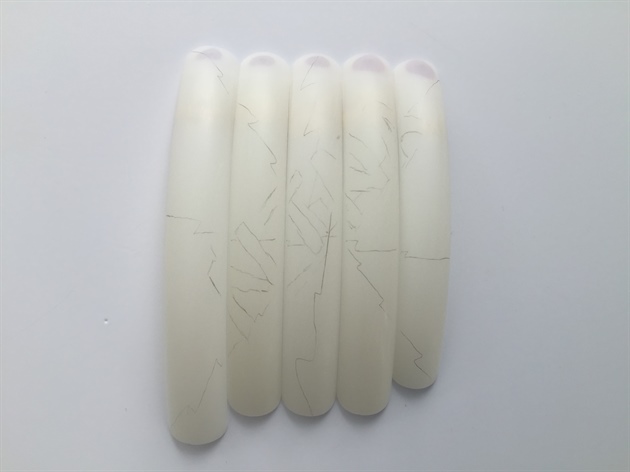
I sketched out the NTNA logo and shattered background in pencil as a guideline.
2
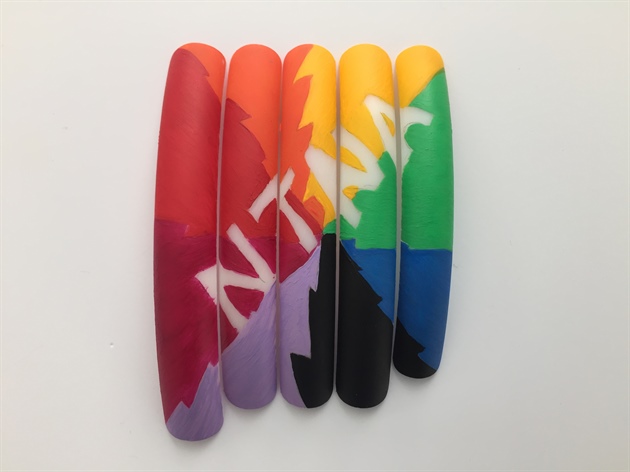
Using brightly colored acrylic nail art paint, I handpainted the individual sections.
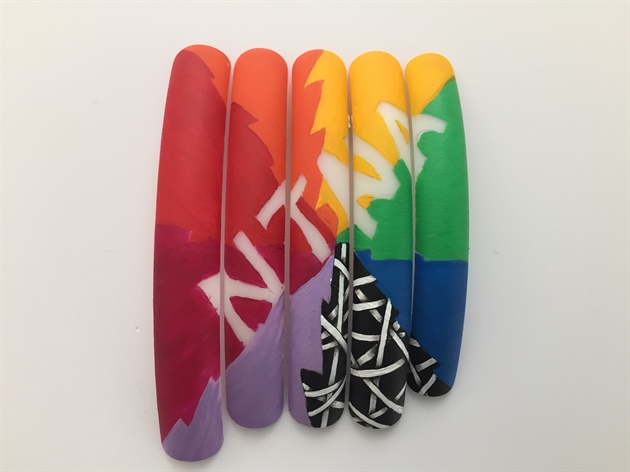
3
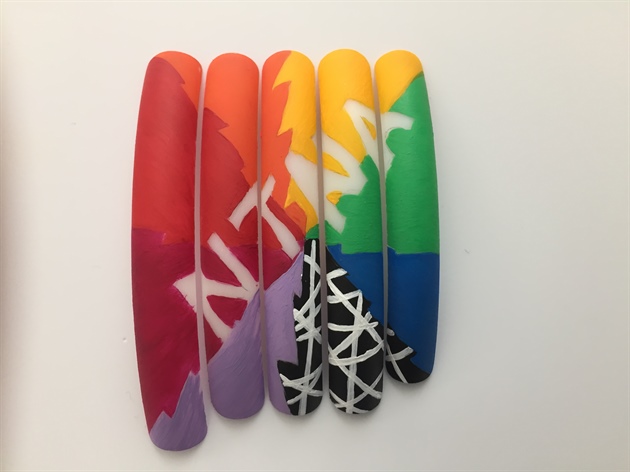
Black section - using white acrylic paint I created random lines criss-crossing one another.
4
Black section - I mixed a black acrylic nail art paint mixed in a 1:1 ratio with black airbrush paint to create a paint that is thinner but with excellent coverage. I outlined the white lines, ensuring that some went under and others over (to create interest) and at the intersections I shadowed with the black paint mix. This creates the effect that the top lines are really higher than their shadowed counterparts.
5
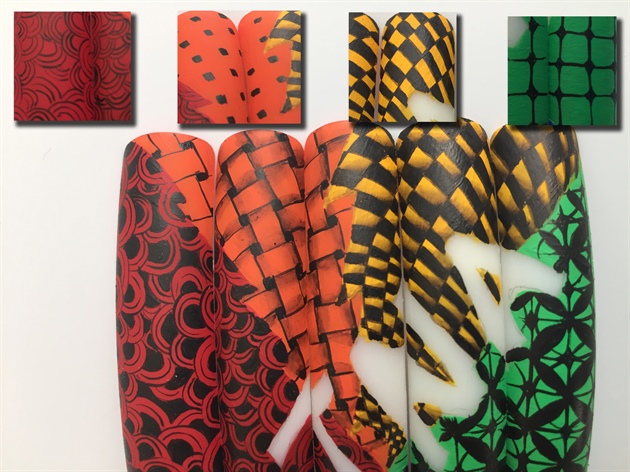
From left to right: Red section - using the previously mentioned black acrylic paint mix I created three fine lines in an arch formation. I continued with this over the entire area and then colored the middle circle in. Orange area - I started off creating tiny squares at equal distances apart. I then joined the lines together - first the inside lines, then the outside lines. From top to bottom and side to side. This creates a woven effect, shadowed with black to create more depth.\nYellow area - I painted arched lines in black acrylic paint mix from the top right hand corner to the center of the tips. I then created arched lines from the right side of the area to the left. I created a checkered effect by painting every second block and shadowed each yellow block in the top right hand corner to create the effect that the design was pulling to that side.\nGreen area - I created an outline of squares using the black acrylic paint mix. I then added circles across each of the four squares. The circles interlocked one another and at these areas I colored in the sections creating a flower type of design.
6
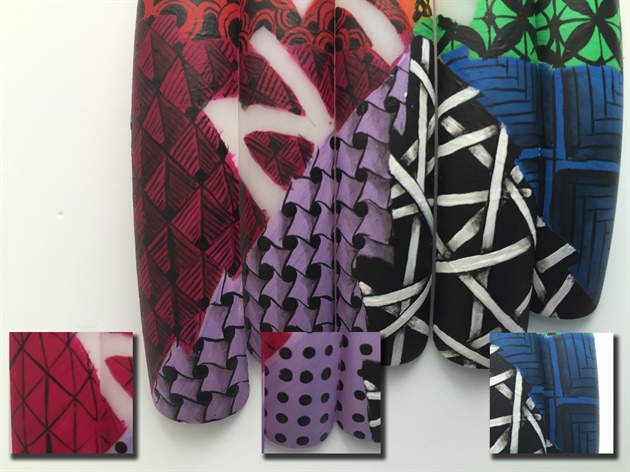
Fuchsia area - Using the black acrylic paint mix I created squares, split them in half and from each triangle that was then created, painted an array of straight lines. In the bottom corner of the square I painted a smaller square and shadowed the right half of the square. Looking in one can imagine you could look INTO the square.\nLilac area - I firstly created rows of evenly spread dots using a dotting tool and the black acrylic paint mix. The task is then, from right to left, to join the dot with a fine line from the top, to the next dot on the bottom (think "s" shape when you do this). Then you need to do the same, but from top to bottom. Once again I shadowed the top right corner of each weave to create depth. Blue section - I started off with two thin lines creating a "+" across the blue section. I then moved from section to section adding a single line. Continue doing this as your squares become smaller but at the same time interwoven. By shadowing the joins of the square, one once again creates some dimension.
7
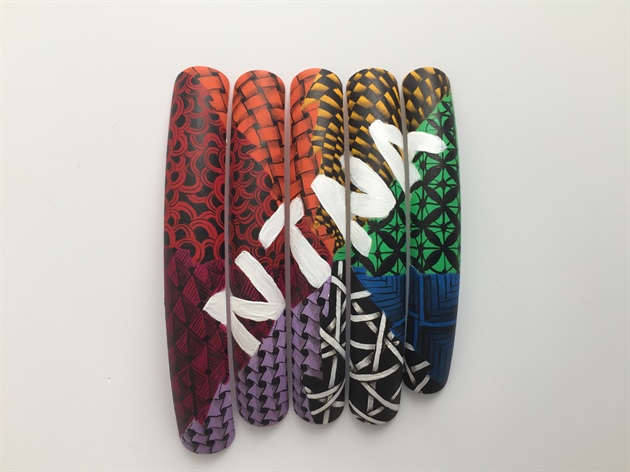
Using white acrylic paint create the NTNA letters.
8
Using black acrylic paint mix outline the NTNA letters and create a shadow in black all leaning towards one side. This can then be outlined with a watered down white acrylic paint just to show the dimensions.
9
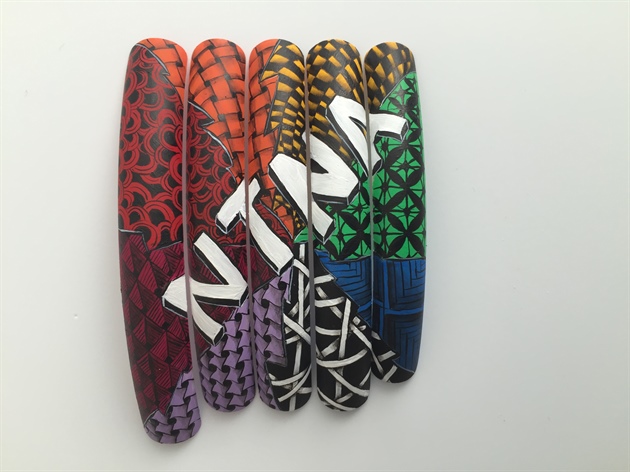
Using white acrylic paint create shards of glass around the design. Allow pieces to layer one another as it will create more of an effect later with shadowing.
10
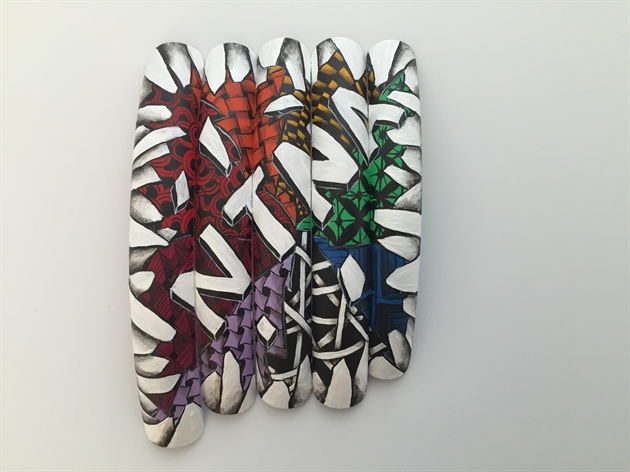
Using the black acrylic paint mix, outline the splinters that are flying around and the shards of glass. Water down the black acrylic paint slightly to create shadows at the intersections of the shards of glass. The shadowing pushes some pieces forward and others towards the background. I have chosen not to seal the design in a top gel to show as much detail as possible!
12 Artists like this Photo
Write a Comment
Submit