This weeks assignment was from Akzentz and we were asked to represent a decade and the colors relevant to that decade and the pop culture references.
Being South African and living in South Africa during the 1990’s, it was all about color. This was the decade where apartheid finally ended, it was the decade where color barriers were broken, it was the decade of change.
Step-by-Step Nail Art Tutorial
1
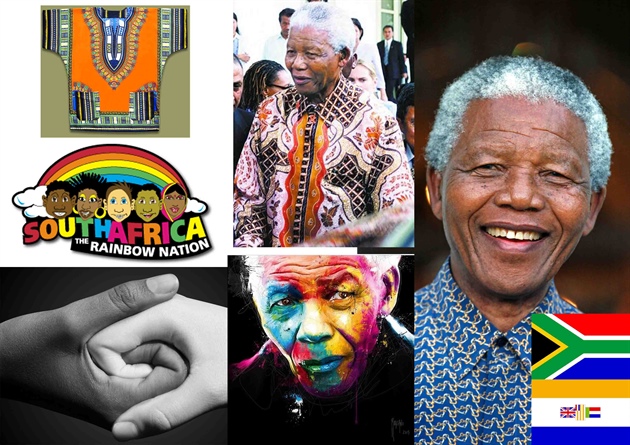
My inspiration for this decade.
2
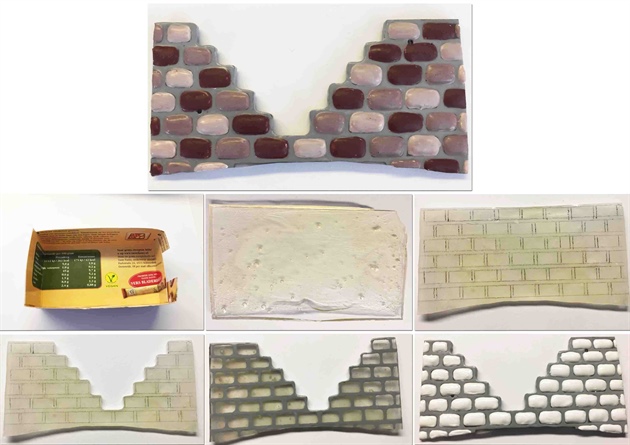
Barriers were being broken everywhere in South Africa. To represent the barrier I created a wall using gel. I created the initial shape out of an old pizza box, cutting it to size and taping the sides so that the gel could not run out.\nI coated the box with cuticle oil for easy removal.\nPour an LED builder gel into the box and cure. This creates the basic structure.\nFile into shape.\nDraw the lines of the bricks.\nUsing an electric file, shape the bottom of the wall to fit snugly onto the tip. Then carve out the middle of the wall along the drawn bricks to make way for people to climb over.\nUsing grey art gel paint the cement around the bricks.\nUsing LED Builder White, add brick to the wall. I have chosen a gel that has the consistency of a paste to keep it in position and create the 3D effect.\nUsing brown acrylic paint in different tones color in the bricks.\nSeal the entire wall with Matte Top Coat.\n
3
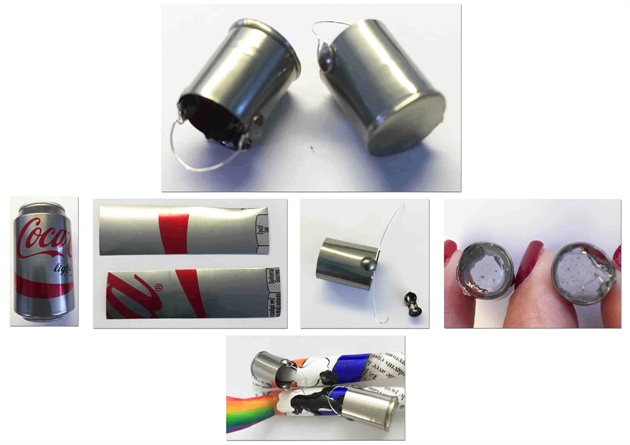
Coca Cola was one of the companies that boycotted South Africa during the apartheid so I used the Coca Cola tin to create my paint tin.\nAfter cutting out two strips, I soldered them together.\nUsing jewellery studs and metal wire I could create the handle on the paint tins.\nI loved working with gel on this piece as I could simply dunk the bottom part of the tin into a LED Builder Gel and it seal it. Cured in the LED light and using Chrome gel polish I finished off the bottom of the tin.\nThe tins were placed as though they had been knocked over with paint running out of them. For this I used a LED White Builder Gel and a Black color gel.\n
4
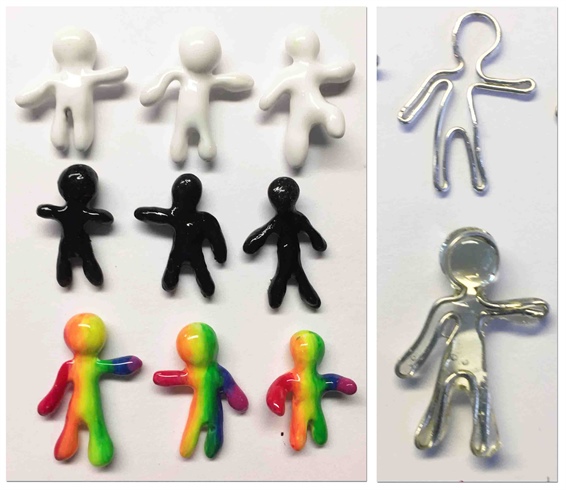
I wanted to create people, but not focus on their faces, just their color as that is what this period was all about. \nUsing metal wire I bent it into different shapes to create my base.\nThese were then dunked into LED Builder Gel clear in two steps, first the bottom, then cure, then the top and cure. The gel gave the little people lovely rounded shapes.\nThe people were then painted with white, black and a combination of colored color gels and sealed.\n
5
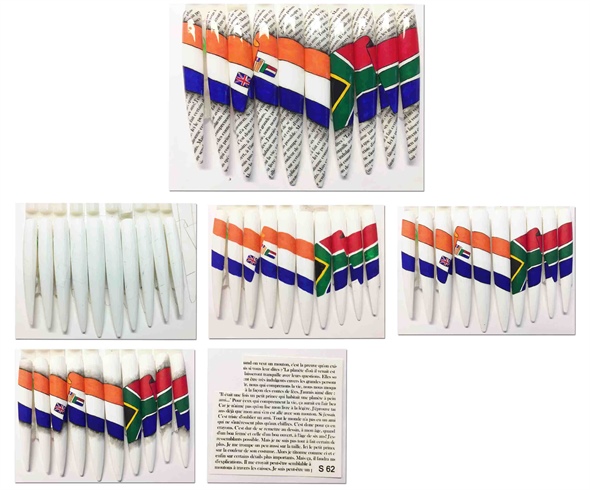
This was all happening in South Africa, however the progress was being followed worldwide. With that being said I decided to use the old South African flag and the new South African flag as my background. It was during this period that South Africa changed flags, so it was especially relevant.\nI first pencilled out the flags on all the tips.\nUsing acrylic nail art paint I added the colors to the flag.\nThese were then outlined using an acrylic nail art paint and microliner.\nWith this same black acrylic paint, watered down to reduce the pigment I added shadows around the flags to make them really pop.\nI mentioned about that this was world news. It was also the moment when the history books for South Africa would change forever. I found it fitting to use Water Transfer Tattoos to create the backround with text to depict that. These were secured using a Soak Off Base Gel.\nThe entire design is sealed with a No Cleanse Top Gel.\n
6
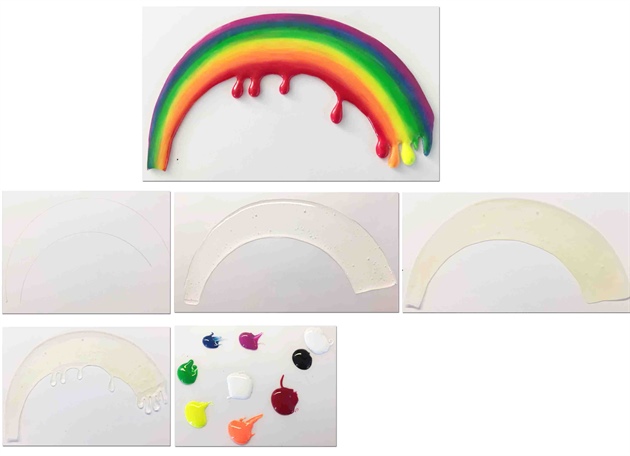
South Africa is now known as the “Rainbow Nation” and it is for that reason that I included the rainbow. The reason that the rainbow has paint dropping from it is to symbolize that the process began during this decade, however it is fresh and it is still not finished yet. \nI drew the outline of the rainbow and inserted it into a plastic sleeve in order to create the gel rainbow on it and for easy removal.\nUsing LED Clear Builder Gel I created the basic shape of the rainbow according to the outline and cured it.\nOnce cleansed I could shape the outline to get the perfect curve using a nail file.\nAdditional beads of LED Clear Builder Gel were added randomly in the shape of drops to create the effect mentioned above. \nUsing the rainbow colors in Art Gel I created an ombre effect on the rainbow. Starting with the purple at the top and then at each stage pulling the next color through the first to get the overlapping effect. None of the layers were cured until all the colors were added and blended.\nThe design is then sealed using a No Cleanse Top Gel.\n
7
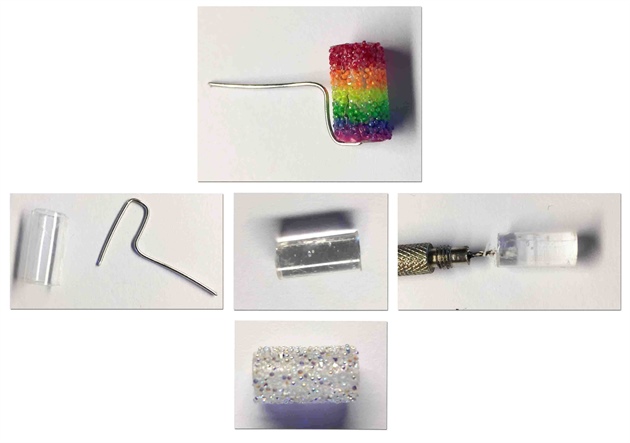
Nelson Mandela is holding a paint roller as he was the artist during this period.\nThe handle of the roller is created by using a piece of metal wire bent into shape.\nThe roller is created by using a plastic brush cap, cut into shape, placed upright and filled with LED Clear Gel.\nOnce it is cured I used a hand drill to drill through the roller for the handle to fit through.\nThe structure on the roller is created by rolling the roller in LED Builder Gel Clear and then sprinkling Crystal Pixie onto it. Cure.\nI then used the Art Gels in the same colors as the rainbow to add color to the roller.\n
8
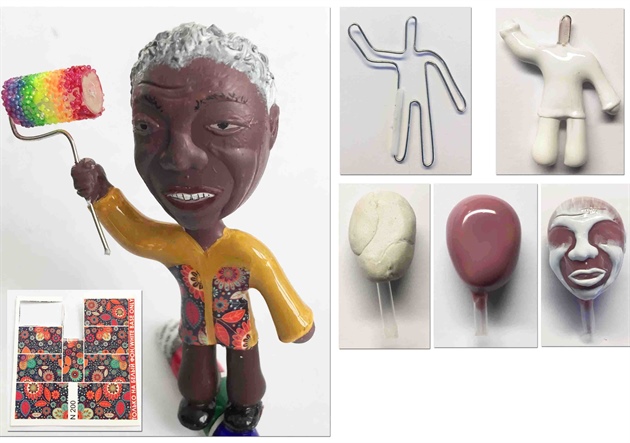
Last, but certainly not least we have Madiba or Nelson Mandela. He is the biggest part of this decade and thus the biggest part of my piece. He was instrumental in bringing change to South Africa.\nHis body is created using metal wire as the frame which is then sealed with a LED Builder Gel with a very thick viscosity to be able to shape it without it running.\nThe entire body is then coated with a LED White Builder Gel to smoothen any imperfections.\nFinal details on the body like the hem of the shirt and the ends of the sleeves were added using a LED White Gel Paste, once again a gel with a thicker consistency for easier shaping.\nFor the head, I used Blue Tack placed on a plastic brush cover. This was coated with LED Cover Gel to create the basic shape.\nUsing a LED White Gel Paste I added the distinguishing details onto Madibas face before painting it with acrylic nail art paint.\nMadibas hair was also created using the LED White Gel Paste with the addition of black Art Gel to give him that salt and pepper look.\nIt could never be Madiba without his outrageous shirts so I created this with the help of a Water Transfer Tattoo. The rest of the outfit was finished off with Art Gel.\n
9
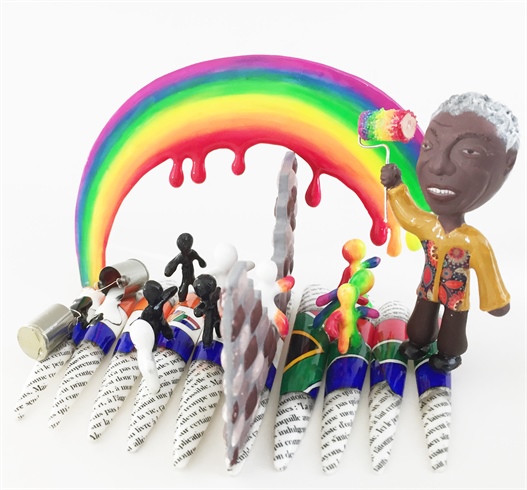
The Rainbow Nation.
10 Artists like this Photo
Write a Comment
Submit