I am hoping that with this design, the nail techs see that not everything is what it seems. I want them to see that each item has several possibilities, so in doing that I have created a Steampunk-Recycled Floral Bouquet for your viewing pleasure.
I am hoping that this design allows you a second glance at any item you may want to throw away and see the endless possibilities it may create. Happy hunting!
The Steampunk-Recycled Floral Bouquet - not for the faint-hearted, designed for the fearlessly fabulous, yet feminine among us.
Step-by-Step Nail Art Tutorial
1
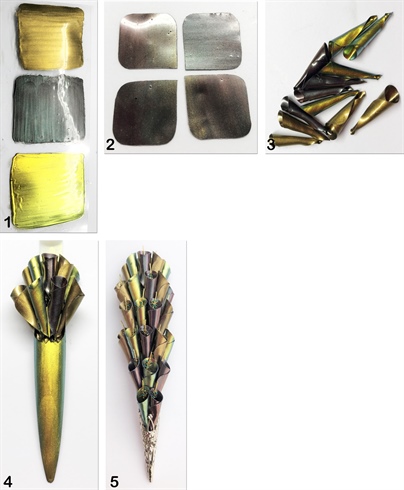
1. Create several gel squares by applying a layer of black LED Gel, sponging it with Chrome powder and sealing it with Top Gel. 2. Cut the gel squares into shape as seen above. 3. Roll the gel parts into funnels and hold them in this shape with resin. 4. Attach the funnels onto a tip randomly with LED gel. 5. Insert metal wire into each funnel and enhance with metal beads to create pollen.
2

1. Create texture on the tip by applying a piece of lace to the tip and securing it with LED gel. 2. Apply a second layer of LED gel over the lace. Cure and dust on several rustic color Chrome powders. 3. Using Black acrylic polymer, create petals on Arabella Forms. 4. Place these onto the tip to create a flower. Coat these with Black LED Gel and dust them with the rustic Chrome powders. 5. Create leaves from metal strips. 6. Hunt in the garage for spare parts. 7. Apply these randomly to the tip to reinforce the Steampunk design.
3
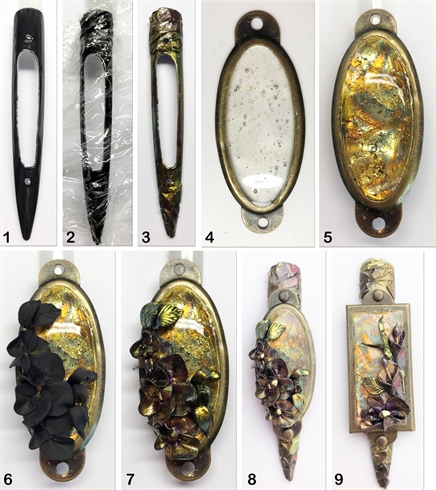
1. Apply a layer of Black LED Gel to the tip. 2. Apply a medium layer of LED gel to the tip and place a wrinkled piece of clingwrap plastic into the gel. Cure. 3. After removing the clingwrap, dust the rustic Chrome pigments into the surface. 4. Fill a miniature picture frame with LED Clear Gel. Cure. 5. Apply rustic gold flakes to the tacky surface and seal the frame in a dome form with LED Clear Gel. 6. Create a floral bouquet with Black acrylic polymer and using a mix of monomer and acetone, create more flexibility in the product to be folded and draped. 7. Coat the flowers with Black LED Gel and dust off with rustic Chrome pigments. 8 + 9. Attach the frames to the base nail.
4
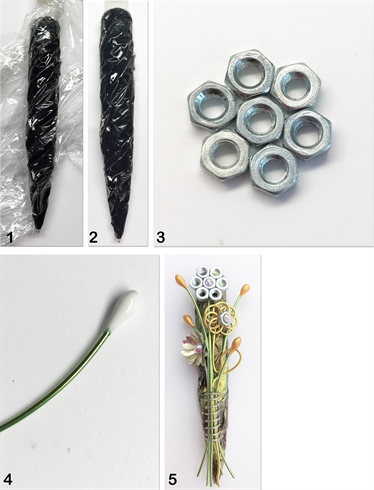
1 + 2. Create the jagged structure using the technique discussed in the previous step. 3. Using various nuts and metals create flowers. 4. Dip a piece of metal wire into LED White Gel to create stamens. Cure and dust off with gold Chrome pigment. 5. Insert the Steampunk flowers into the spring and secure with LED Gel. Steampunk bouquet.
5
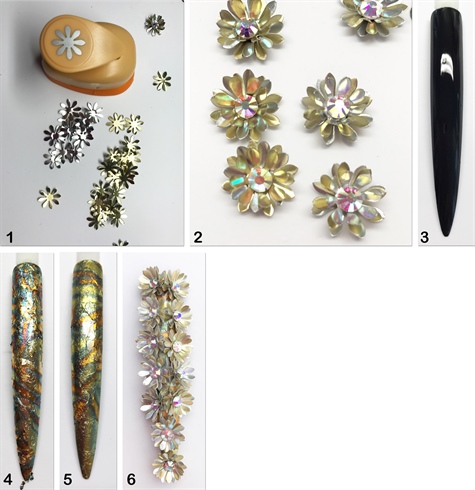
1. Using gold and silver metal sheets, stamp out daisies with a paper punch. 2. Apply three layers of daisies and hold into place with resin. 3. Apply a black LED Gel to the tip. Cure. 4. Attach rustic gold flakes to the tacky surface. 5. Seal with LED Gel. 6. Attach the flowers using LED Clear gel.
6
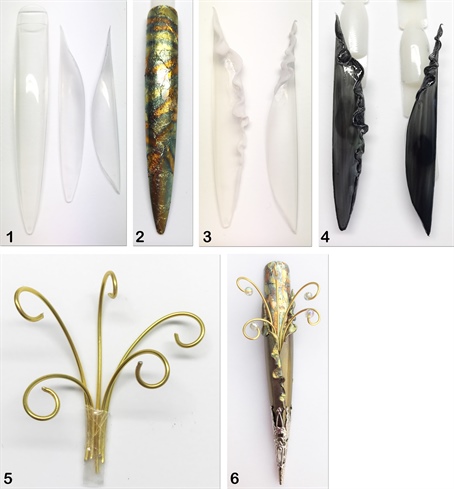
1. Cut two extra tips into overlapping shapes. 2. Seal the tip as discussed in the step above. 3. Using acrylic polymer and monomer and acetone mix, create the edges of the petals of the flower. 4. Seal tips with black LED Gel and dust off with rustic Chrome pigments. 5. Curl wire strips and insert beads onto the heads to create stamens. 6. Metal stiletto cap defines the stem of the flower.
7
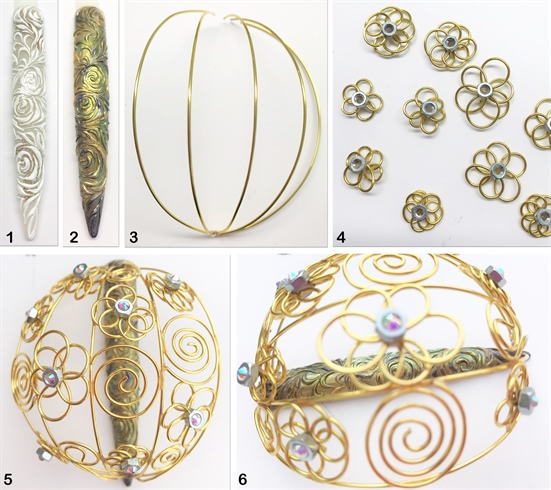
1. Create an embossed rose design using Gel Paste. 2. Dust off with rustic Chrome pigments. 3. Create the dome with metal wire. 4. Create floral elements by rolling metal wire around pinching sticks and flattening them. 5 + 6. Attach the flowers and curls to the dome with LED Gel.
8
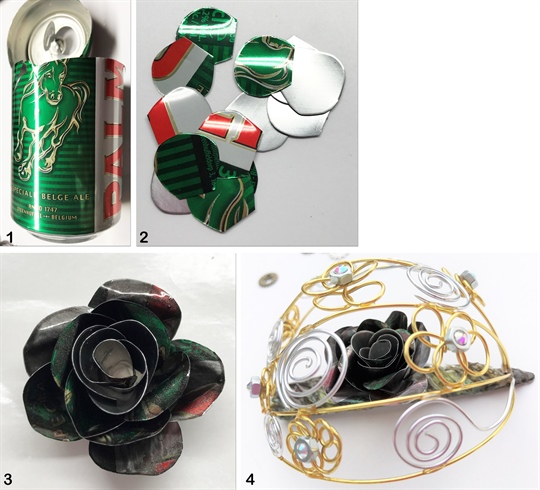
1. Not encouraging drinking or promoting a brand, just using the can to promote recycling! 2. Cut even sized pieces of the can as shown above. 3. Mix a small amount of bronze Chrome pigment into a Top Gel and coat the surface of the petals to take on a more rustic look. Bend the petals into shape to create a rose. Hold petals into place using LED gel. 4. Protect the rose with the metal dome.
9
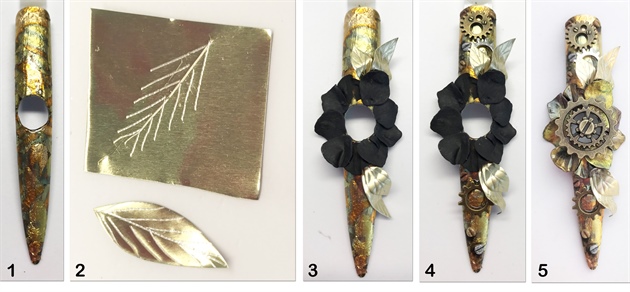
1. Seal the tip with rustic gold flakes. 2. Draw out the veins on the leaves with a scissor point and cut into shape. 3. Place the acrylic petals around the hole. 4. Add cogs and create screw heads using acrylic polymer in various rustic colors. 5. Dust off the petals with Chrome pigments and insert the cog as the center of the flower.
2 Artists like this Photo
Write a Comment
Submit