My LA French manicure is inspired by the glitz and glam of Hollywood. It represents the classic beauty of old world Hollywood with a fresh, modern day twist. It's versatile enough to wear during the day and easily transitions to an elegant evening manicure just like Orly's original French mani. I used a combination of gel polish, nail polish and acrylic paint to create this design. Here's how you can get this look...
Step-by-Step Nail Art Tutorial
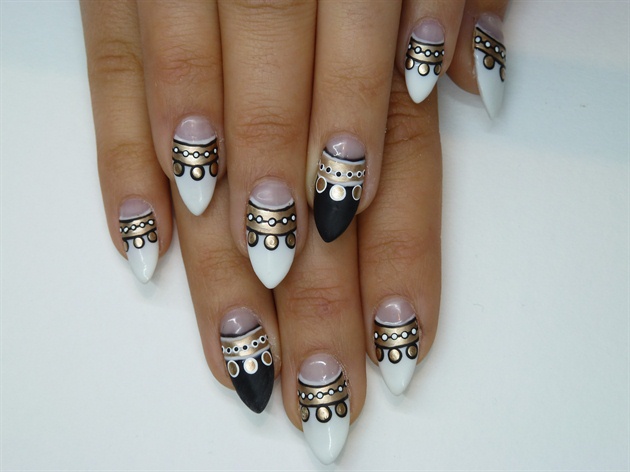
1
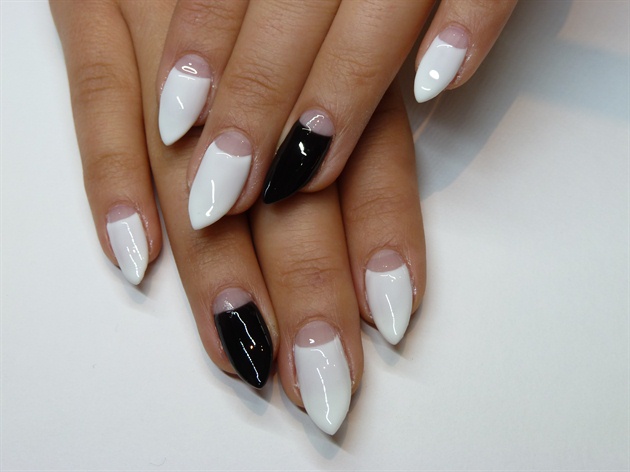
Clean and prepare nails for application. Begin by applying your half moon french using gel polish and cure. I have chosen white for all of the nails except for the ring fingers, where I have used black to create a feature.
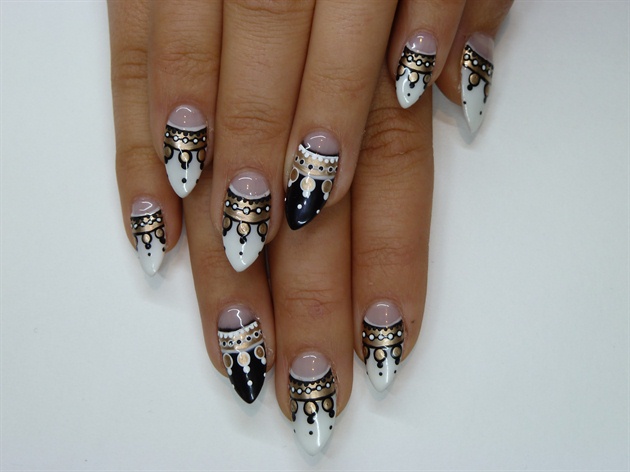
2
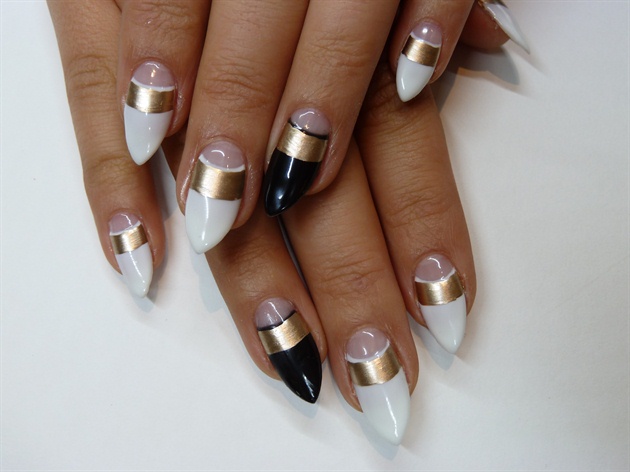
Apply a section of gold on each nail using polish and allow to dry.
3
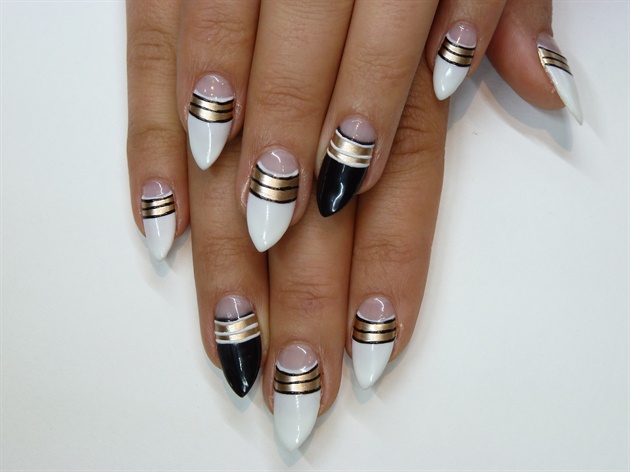
Using gel polish, paint three vey thin black lines(white for ring fingers) widthways on your gold polish.
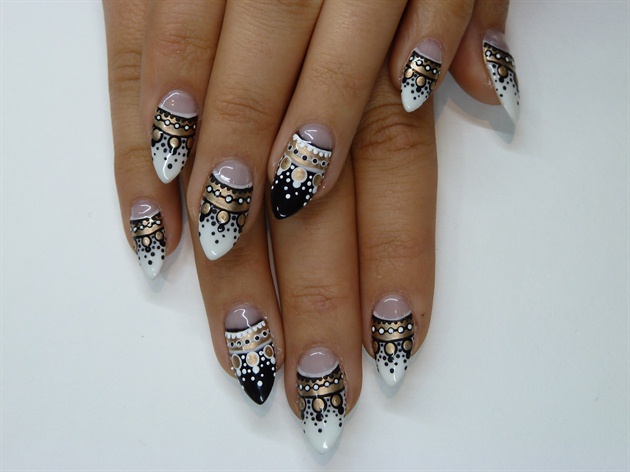
4
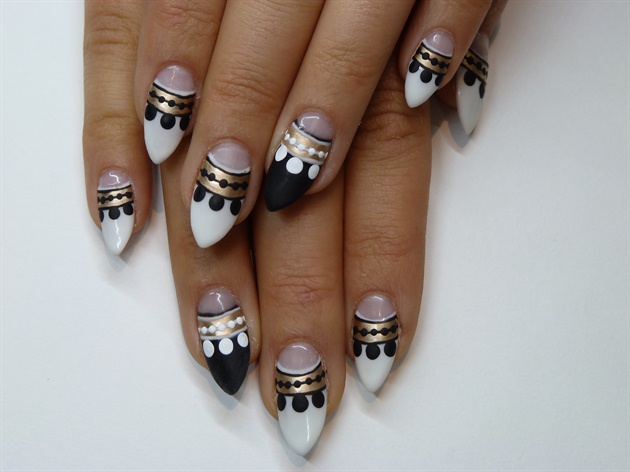
With a double ended dotting tool (two sizes) and either polish or acrylic paint apply small black dots through the centre line and three large dots (droplets) below the gold section. (Remember to use the opposite colors for the ring fingers.)
5
Apply a tiny white dot to the centre of each black dot you created in the previous step and a smaller gold dot into the three droplets.
6
Create a scalloped edge effect by applying more dots to the top black line and add some additional dots close to the free edge as pictured.
7
Next apply some very small dots to outline and highlight your droplets.
8
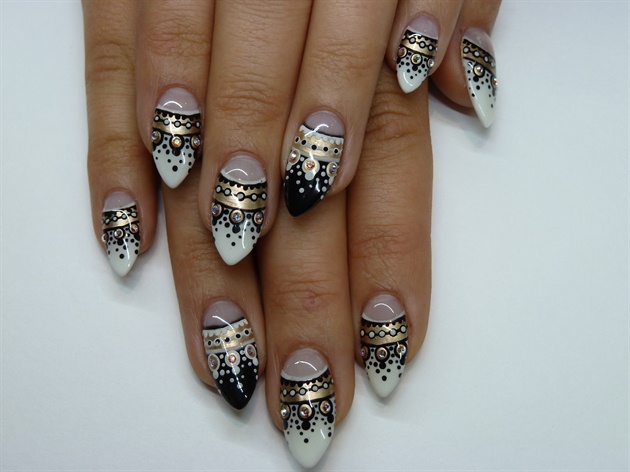
Finish your design with top coat gel polish and complete the look with some ss3 sized Swarovski crystals to the three droplets on each nail to add a touch of bling.
173 Artists like this Photo
Write a Comment
Submit