This week's challenge is sponsored by Minx and their newest collection "Backside". We were asked to create a set of nails on the front with a coordinating design on the back as well. I chose to do a girly punk rock look complete with hot pink, black, studs, plaid, and of course a 3d glow in the dark skull. I used a mixture of lacquer, gel polish, and acrylic paints to complete this look, as well as various hand made and pre made 3d elements.
Step-by-Step Nail Art Tutorial
1
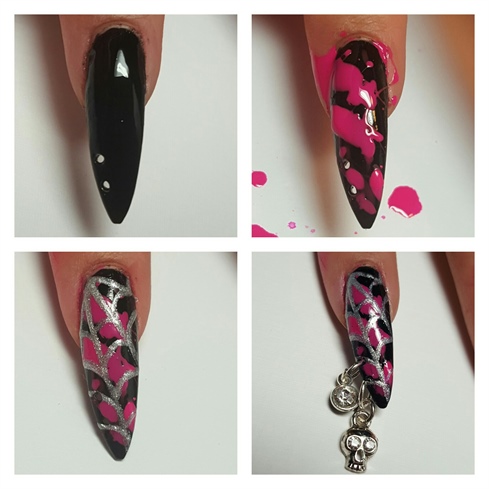
I began by using a nail piercing bit to drill two holes in the side of the nail. Then did two coats of black polish. I thinned down the neon pink polish and splattered it across the nail. Then using a metallic silver polish and a striper brush I painted on the spider web. The final touch were adding the two charms through the holes created at the beginning.
2
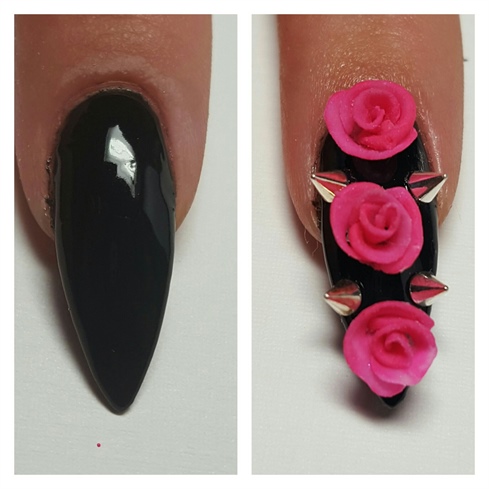
I began with black polish and let it dry. The roses are hand made from a custom mixed acrylic to match the polish. I adhered the spikes and roses with nail glue.
3
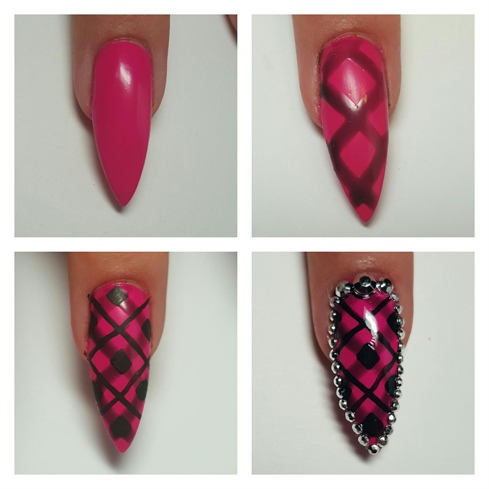
I started with a hot pink polish and let that dry. I then made a mix of black and clear gel polish to create the thick transparent black lines. Then added the rest of the black details with black acrylic paints and finished with a border of silver studs.
4
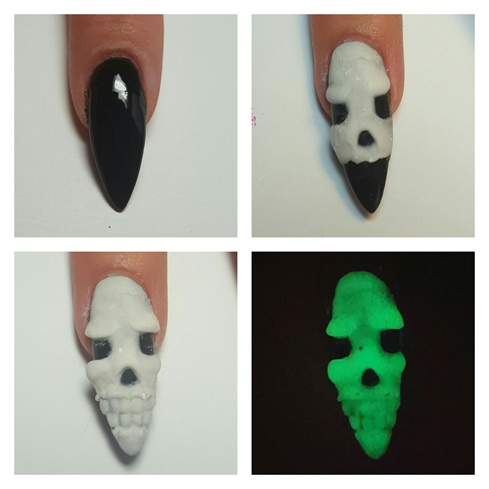
First I did two coats of black gel polish. Then taking a glow in the dark white acrylic created my 3d skull. Details done using a size 2 acrylic brush and silicone tools.
5
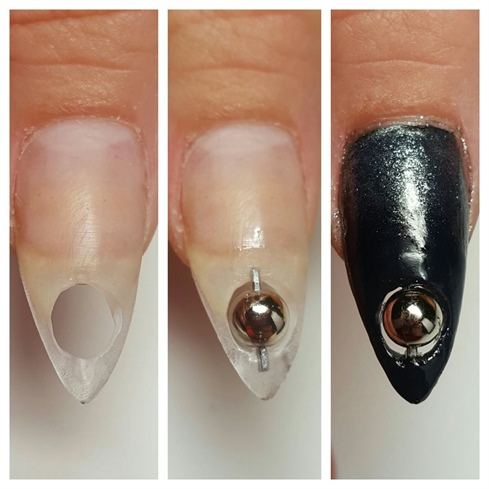
First I began by making the hole with different carbide and diamond efile bits. Then I placed the bead on a small metal piece and encapsulated the ends with acrylic. Then I polish with two coats of black polish and ombre'd the nail with a black metallic polish and a make up sponge.
6
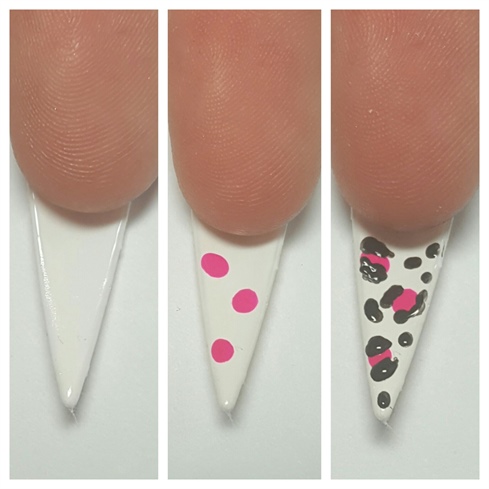
The underside is a simple, complementary cheetah print. I began with a white polish, then made small dots of the hot pin used on other nails and then added the black spots with acrylic paints.
9 Artists like this Photo
Write a Comment
Submit