beauty schoolPhotos
2598
0
6
Posted on 02-18-2013
Spring Floral
by NinaB
Posted on Apr 13, 2024
17 Views | 0 Likes 0 Comments
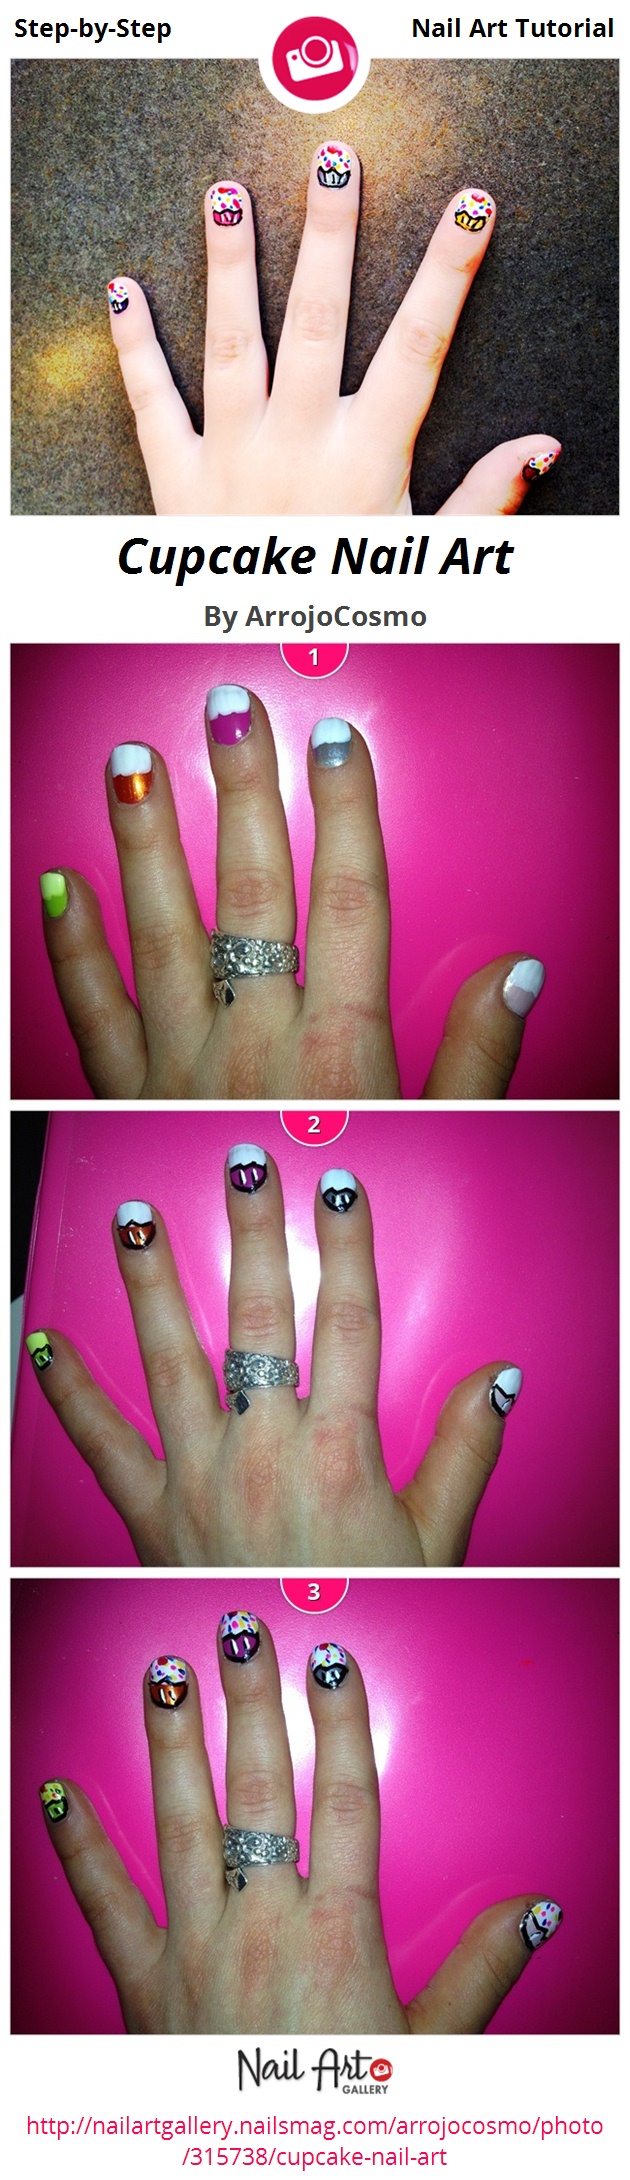
<a href='http://nailartgallery.nailsmag.com/arrojocosmo/photo/315738/cupcake-nail-art?ref=side-embed'><img src='http://s3photo.nailartgallery.nailsmag.com/7fc549ee-b42d-4055-9a07-0d4ae1487179_set.jpg' alt='Cupcake Nail Art - Nail Art Gallery' /></a> Copy and paste the embed code above to put this step-by-step nail art tutorial on your web site.
Start with clear base coat, then paint each nail a different color. This will be the cupcake wrapper. Then paint the top half with white to create cupcake icing.
Next, use a thin brush to outline the wrapper with black. Add small black and white lines to create detail.
Then, use a small dotter or brush to add sprinkles in a variety of colors. Add a red cherry on top to complete the look.