#entitybeautyPhotos
1063
0
Posted on 09-18-2013
Spring Floral
by NinaB
Posted on Apr 13, 2024
17 Views | 0 Likes 0 Comments
<a href='http://nailartgallery.nailsmag.com/ashley_g_nails/photo/340230/youve-always-been-mysterious-ntna?ref=side-embed'><img src='http://s3photo.nailartgallery.nailsmag.com/42fcda8b-14c1-424e-b2ad-5a29003e3f53_set.jpg' alt='You've Always Been Mysterious - NTNA - Nail Art Gallery' /></a> Copy and paste the embed code above to put this step-by-step nail art tutorial on your web site.
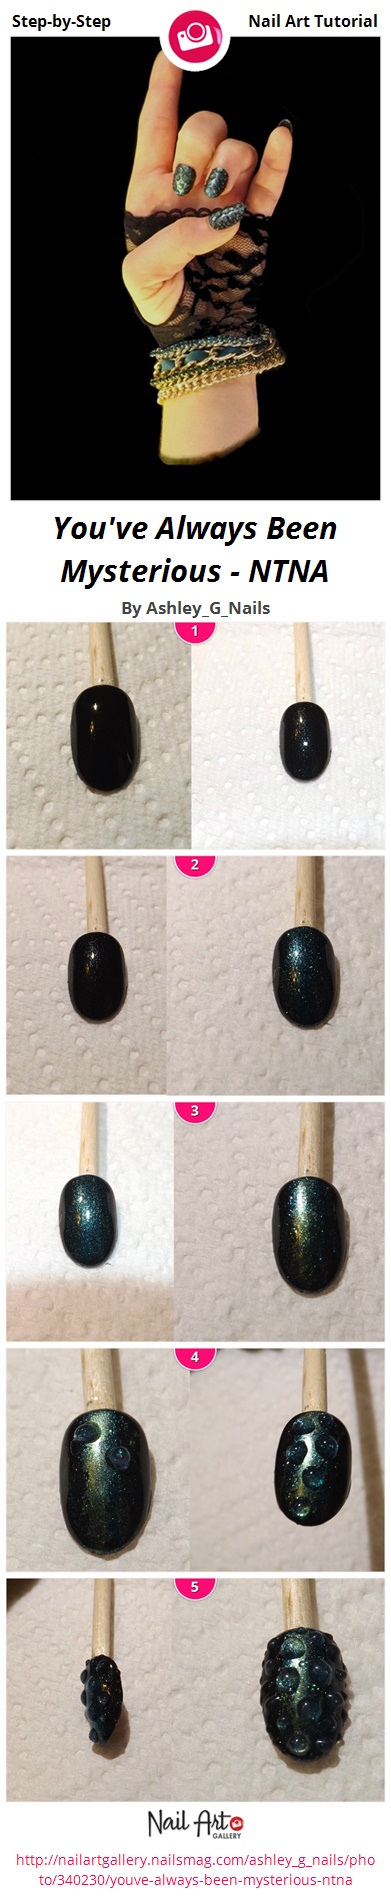
Begin with a prepped nail. Apply gel polish basecoat and two coats of a black gel polish.
Using a dark green shimmer gel (like Entity 1 Color Couture in Sea Me On The Marquee) apply a thin coat across the nail, leaving the sidewalls black. Apply a second coat just to the center third of the nail.
Using a turquoise jeweled gel polish (like Entity 1 Color Couture in Jewel Tones) apply a thin coat of color just at the center of the nail, creating an ombré effect from the center to the sides. Apply second coat in thin stripe at center of nail.
Apply gel top coat to the nail and cure. Remove tacky layer. Begin applying large dots of a non-levelling sculpting gel to the center of the nail. Flash cure to set. As you work your way outwards, make the dots smaller.
Place smaller and smaller gel dots on the outer edges of the nail plate. Flash cure after every few dots to avoid gel running together. Once finished placing gel dots, cure and remove tacky layer. You're done!