BeautyBySuzi'sPhotos
4849
1
14
Posted on 09-02-2013
Spring Floral
by NinaB
Posted on Apr 13, 2024
17 Views | 0 Likes 0 Comments
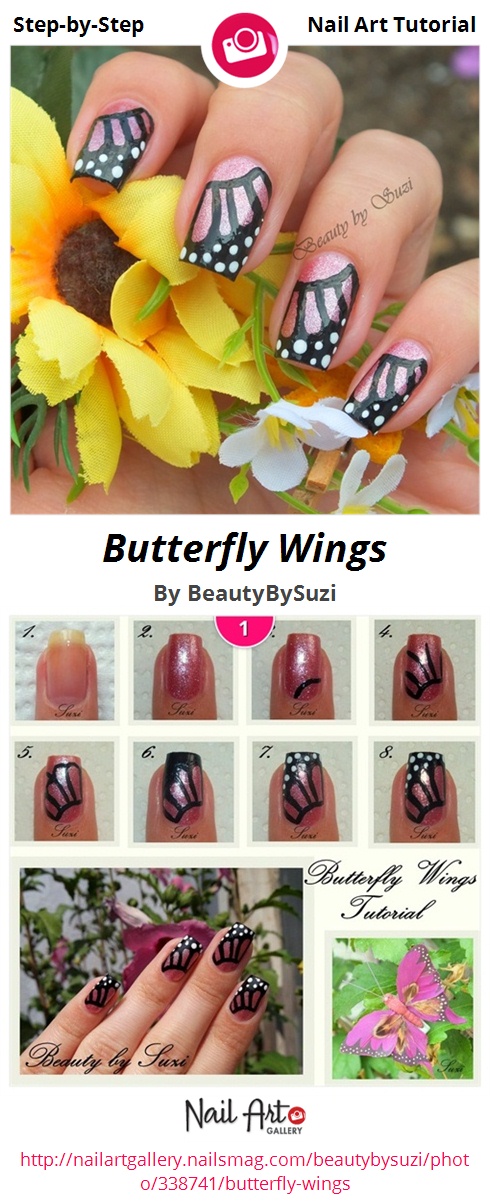
<a href='http://nailartgallery.nailsmag.com/beautybysuzi/photo/338741/butterfly-wings?ref=side-embed'><img src='http://s3photo.nailartgallery.nailsmag.com/55061dfe-d430-4290-bad8-7bee0eec1c07_set.jpg' alt='Butterfly Wings - Nail Art Gallery' /></a> Copy and paste the embed code above to put this step-by-step nail art tutorial on your web site.
1. Apply a base coat.\n2. Apply select nail polish and let it dry.\n3. Paint an arc with nail art brush.\n4. Then paint some stripes...\n5. ... and connect them with small arcs.\n6. Paint black a tip of the nail and let it dry.\n7. Make some dots on the black part and let it dry.\n8. Apply a top coat.