Beautynailz8'sPhotos
1195
0
1
Posted on 06-19-2014
Sun and Flowers--Toes
by Cr8tive1
Posted on Apr 8, 2024
22 Views | 0 Likes 0 Comments
Sun and Flowers
31 Views | 0 Likes 0 Comments
Spring Floral
by NinaB
Posted on Apr 13, 2024
6 Views | 0 Likes 0 Comments
<a href='http://nailartgallery.nailsmag.com/beautynailz8/photo/364498/bow-polka-dots-nailart?ref=side-embed'><img src='http://s3photo.nailartgallery.nailsmag.com/f1f0f720-dede-4e40-a927-e2ce01b26805_set.jpg' alt='Bow & Polka Dots NailArt - Nail Art Gallery' /></a> Copy and paste the embed code above to put this step-by-step nail art tutorial on your web site.
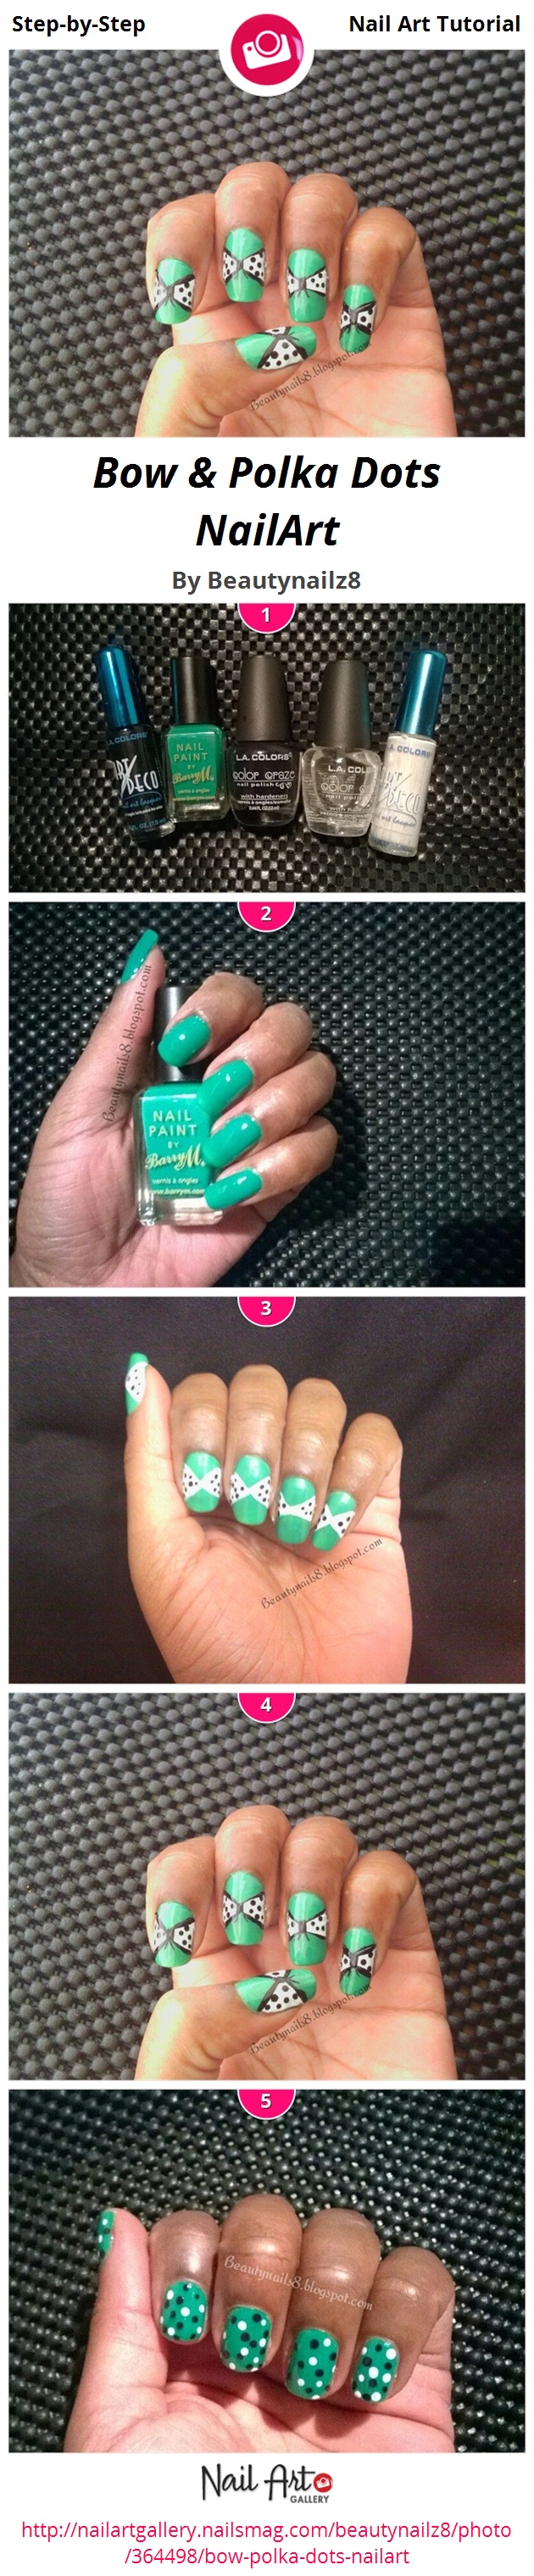
Products Used:\n\n* Art Deco black NA902\n*BarryM Spring Green NP290\n*L.A Colors Circuits NP412\n*\nL.A Colours top coat\n*Art Deco white NA901
Apply 2 coats of Spring Green 290 by BarryM
Paint a Ribbon/Bow with a thin brush or an Art Deco by painting two triangle shapes side by side\n*Fill in the inside as well with white nail polish\n*Use tooth stick to make the dots using black nail polish
To make the bows stand out outline them with black Art Deco
After doing step one,\n*Place few drops of the white and black nail polish on a parchment paper.\n* Take a small amount of nail polish using a tooth stick and create dots on the nails.