tutorialPhotos
976
0
14
Posted on 11-09-2016
Spring Floral
by NinaB
Posted on Apr 13, 2024
17 Views | 0 Likes 0 Comments
<a href='http://nailartgallery.nailsmag.com/bnailmaster/photo/458050/velvet-roses?ref=side-embed'><img src='http://s3photo.nailartgallery.nailsmag.com/6a3f8264-c9f2-4d25-9f1f-8753b684f0b7_set.jpg' alt='Velvet Roses - Nail Art Gallery' /></a> Copy and paste the embed code above to put this step-by-step nail art tutorial on your web site.
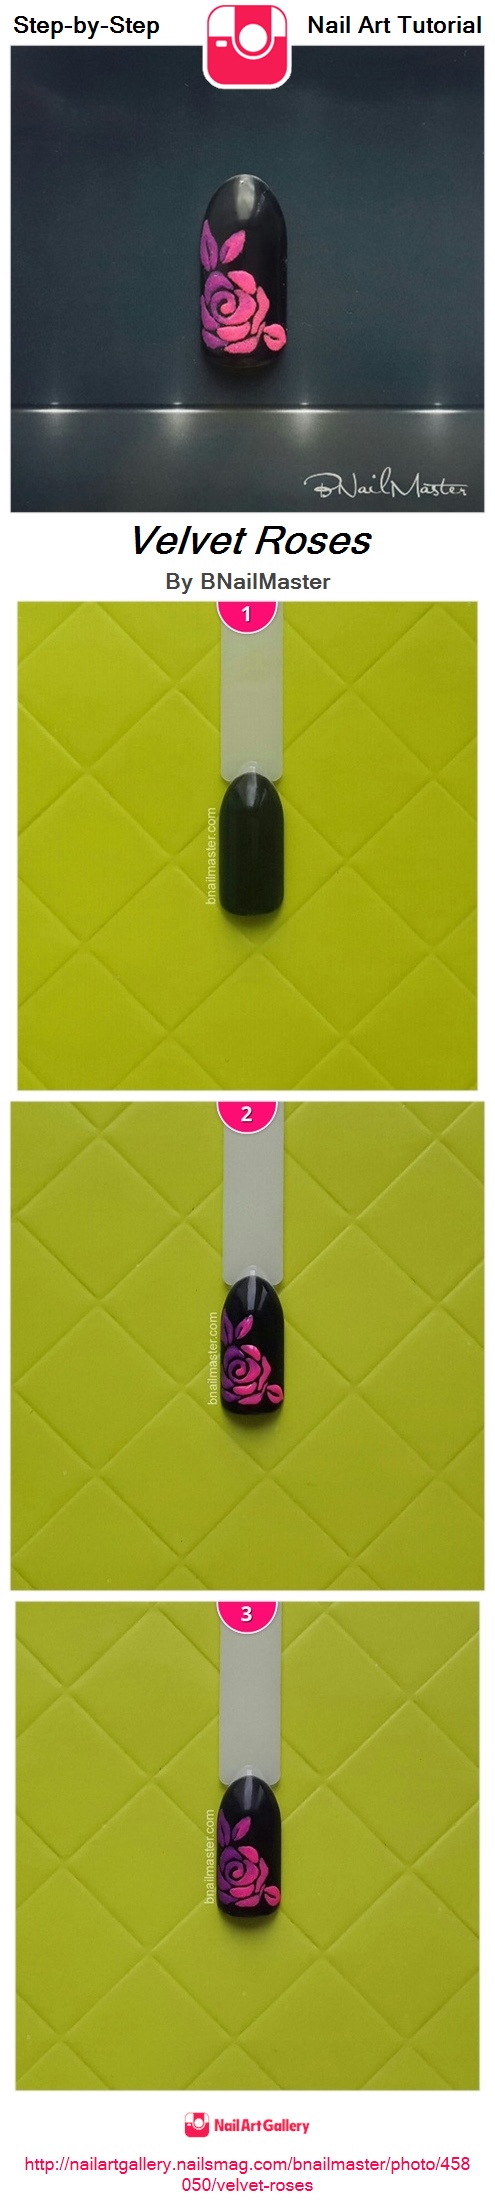
1) Start with nails prep\n2) I applied two layers of a black gel polish and cured each of them\n3) Then I topcoated the nail, cured and carefully removed the tacky layer\n
4) I used neon pink and neon violet gel polishes to paint my rose. (Do not cure!)
5) I poured clear acrylic powder on my painting and cured\n6) Finally, I swept the remains of acrylic powder from the nail using a brush\nVelvet roses design is done!\n