Telegraph to:
Schwab’s Pharmacy
8024 Sunset Boulevard, Hollywood
Dear Mr. Sidney Skolsky,
Photoplay is my favorite column in the New York Daily News, “From A Stool At Schwab’s.” Your description of Marilyn Monroe arriving at Ciro’s nightclub, the hottest club in Hollywood, featuring the Who’s Who of American entertainment, made me feel like I was there dancing on the dance floor to the big band sounds of Glenn Miller or Benny Goodman. Thank you for describing the excitement of life on The Sunset Strip to all of America to enjoy through your eyes.
Happy Holidays!
The rich history of The Sunset Strip is the perfect location to showcase the ORLY upcoming holiday collection. From its early roots as a poinsettia farm, this mile and one-half stretch of rolling hills in West Hollywood California became known as The Sunset Strip which quickly grew into the playground of Hollywood’s most famous celebrities.
Any Hollywood star of tomorrow, rocking the 1950’s Marilyn Monroe inspired diamond feathered starlet brooch nails would certainly gain entrance to the likes of glitzy clubs like Ciro’s, Macambo, or Trocadero’s. Poinsettias reminiscent of the early roots of this iconic location in America showcase the alluring colors of the ORLY holiday collection. Sidney Skolsky, 1950’s Hollywood gossip columnist, would have devoted his entire column to describe the expert details admiring Marilyn and strategic use of glitz, feathers, and diamonds to epitomize this holiday collection.
Step-by-Step Nail Art Tutorial
1
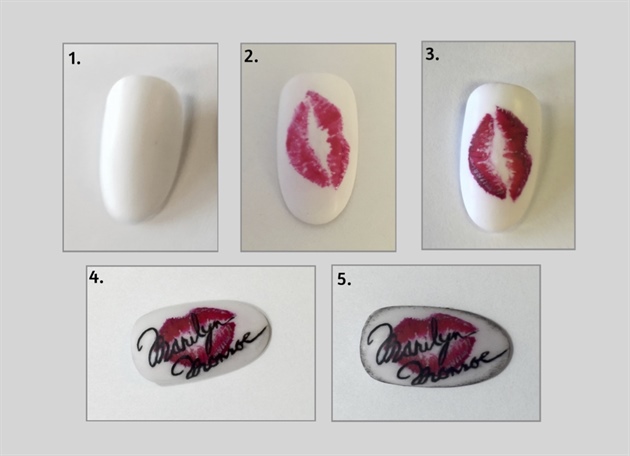
1.) Start by polishing the entire nail with your favorite white gel polish.\n2.) Using a true red gel polish, make the base of your kiss mark in the center of the nail. \n3.) Using a darker shade of red, outline and add shadowing to the areas that you think need it. \n4.) Add a worthy signature using a fine tipped art brush and black gel polish. \n5.) Outline the nail giving it a smokey look by using black gel polish and dabbing lightly with a sponge.
2
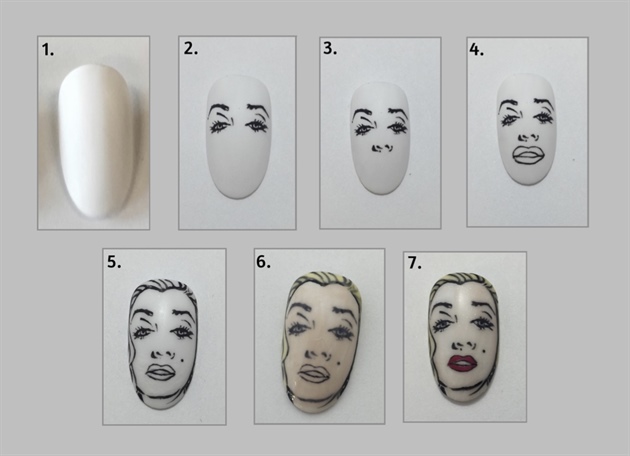
1.) Start by polishing the entire nail with your favorite white gel polish.\n2-5.) Using a very fine tipped art brush and black gel polish, add eye, nose, lip, hair, and face shape detail. I also keep a small dish filled with isopropyl alcohol and a clean brush nearby for mistakes.\n6.) Completely cover the face in a sheer nude and hair with a sheer yellow polish. Yes, you are covering up all that tedious detail work but it will be worth it. \n7.) Trace over the original lines with the fine art brush with black gel polish. This way you can go in and make your lines stand out. Add the last second detail work and don't forget the red lip color.
3
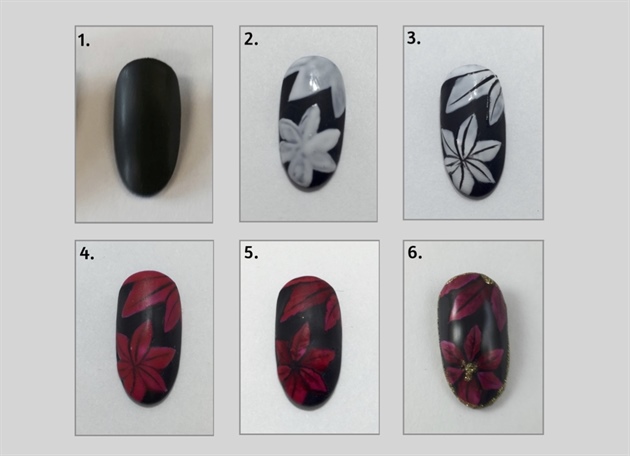
1.) Start by polishing the entire nail with your favorite black gel polish.\n2.) Pick where you want your flowers to be on the nail and mark the spot with white gel polish. This way the color you are using will pop off the black background. \n3.) Using a fine tipped art brush outline your petals and adder center lines down the petal.\n4.) Cover the white flower in the right amount red gel polish so you are able to still see your lines.\n5.) Figure out which petals you want to appear on top of the flower and use a darker shade of red to shadow and add detail to the petals.\n6.) A very sparkly gold glitter polish adds the perfect glitzy effect to the center of the flower and free edge.
4
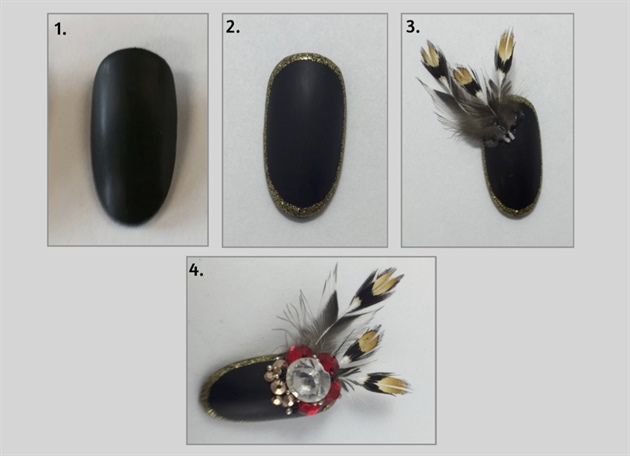
1.) Start by polishing the entire nail with your favorite black gel polish.\n2.) Outline around the entire nail to create the perfect frame.\n3.) Add feathers by tacking them down with a high powered nail resin.\n4.) Diamonds are a girls best friend, add your favorite embellishments to complete the 1950's inspired brooch nail look. \n
5
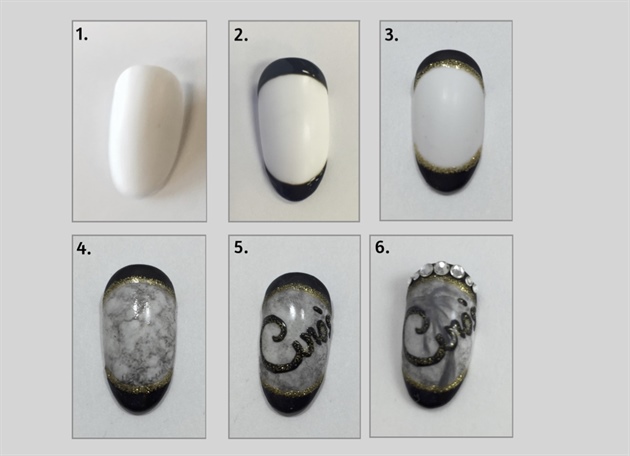
1.) Start by polishing the entire nail with your favorite white gel polish.\n2.) Outline the free edge and base of the nail using black gel polish.\n3.) A glizty gold added between the black and white adds a fancy touch.\n4.) Add a marbled look using black gel polish and a sponge on the center of the nail.\n5.) The fine tipped art brush and isopropyl alcohol strikes again. \n6.) Add the perfect amount of embellishments and glitter where it is needed in the design.
5 Artists like this Photo
Write a Comment
Submit