Since I do traditional p&w competitions (but only in gel) I was really excited to try out my first acrylic nails ever and on top of that – competition style with a haut couture twist!
A couple of years ago I actually ran my own webshop where I sold my own handmade jewelery with my own brand, “byCelina”. So that’s what I wanted to incorporate into my design. Haut couture for me means statement design that’s really over the top and one of a kind, something that you’ve never seen before. So I pulled all of my former jewelry designer skills back and really tried to make something that would be over the top and memorable!
I started off by doing some research online to find out what colors and textures are in for the fall and winter seasons. Since the base would be mostly white I found that I still wanted to keep it clean by sticking to the colors grey and black to compliment the p&w base and still be fashion forward when it comes to coloring.
I then did some research on textures and shapes this coming season and I saw a lot of lace and large wavy skirts mixed with metallic (both gold and silver) so that was definitely something I wanted to incorporate. I did also find that a lot of the designers used hand and nail jewelry in their collections with a lot of rings so that worked perfectly with my vision!
The “spike piece” on the pinkie was inspired by a hat I saw and the large white nail/finger piece by one of the large wavy dresses and so I ended up with my take on if I would have been a haut couture nail designer! I hope that this piece will get your inspiration going and maybe want to try out something that’s a little bit over the top.
Step-by-Step Nail Art Tutorial
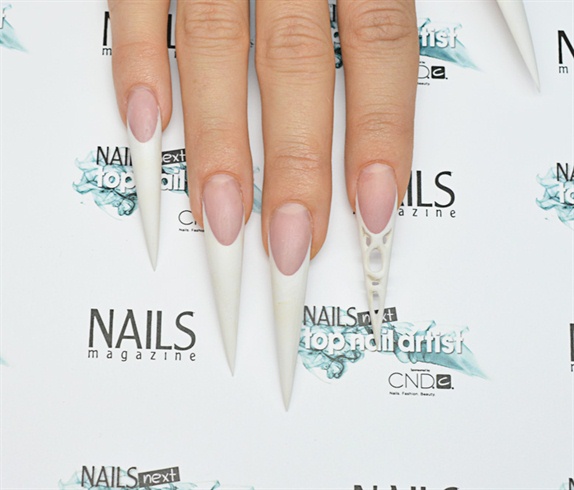
1
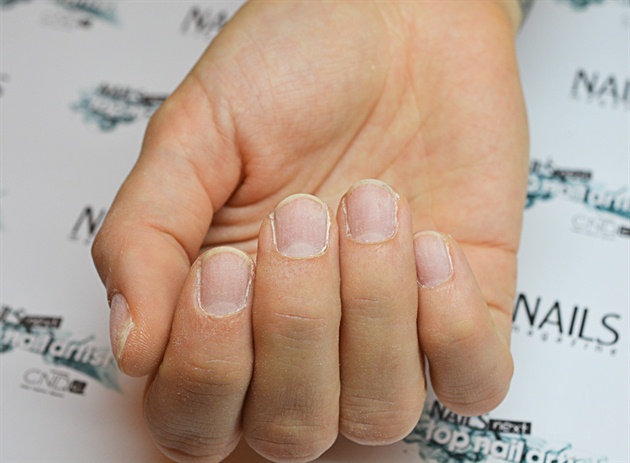
This is what I started off with after doing my prep work (cleaning up around the cuticle area and carefully buffing up the nailplate).
2
I then applied the forms and started to build the nail bed using a cover pink and then a soft transparent pink on top. I also pinched the nail bed extension to make the result look slimmer using small clips and a pinching tool.
3
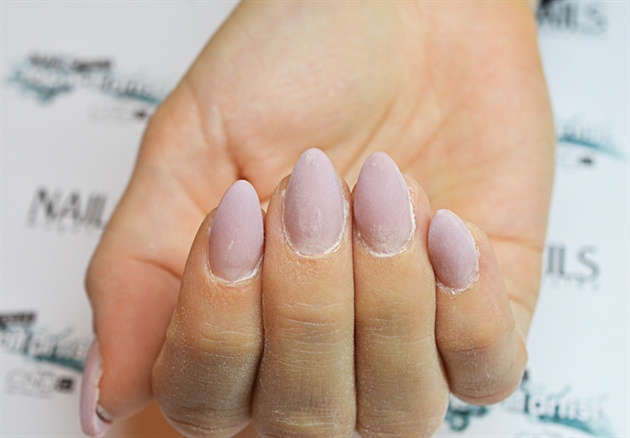
Here you have the nail bed extensions without the forms, clips and with a filed smile line. After removing the clips and forms I took a file and started to file the edge of the extension. Make sure to tilt the upper side of the file a tiny bit from you when filing, if you tilt it towards you, you’ll get white under the pink and that will mess up your smile line. Also make sure to really get into the sides. Pull the skin down and file all the way in, or you will loose the corners of the white when you start shaping. Also make sure that the thickness of the extension is even all around the free edge, if not that will force you to file much more than you want to get rid of all the white.
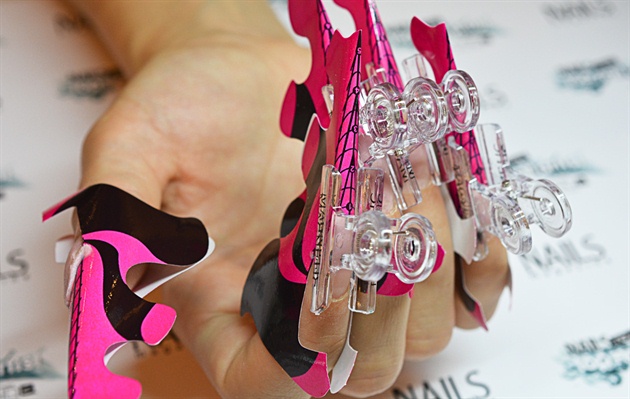
4
Time to add the white! I placed my forms again and tilted the forms a little bit downwards as I wanted to do a stiletto shape. I placed my white acrylic all the way up to the pink and even a little bit over it to really make sure that I got white all pressed up against the nail bed extension and added white all the way into the corners that I filed out before. Same here, make sure to really press it up against the pink and even a little bit over it. The corners can be the trickiest part so you have to be picky. As soon as I finished one nail I took my pinching tool and pinched it to get a slimmer shape and left it there. When I finished the next nail I removed the tool and put a clip over instead to keep it in place.\n\nThe index finger was done by simply just adding white where I wanted and then slowly building it up.\n
5
The last thing to do was to shape the nails. When you’re doing stiletto nails, make sure to file away the bulkiness on the sides. You can do that by actually turning your clients hand up side down, then you’ll have a better view of the material that needs to be filed off. Also, be careful not to file too hard in the smile corners, its really easy to accidentally remove the white. File around the cuticle area and make sure you have a smooth seamless transition from the natural nail. It’s also really important to look at the nails from different angles (both sides, front, turn your clients hand and look down the nails, from the clients view, etc). Don’t forget to use your fingers as well! Sometimes, some imperfections are hard to see with your eyes, so close them and just run your fingertips over the surface.
6

Picture of the thumb.
30 Artists like this Photo
Write a Comment
Submit