All Photos
799
0
Posted on 06-14-2016
Spring Floral
by NinaB
Posted on Apr 13, 2024
17 Views | 0 Likes 0 Comments
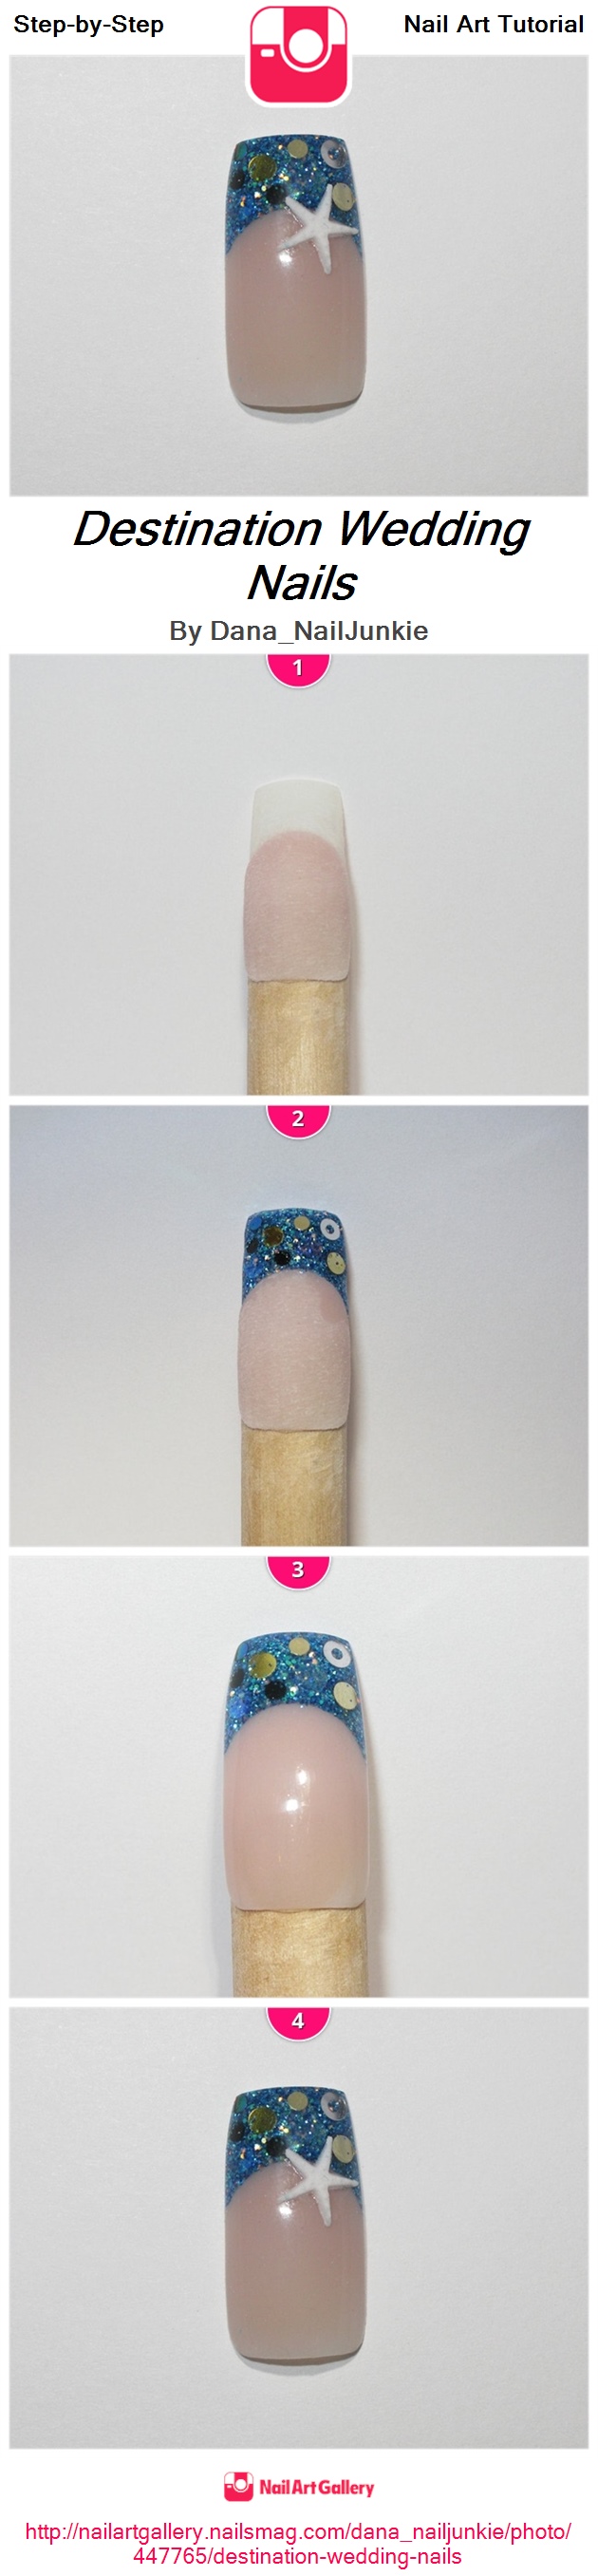
<a href='http://nailartgallery.nailsmag.com/dana_nailjunkie/photo/447765/destination-wedding-nails?ref=side-embed'><img src='http://s3photo.nailartgallery.nailsmag.com/c085c0eb-7ff7-4f8b-a612-8ff2df74aa6c_set.jpg' alt='Destination Wedding Nails - Nail Art Gallery' /></a> Copy and paste the embed code above to put this step-by-step nail art tutorial on your web site.
Your first step would be to prep the natural nail for acrylic application. Use a cover nude powder to create the nail bed. Be sure to shape your smile line in so you can easily move onto the next step. For an added clarity to the line, file the smile into shape.
Choose an acrylic powder, or mix one custom like I did, to create your tip. When it's still a bit wet, add your sparkly treasures, whatever they may be. ;)
Encapsulate everything in a clear acrylic and finish with a topcoat of gel.
For an added beachy dimension, create a cute white starfish freehand, or with a mold. I used a mold for this little guy. Then glue, and enjoy!